15 Bleach Shirt Designs to DIY This Weekend
How to use this guide
Choose ideas based on the materials, time, skill level, and finish you can realistically manage. For any dye, bleach, paint, or alteration project, test on a spare piece first and follow the product safety instructions.
Plain t-shirts pile up in drawers faster than anyone actually wears them, and most end up forgotten after a season or two. Bleach changes that math entirely, turning a two-dollar blank or a faded favourite into something that looks pulled from a small-batch studio rather than a big-box rack. A splash of bleach, a few folds, and thirty minutes of drying time can produce results that rival printed tees costing four times as much, and the process leaves room for actual creative control instead of picking from whatever design a retailer decided to stock.
This roundup walks through fifteen distinct bleach techniques, from sharp geometric stencils and delicate lace overlays to loose ombre fades and marbled swirl effects achieved with sea salt. Some designs suit a lazy Saturday afternoon with minimal supplies, while others call for real-leaf sun printing or careful symmetry work best tackled with a full weekend ahead. Whether the goal is a moody constellation tee for cooler months or a picnic-ready gingham fade for summer, each idea below includes the technique behind it.
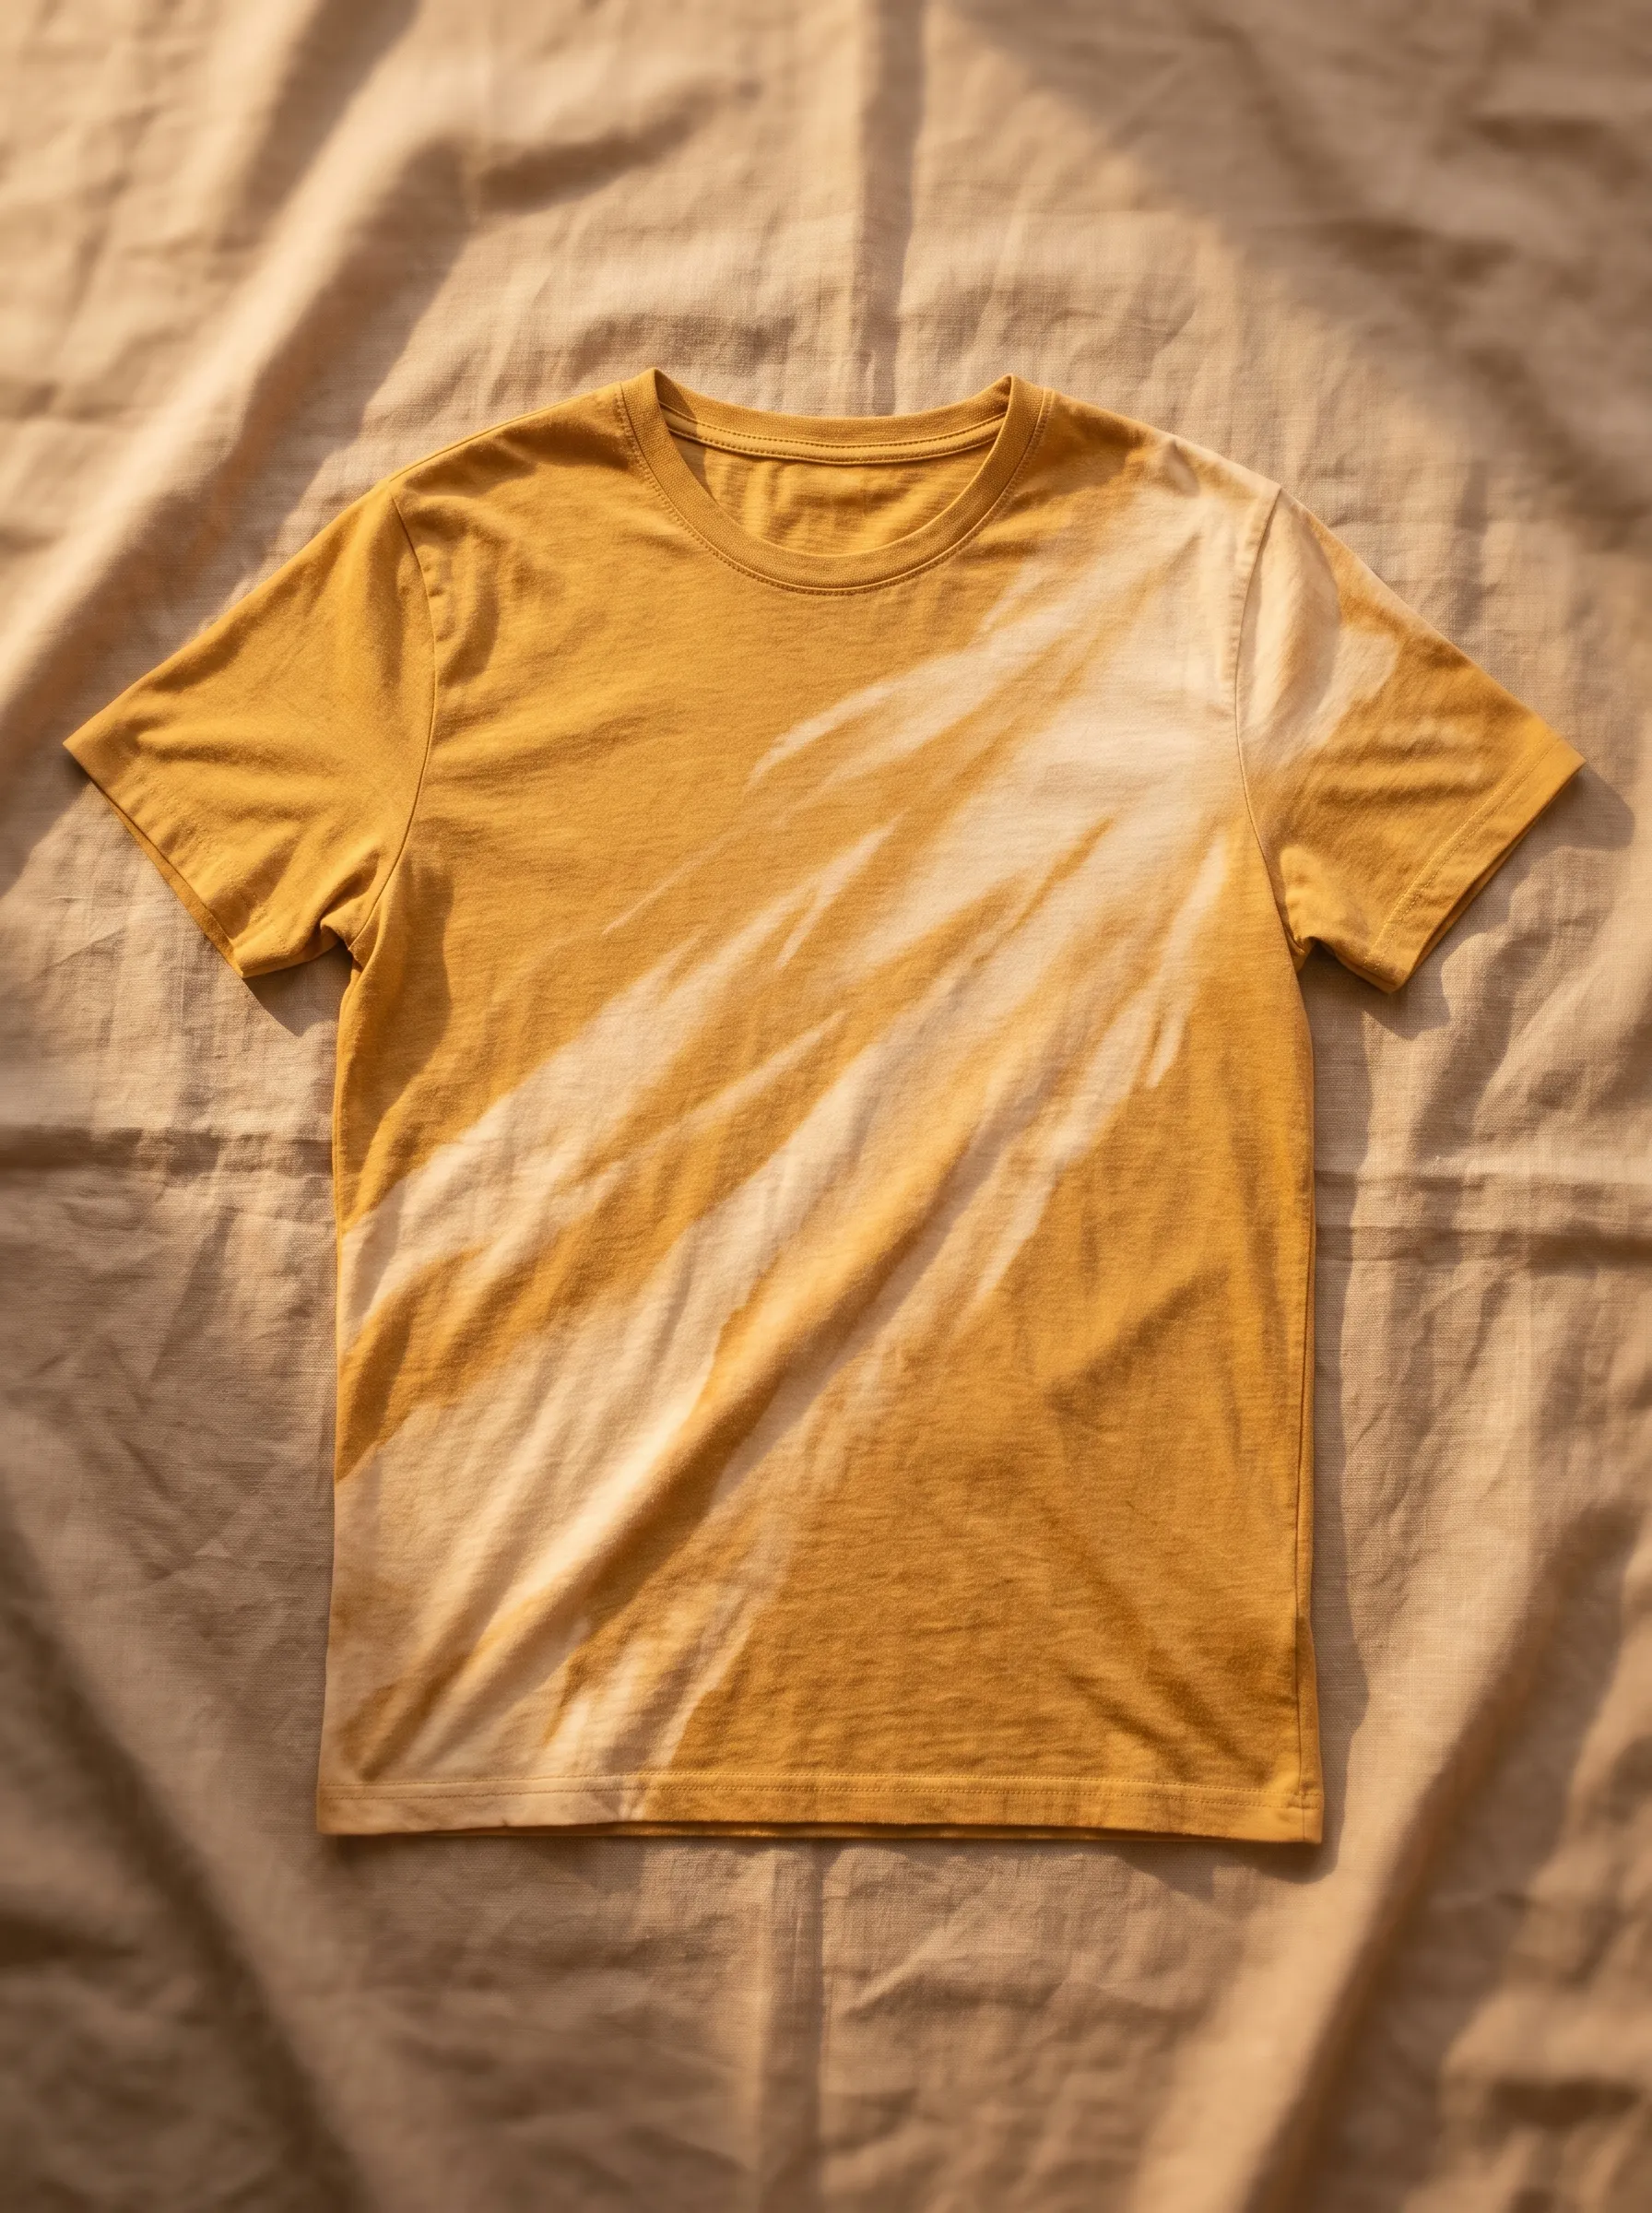
Feather-Sweep Bleach Tee
Sunlight seems to fall across this mustard yellow shirt in a soft diagonal streak, mimicking a feather brushed through wet bleach. Warm amber tones fade into pale cream where the bleach worked hardest, giving the fabric a sun-bleached, lived-in quality. Nothing about the pattern feels forced or symmetrical, which makes it read as organic rather than manufactured. A plain crew neck keeps the design grounded so the gradient stays the focal point. Casual wear benefits from this kind of understated colour shift, since it pairs easily with denim or khaki without clashing. Anyone drawn to earthy, autumn-inspired palettes will find this design approachable for a first bleaching attempt, since the technique only requires a folded application and a light hand.
Topographic Map Tee
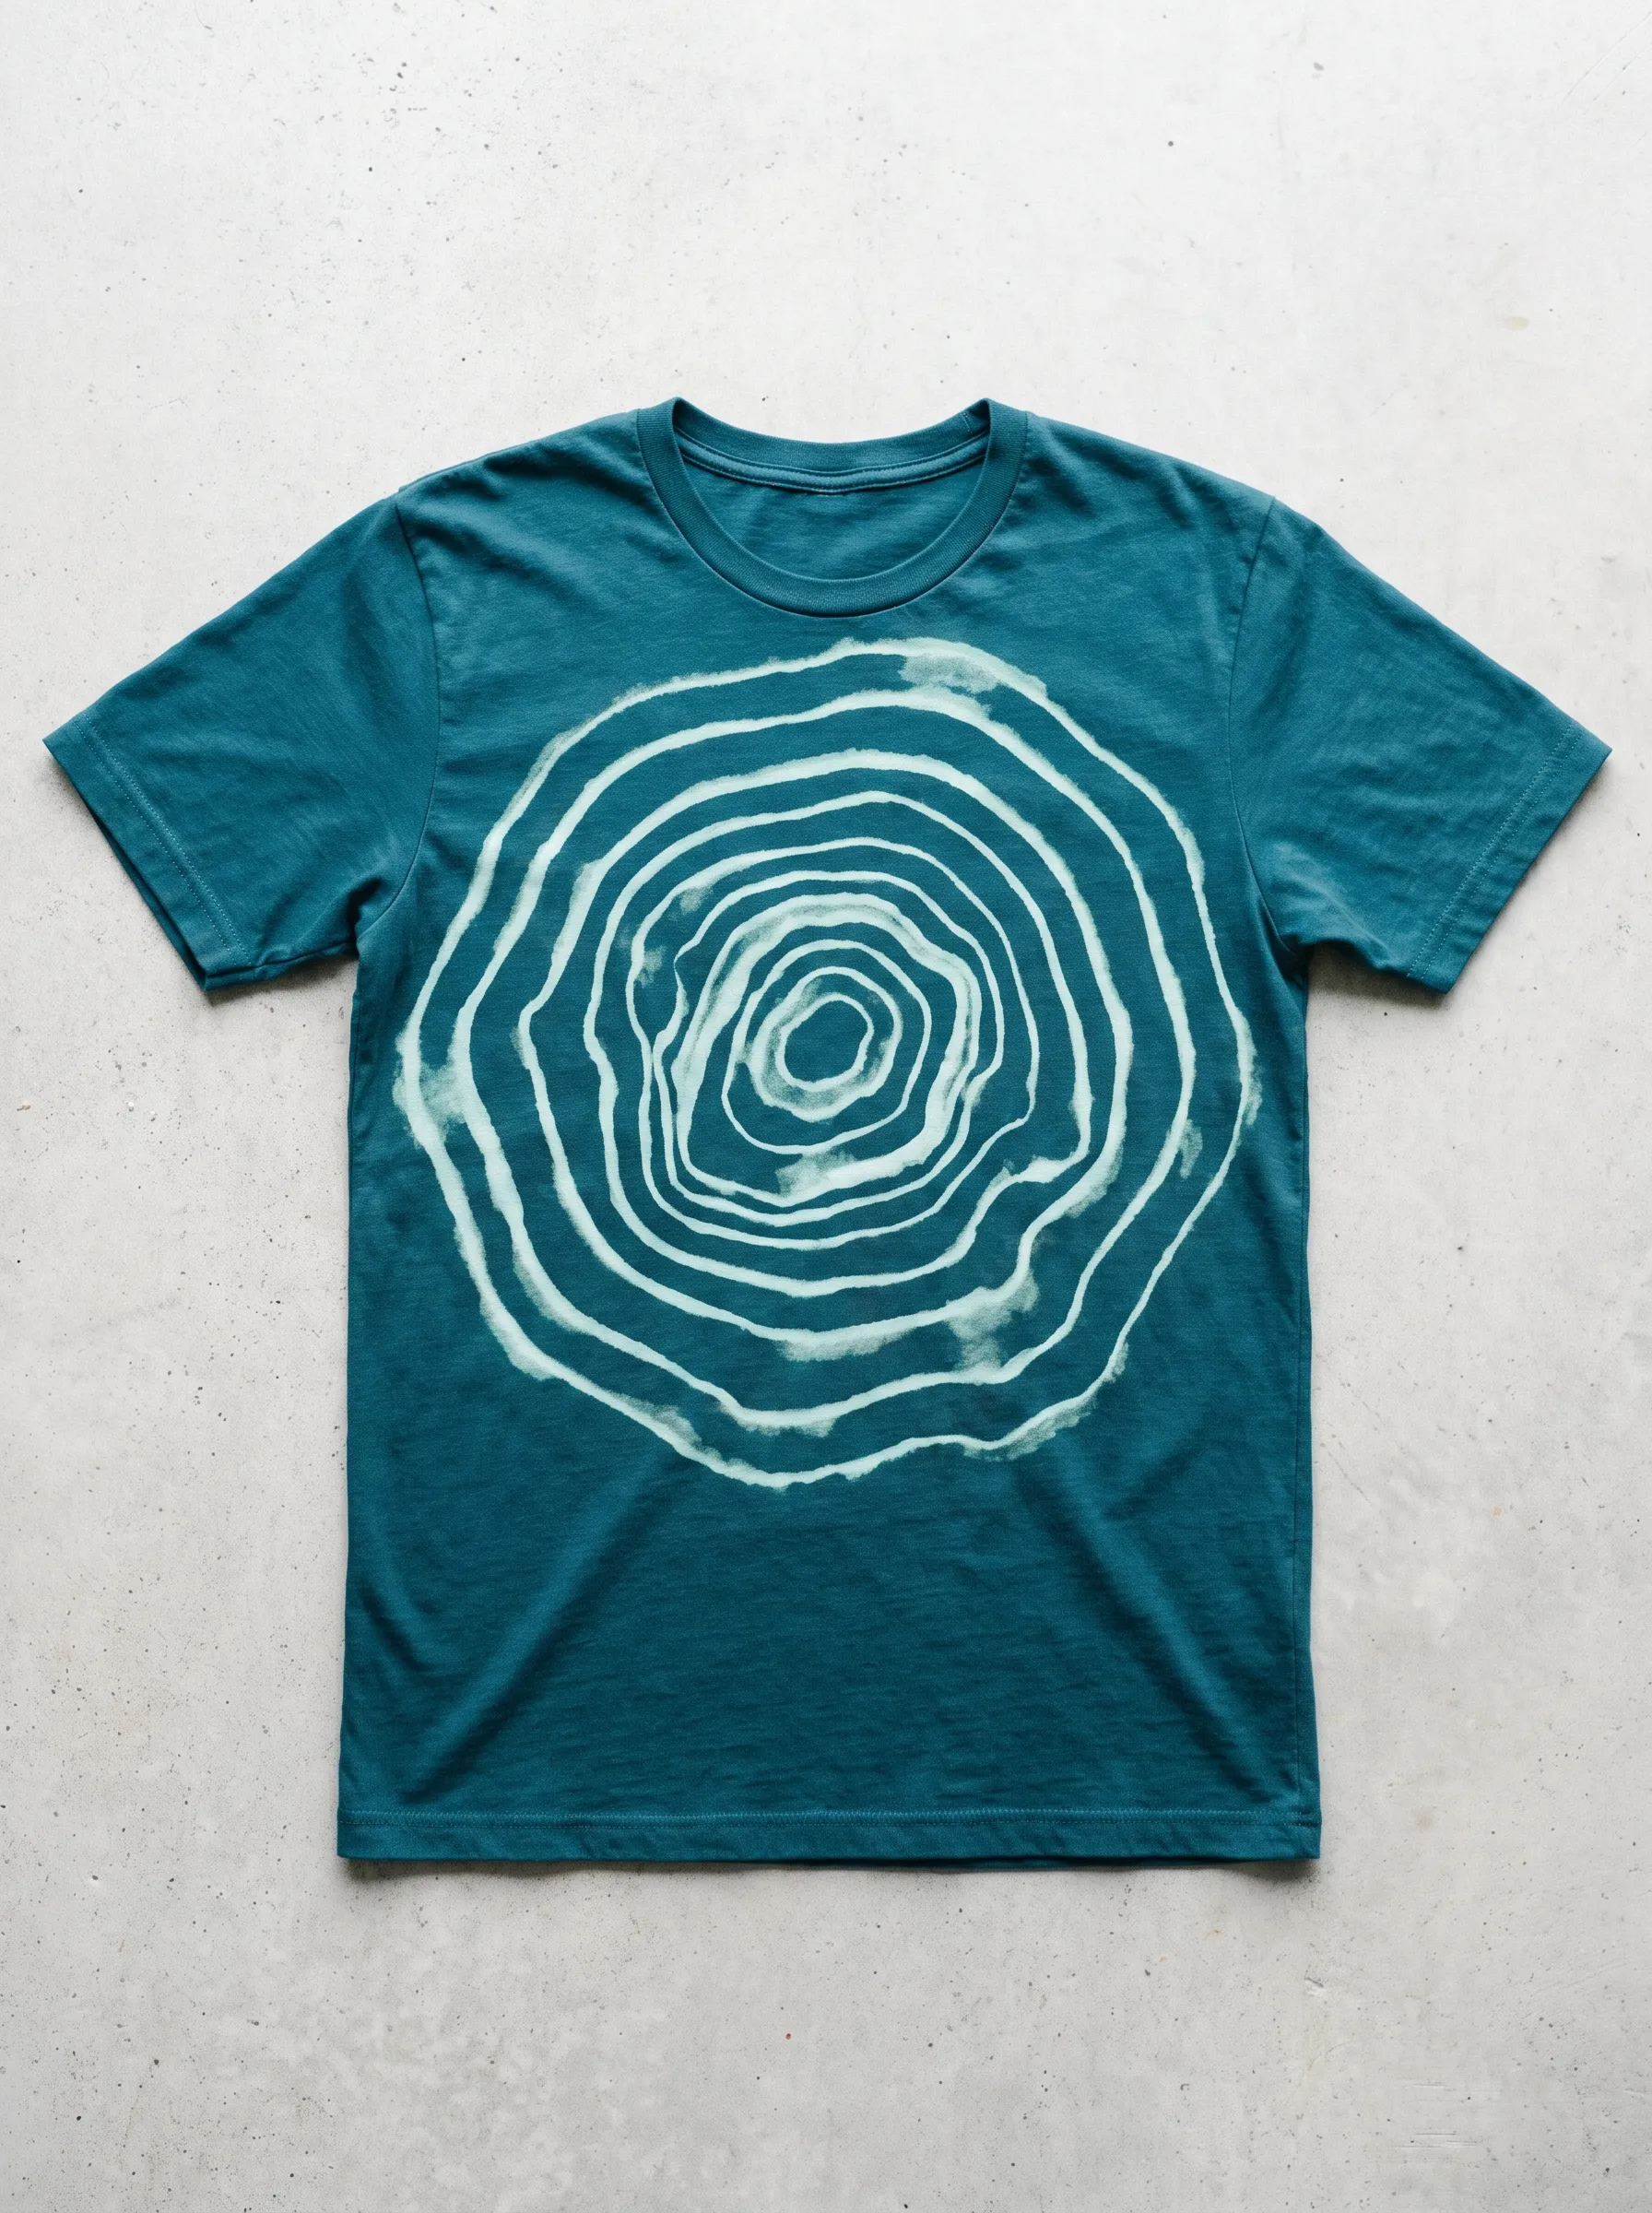
Concentric rings spread across a deep teal shirt, resembling contour lines on a topographic map or rings inside a tree trunk. Each loop grows tighter toward the centre, creating a hypnotic, almost meditative visual. The pale mint bleach marks stand out sharply against the teal base, giving the design real depth and dimension. Precision matters here, so a compass, stencil, or careful freehand technique works best for clean lines. Nature lovers and outdoor enthusiasts often gravitate toward patterns like this one, since it echoes elevation maps or geological formations. Styling stays simple with this shirt, since the graphic carries enough visual weight on its own. Bleaching this pattern takes patience, but the payoff is a striking, one-of-a-kind piece that looks intentional rather than accidental.
Gingham Fade Tee
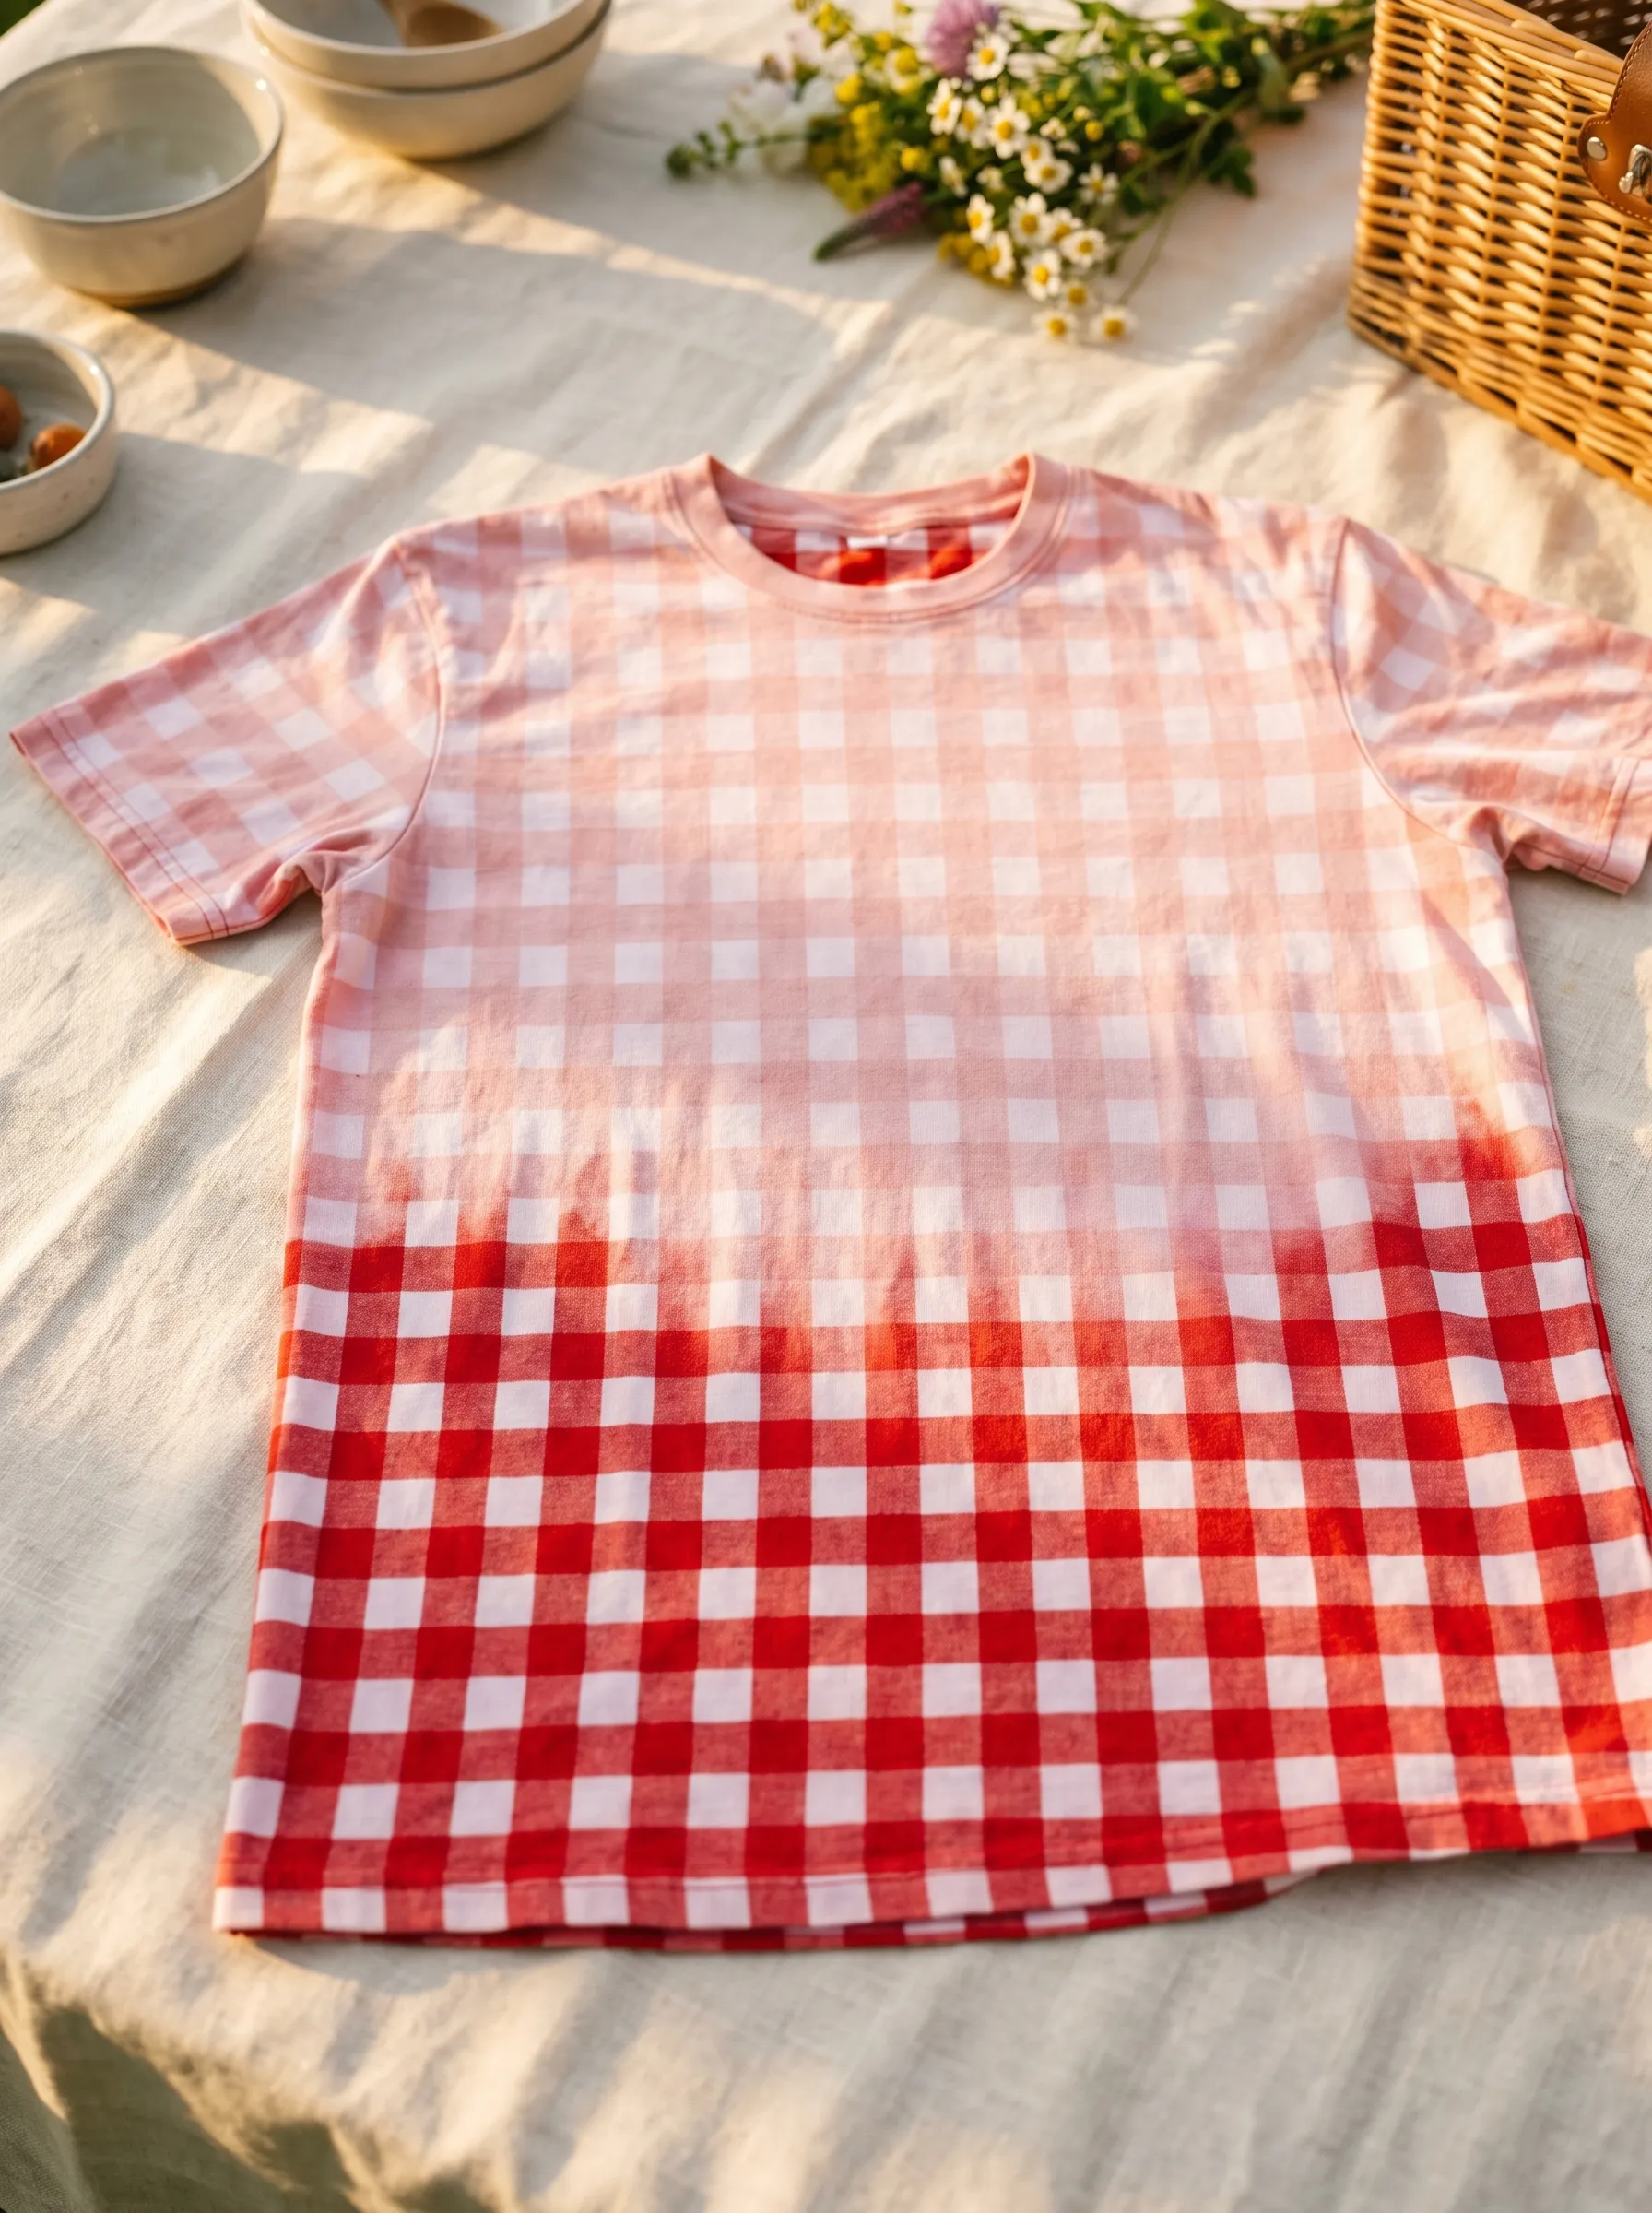
Small red and white checks cover this shirt from collar to hem, but the pattern doesn't stay uniform. Near the shoulders, the gingham fades into a soft blush pink, while the lower half holds a rich, saturated red. Picnic vibes come through instantly, especially with the wicker basket and wildflowers styled nearby in the shot. Layering a bleach gradient over an existing checked fabric creates a two-in-one effect, blending tie-dye techniques with classic print. Summer gatherings call for pieces like this, since the colour and pattern feel festive without being overly bold. Achieving this look requires starting with a gingham shirt and applying bleach in a controlled pour, letting gravity do the fading work as the solution travels downward through the weave.
Moth-Wing Tee
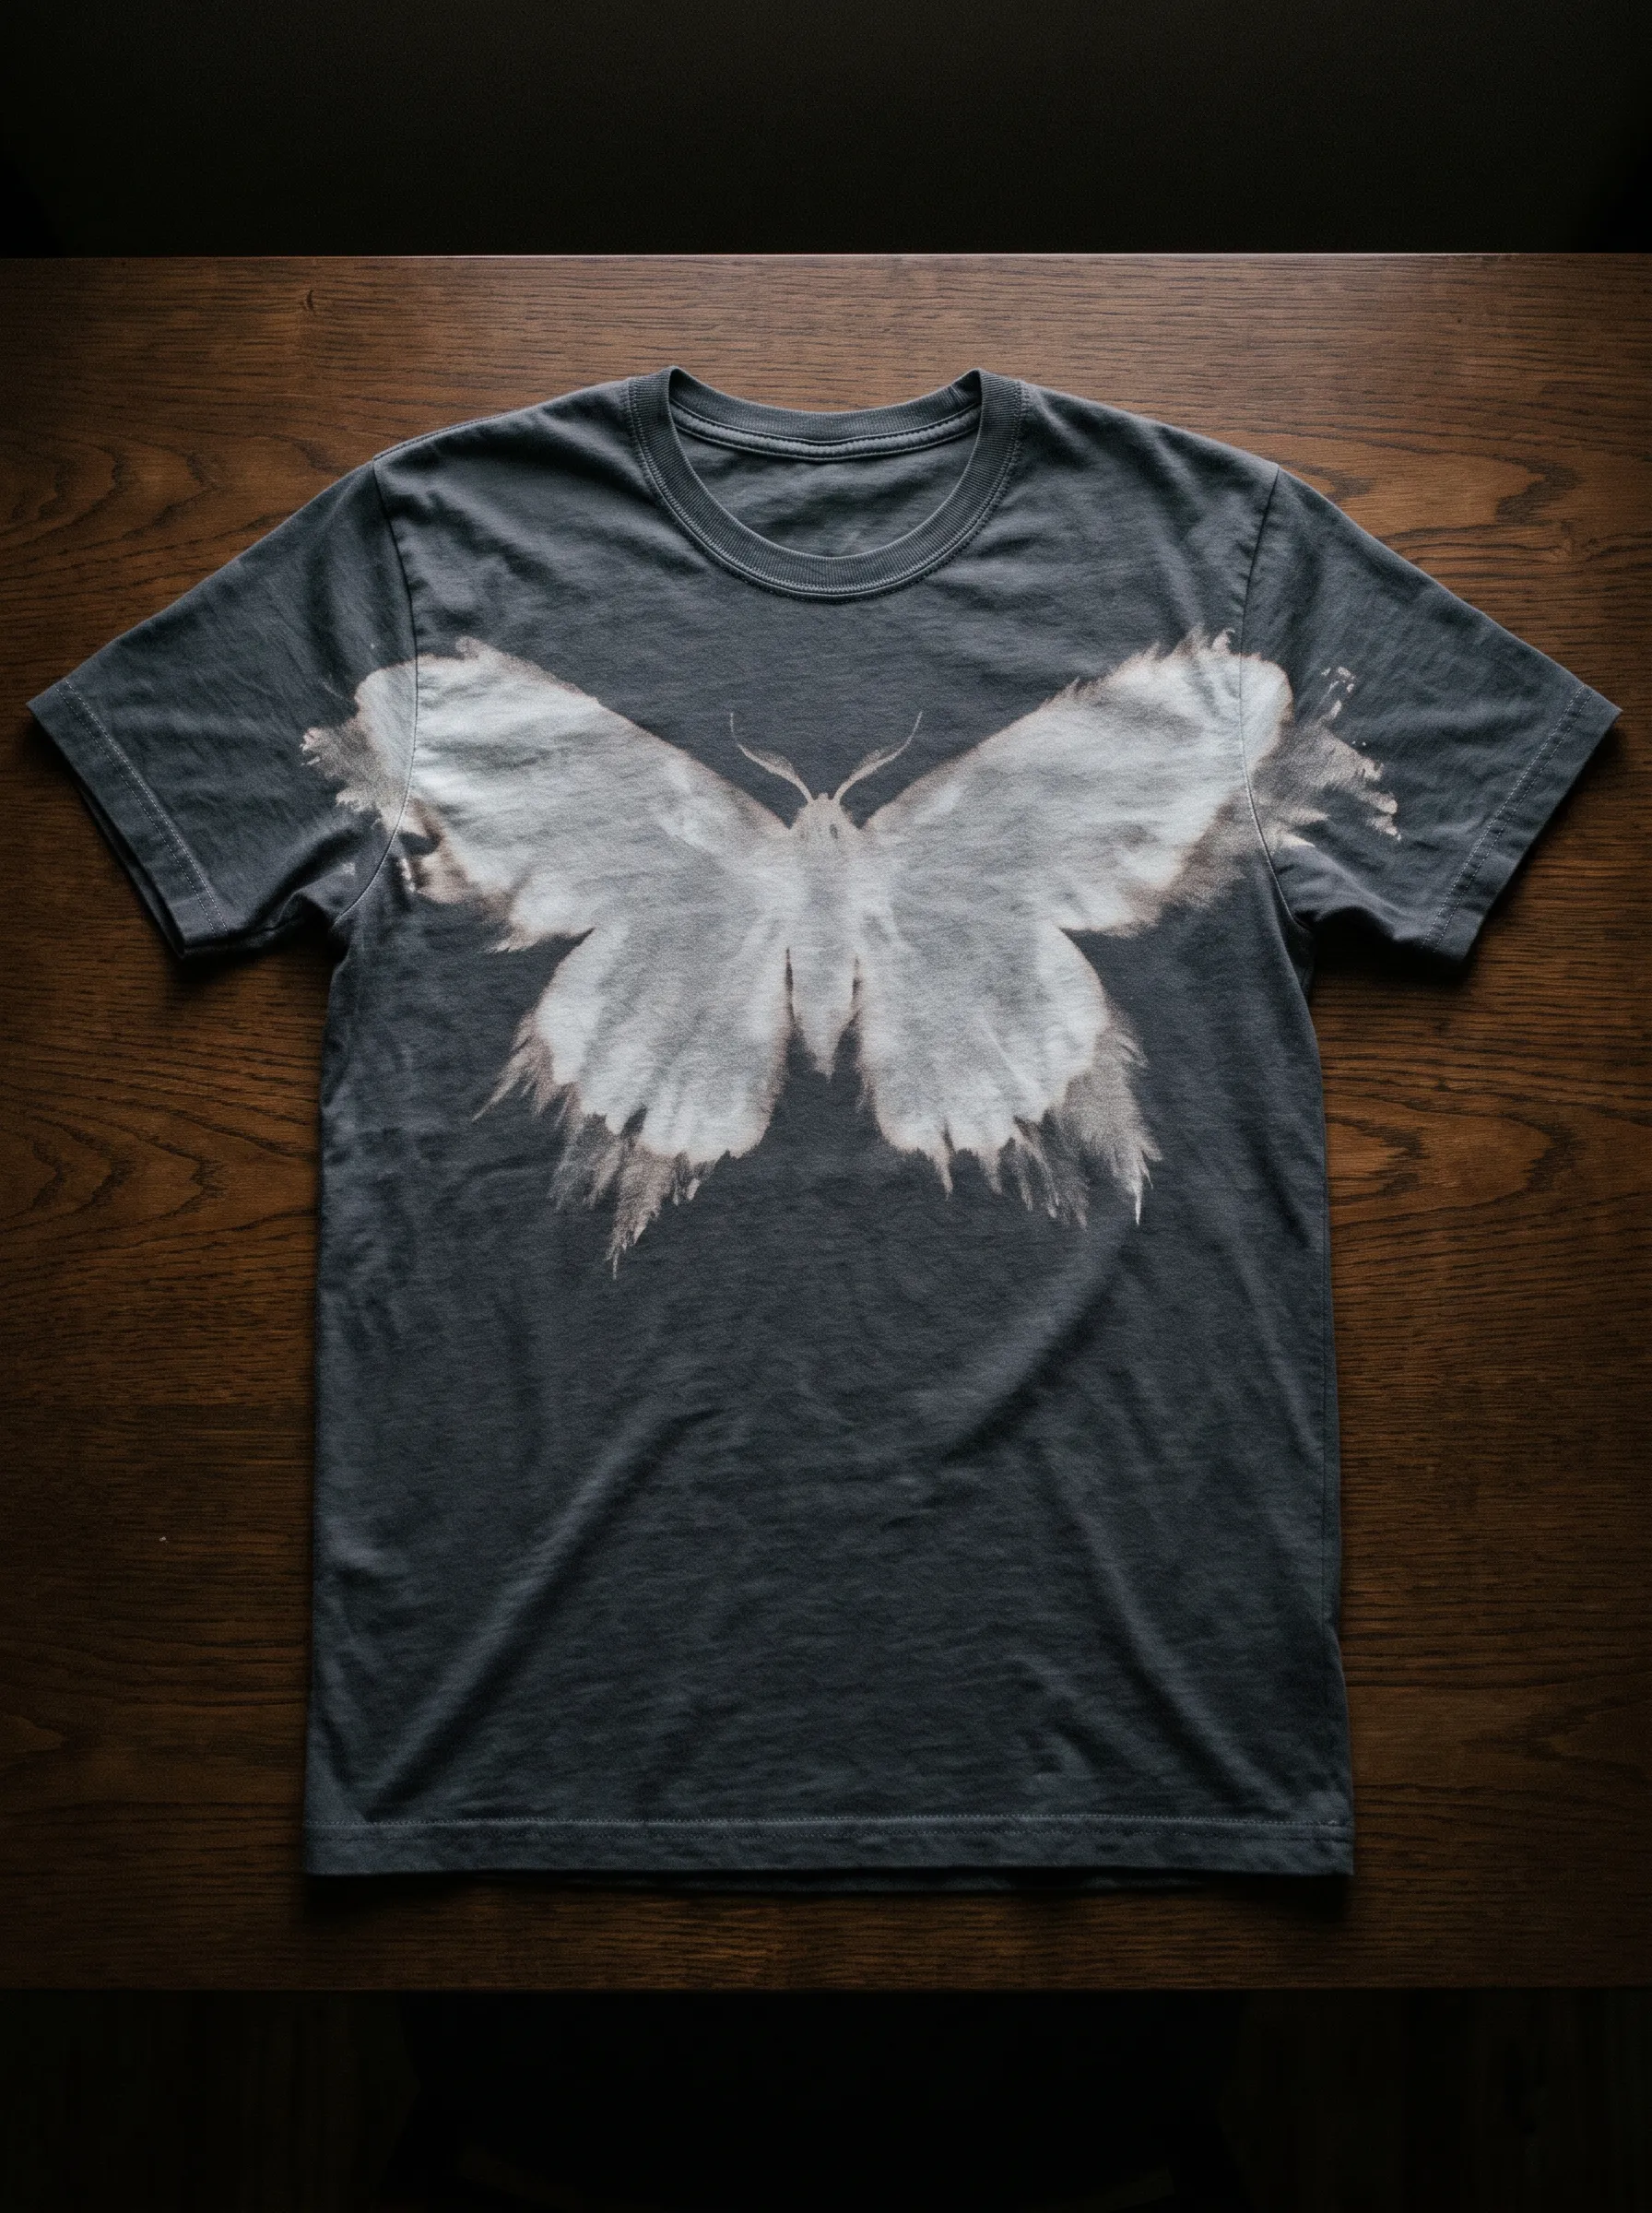
Two large wings spread from a small moth body stencilled at the chest, bleached in soft ivory against a charcoal grey shirt. Wing edges flare outward in torn, feathery patterns, giving the moth a slightly ragged and moody appearance. Nothing about this design feels cheerful, and that's the point, since the muted greys and cracked white tones lean into a gothic, nature-inspired aesthetic. Symmetry plays a key role in pulling off this look, so folding the shirt in half before applying bleach helps mirror both wings evenly. Moody wardrobes benefit from statement pieces like this one, since the shirt works well with black jeans or boots. Stencilling remains the easiest route for beginners chasing sharp wing outlines without freehand guesswork.
Word-Stencil Tee
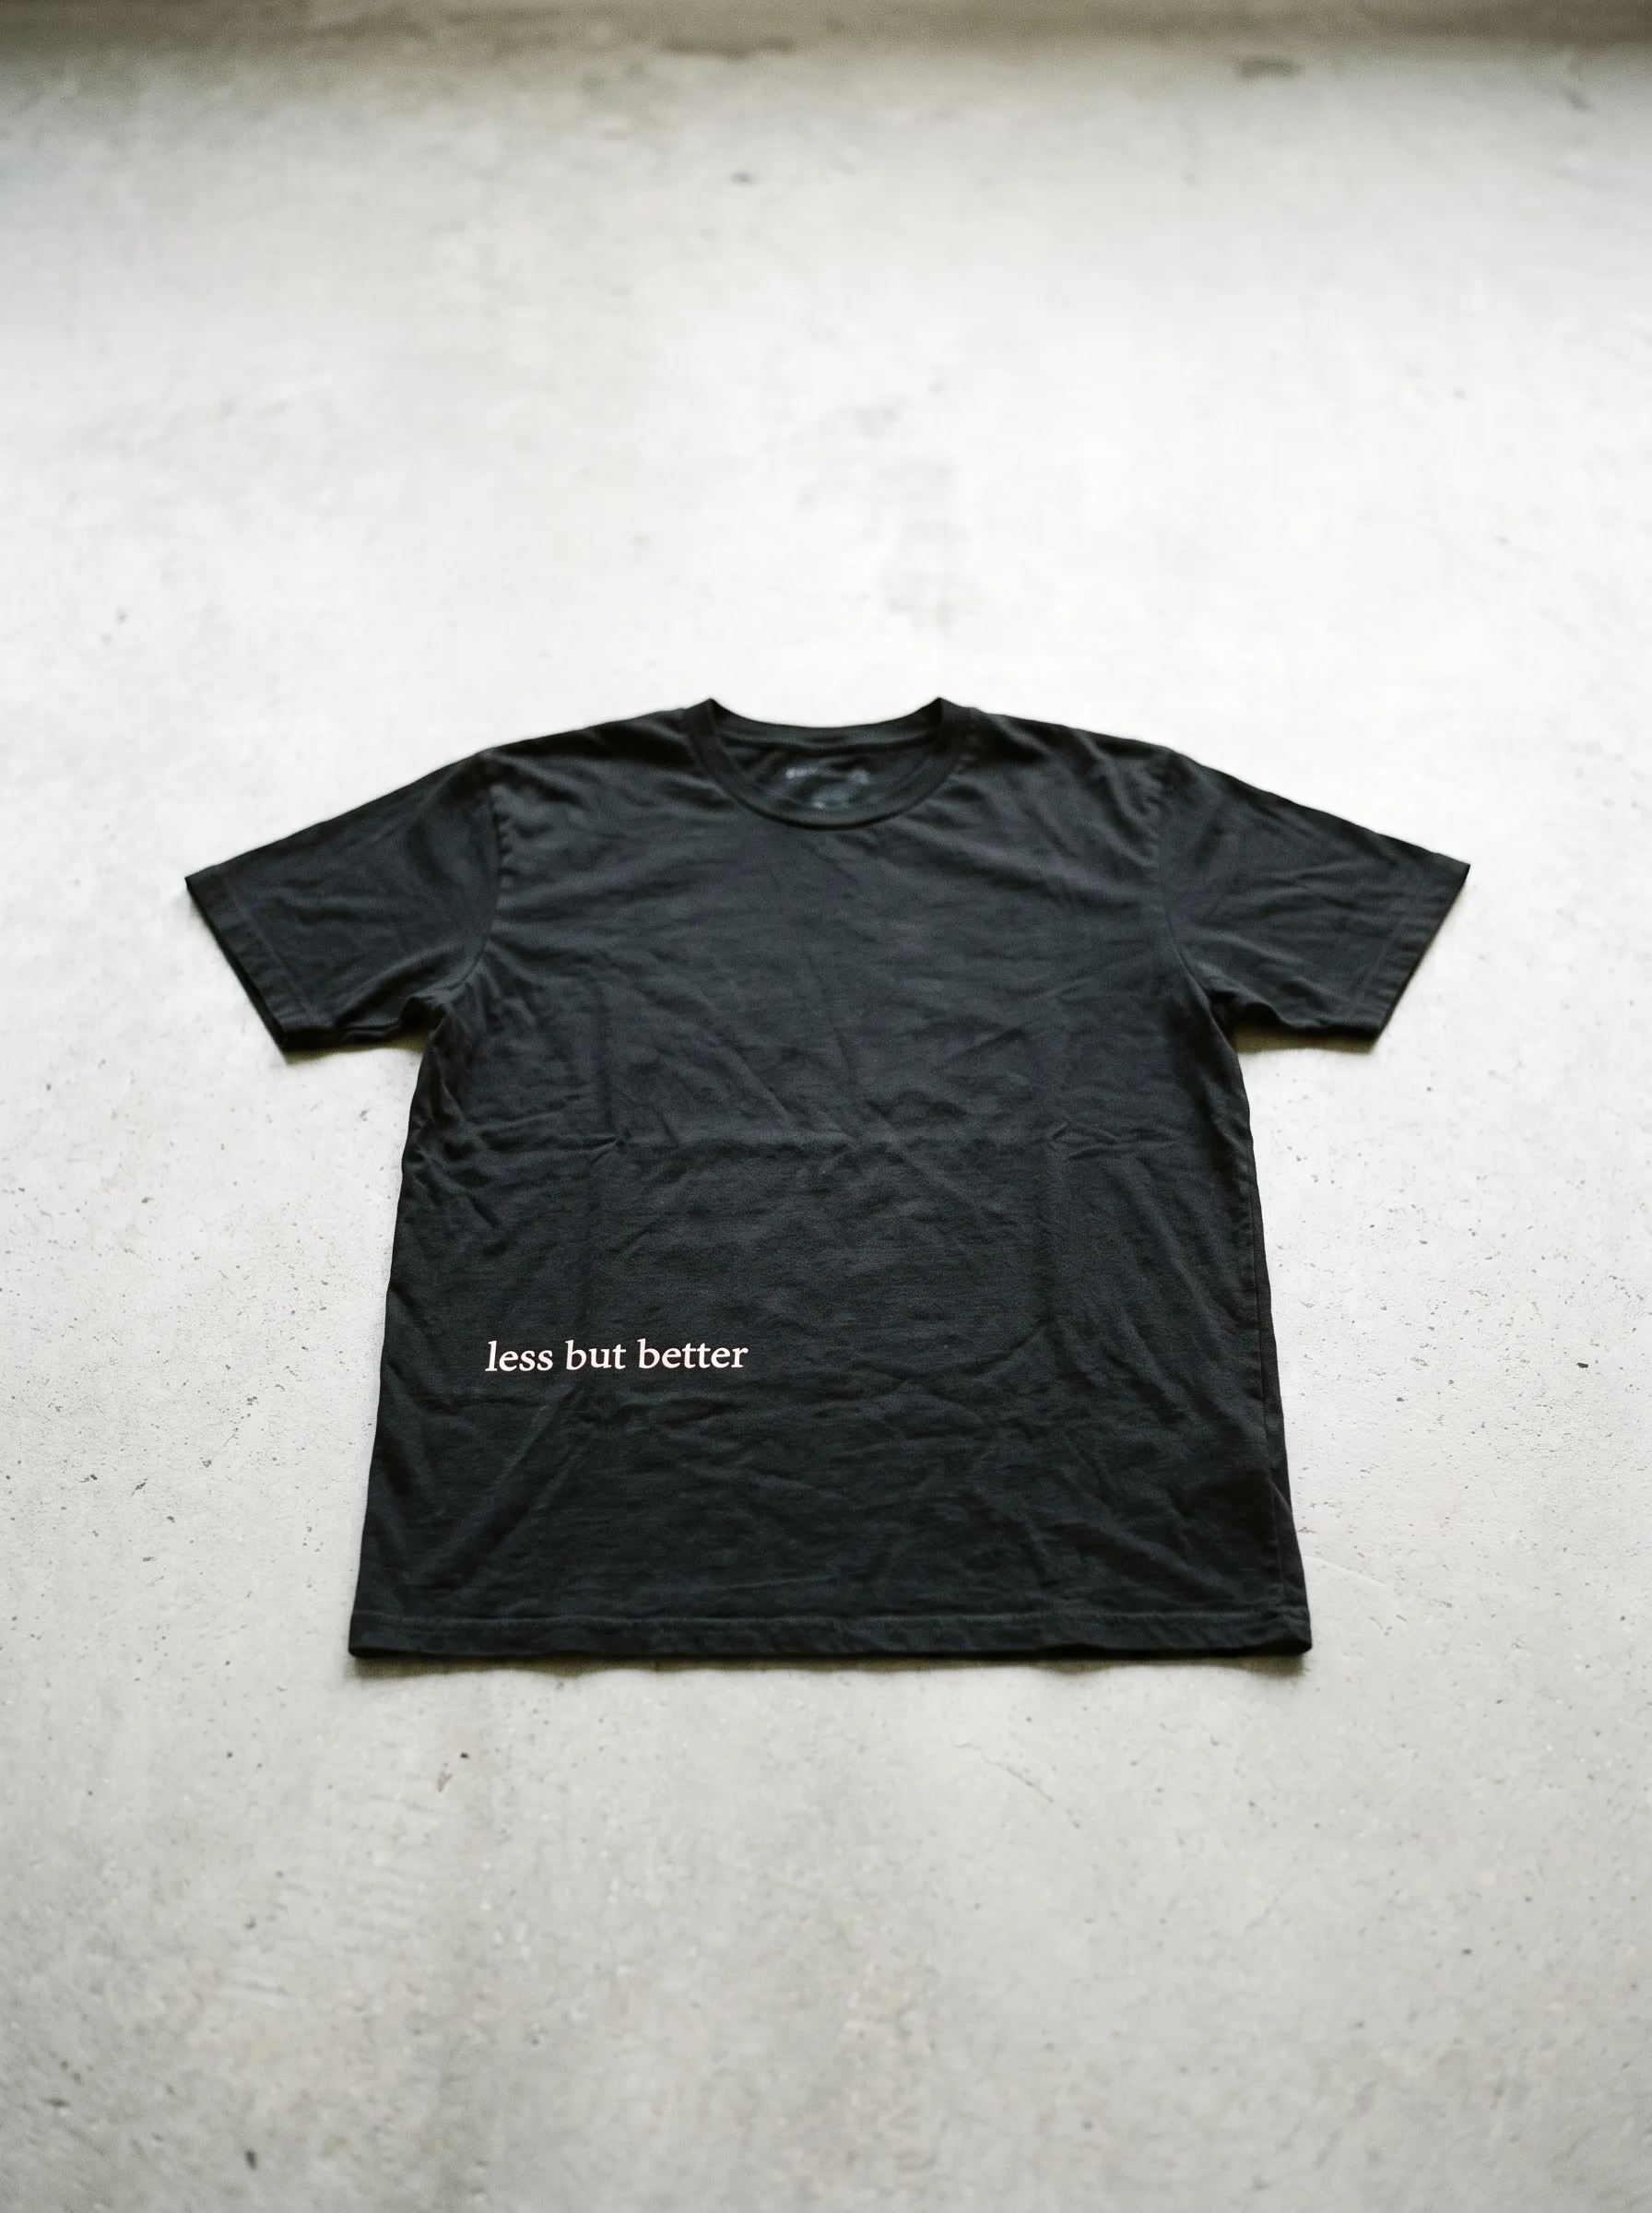
Three simple words sit low on the hip of this black shirt, printed in a clean serif font that reads "less but better." Minimalism defines this entire design, since the bleach mark stays small and deliberate rather than sprawling across the fabric. Text-based bleach designs suit anyone who prefers a message over a graphic, and stencils make this style far easier to execute than freehand lettering. Placement matters a lot here, since keeping the phrase low and to one side avoids overwhelming the shirt. Wardrobe staples like this pair effortlessly with almost anything, from joggers to tailored trousers. Adhesive vinyl stencils work best for crisp letter edges, and a light bleach spray keeps the ink from bleeding into surrounding fabric.
Crackle-Texture Tee
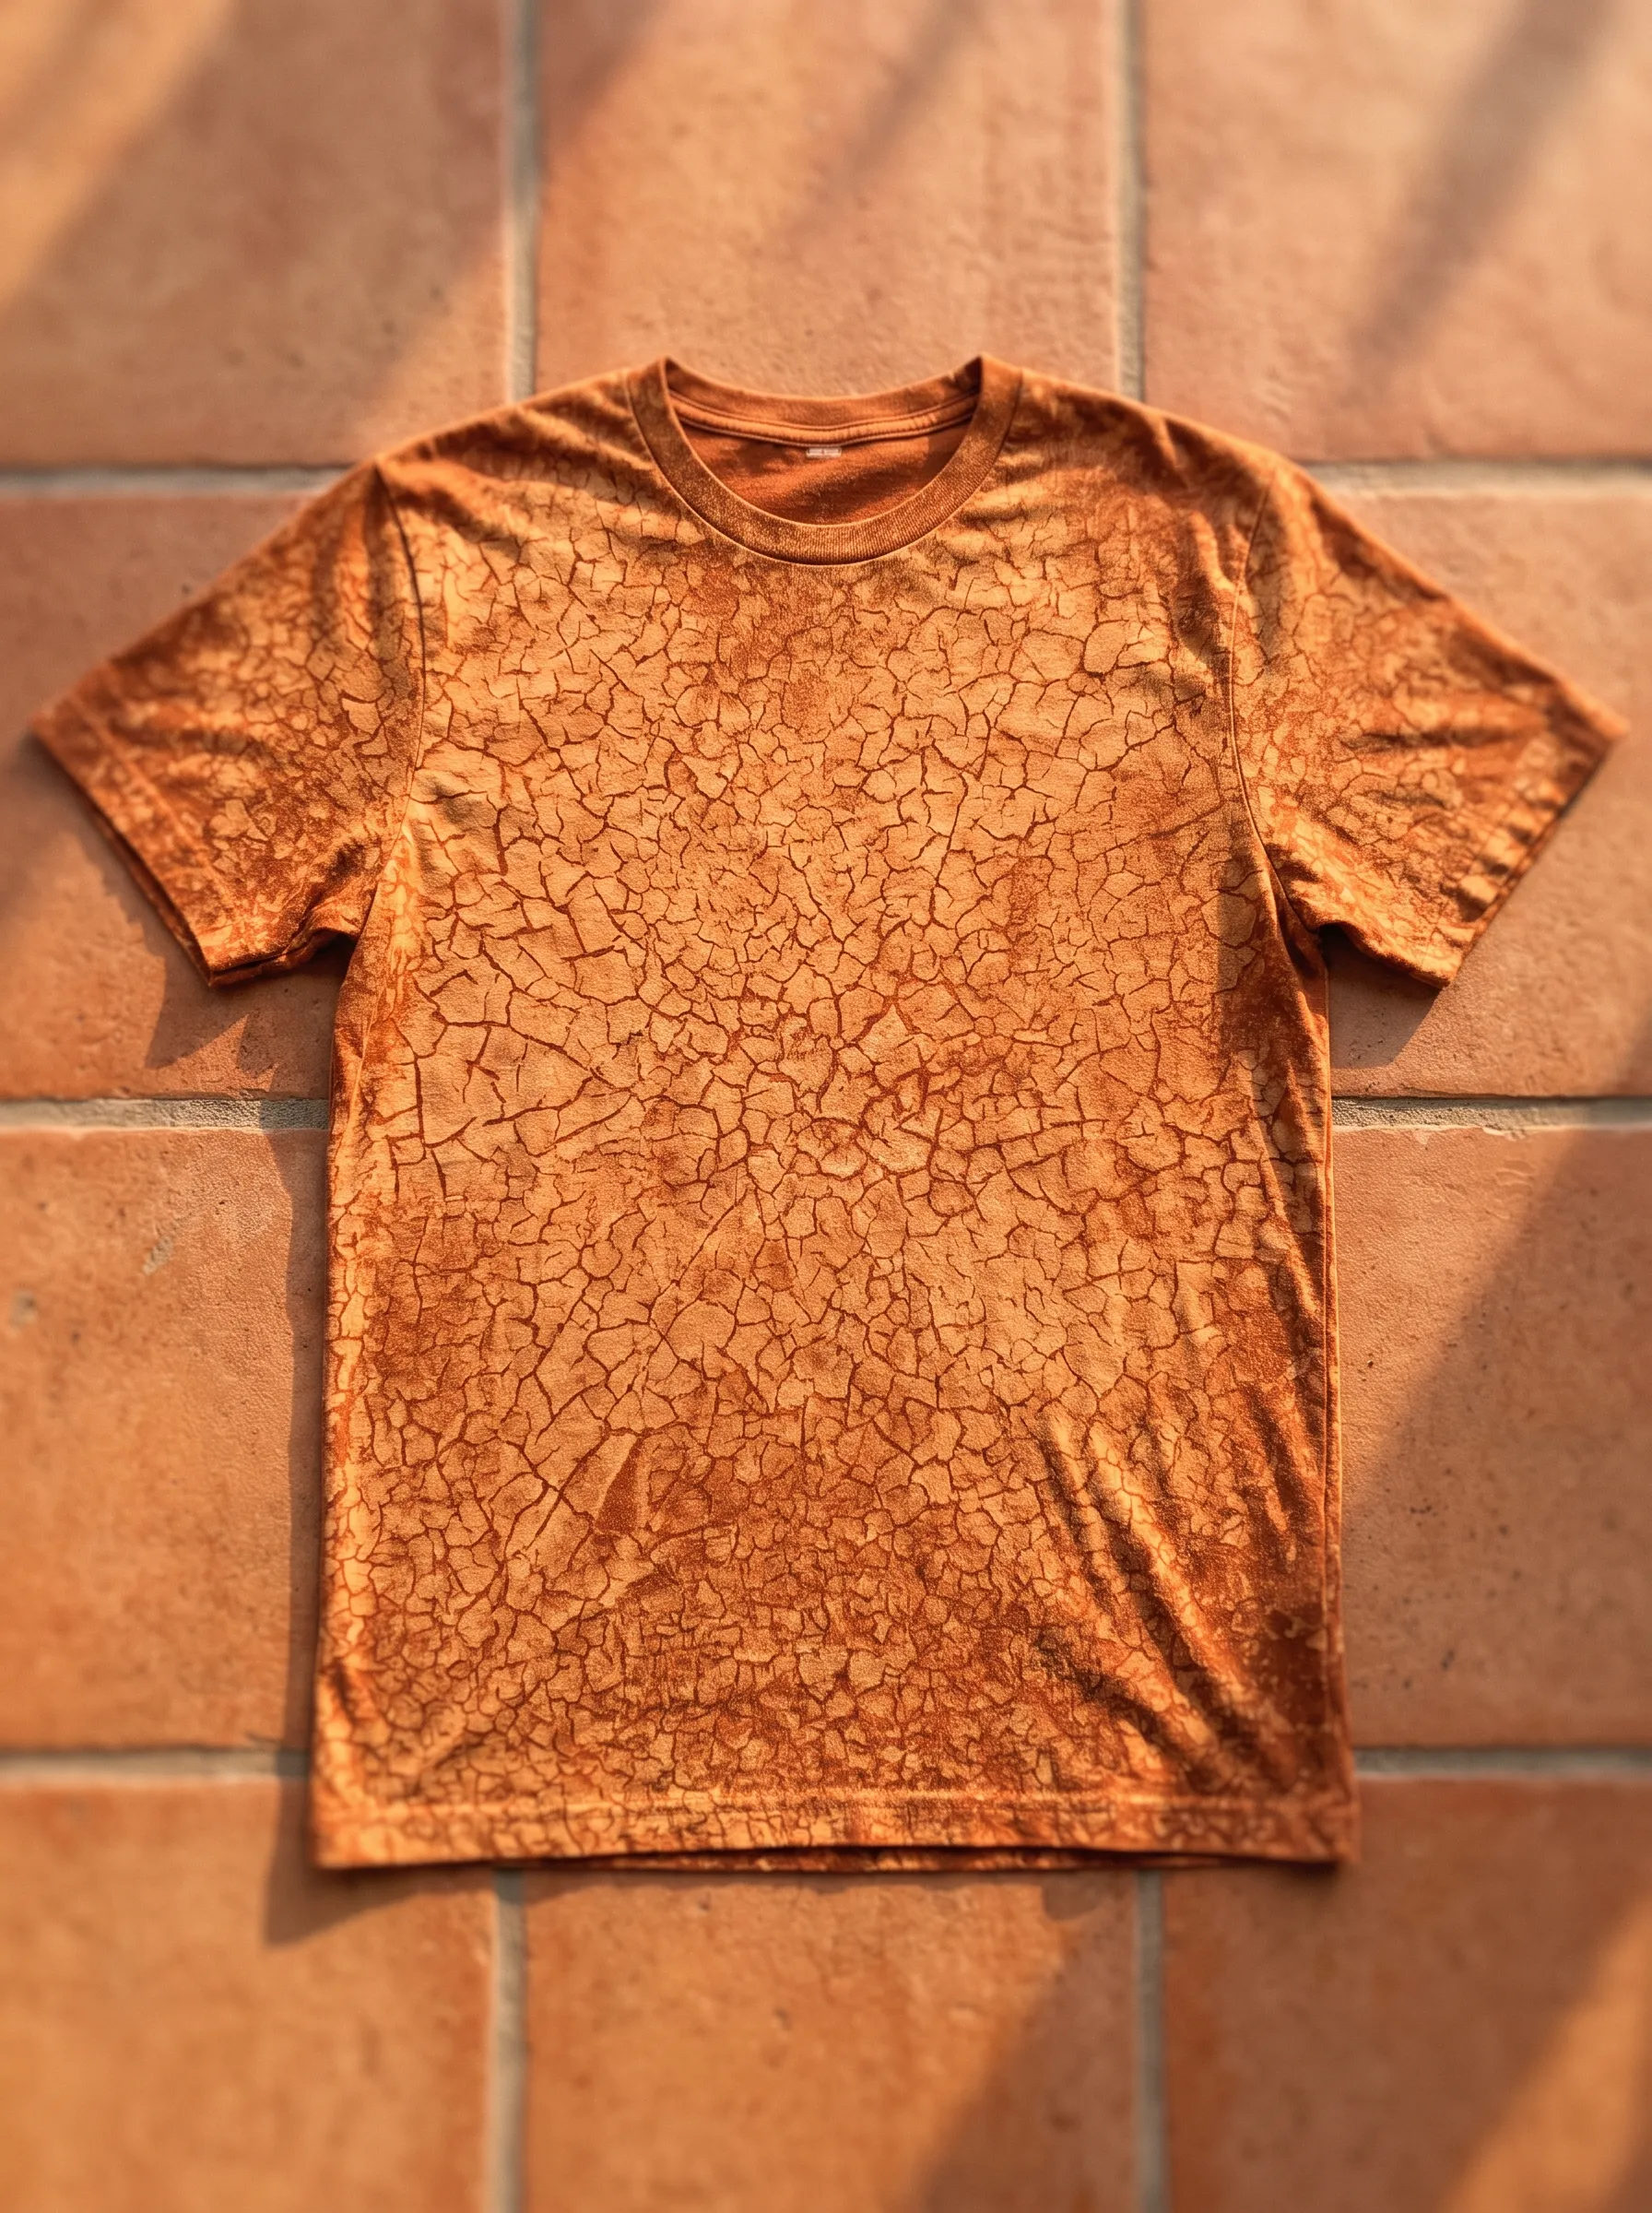
Rust orange dominates this shirt, covered edge to edge in a cracked, dried-earth pattern that looks almost reptilian. Deep brown fissures run through the lighter orange background, creating a texture reminiscent of parched desert ground or aged leather. Terracotta tile flooring in the photo echoes the shirt's warm tones perfectly, tying the whole aesthetic together. Achieving a crackle effect like this usually involves a gel-based bleach product applied thickly, then left to dry unevenly so natural cracks form across the surface. Textural designs like this stand apart from typical dye patterns, since they mimic something tactile rather than flat. Earth-tone lovers will appreciate how this shirt captures a raw, weathered look without any actual wear or damage.
Vine-Trail Tee
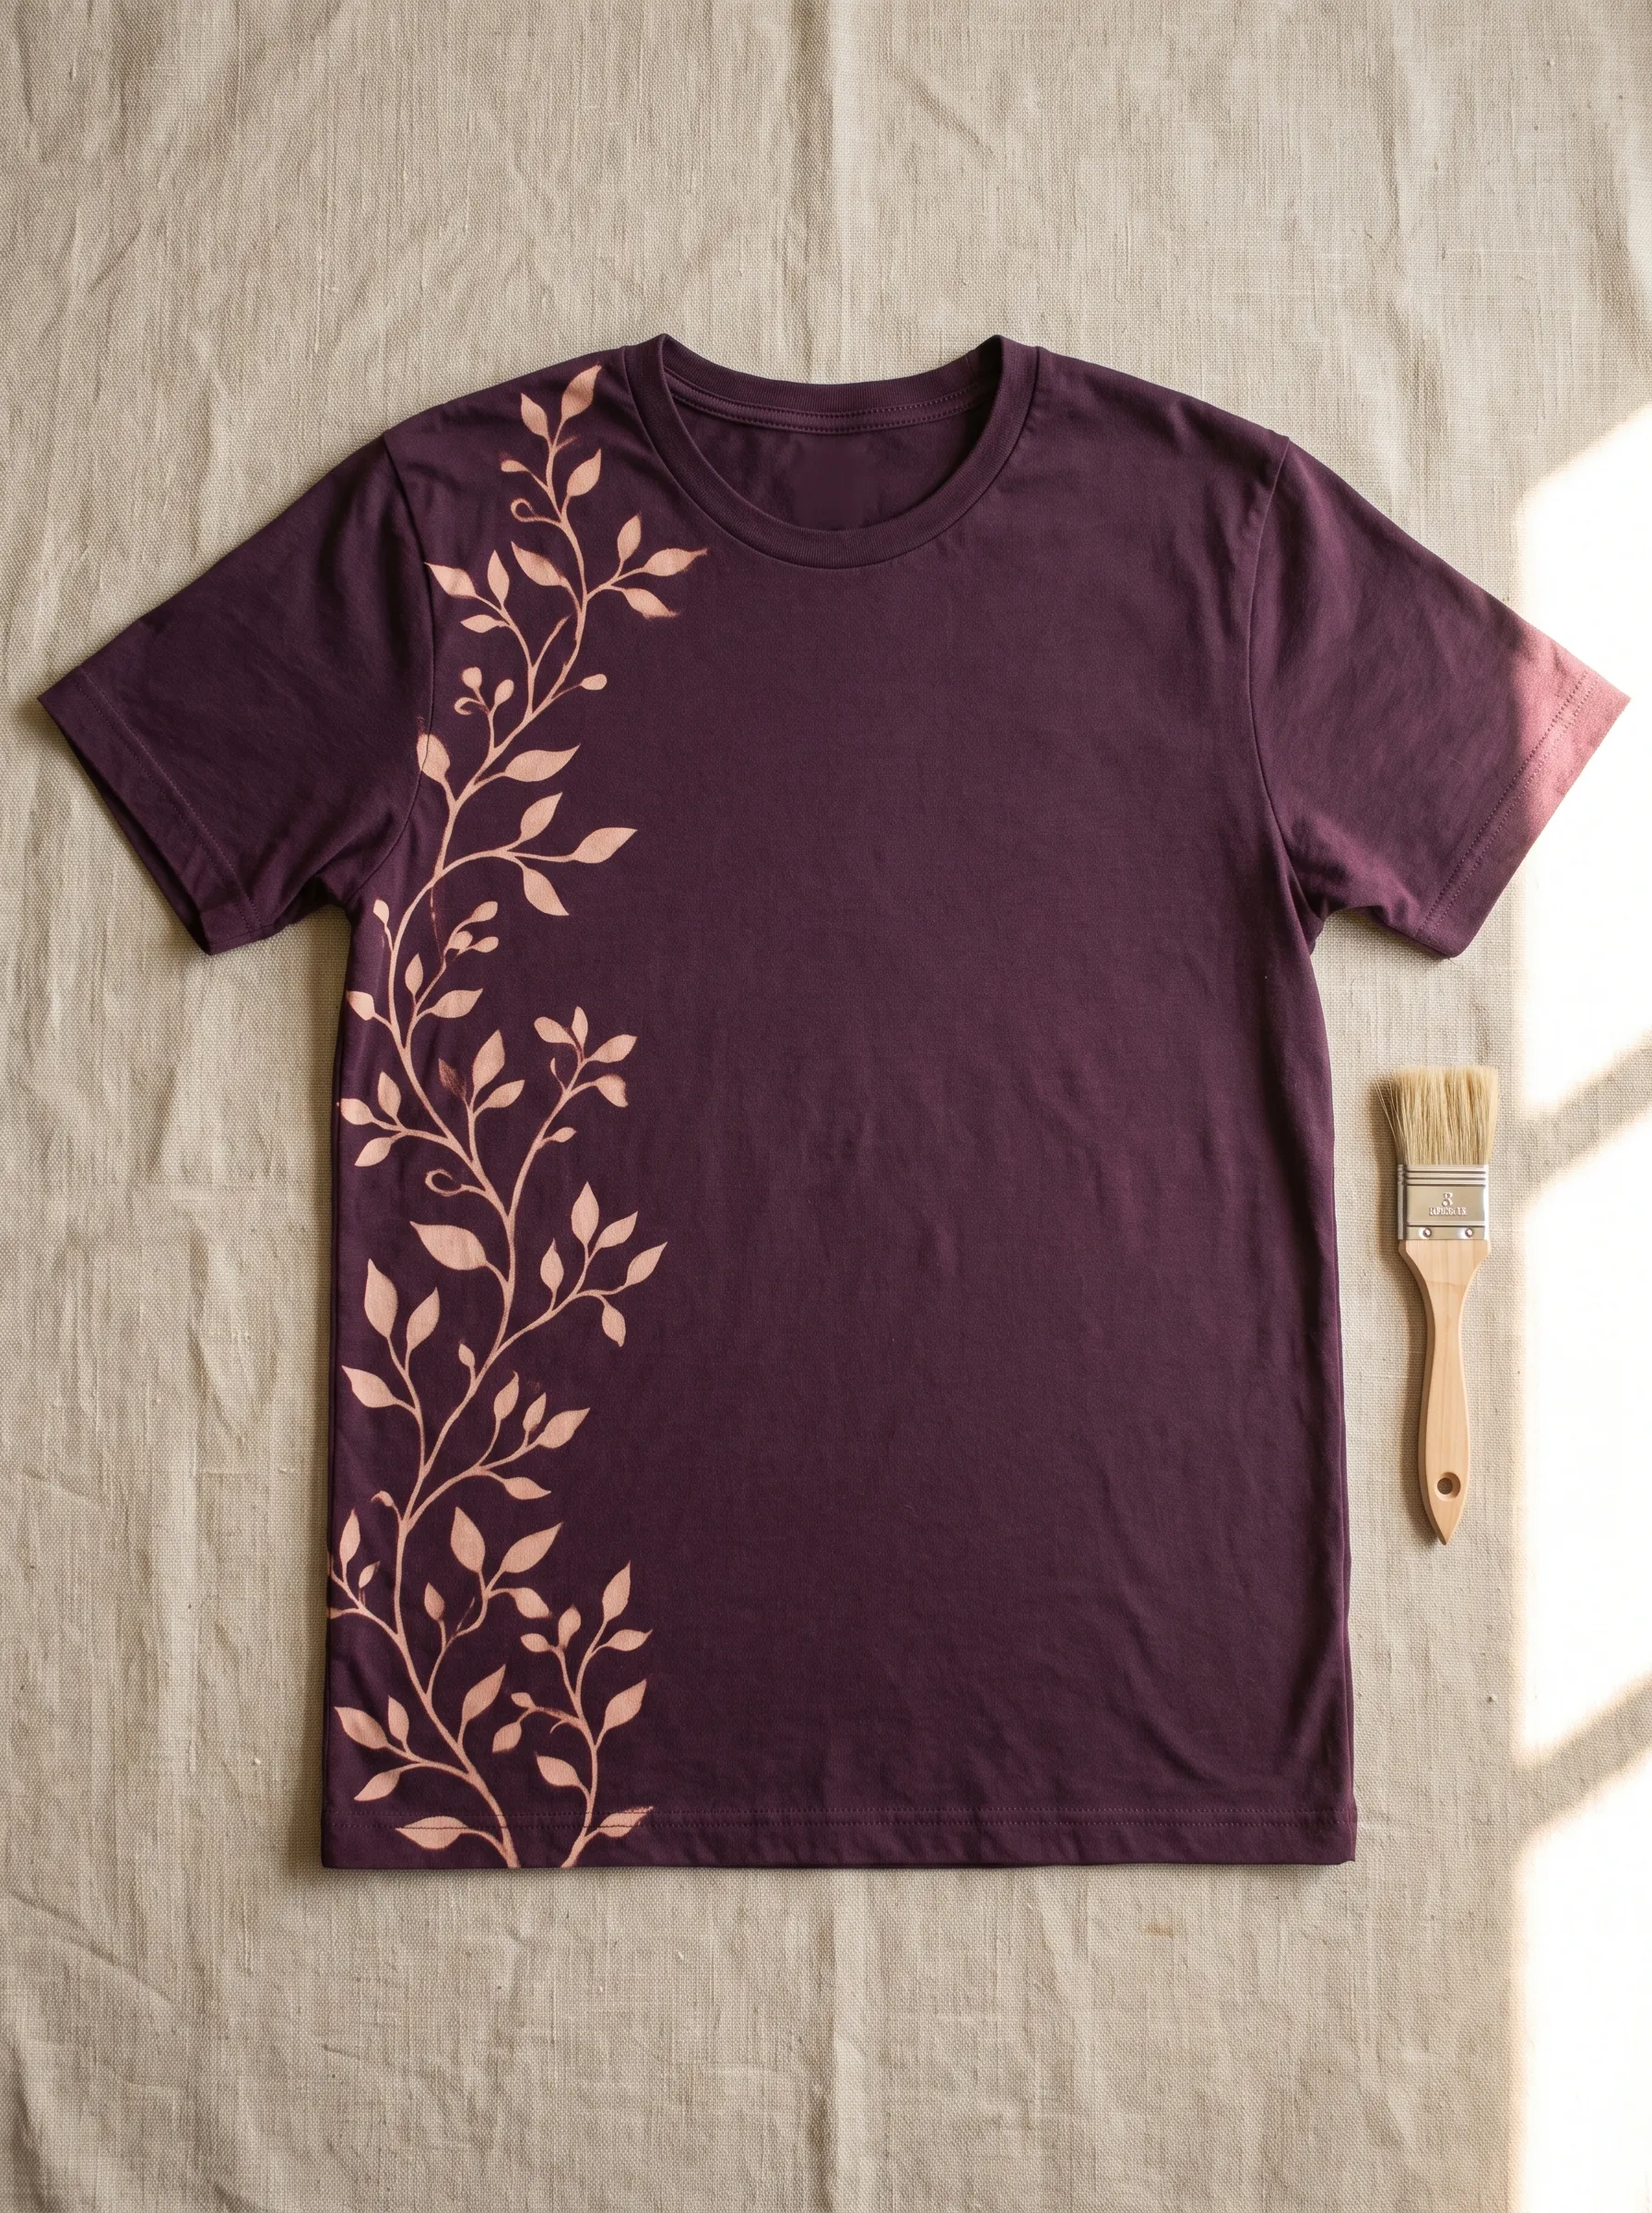
A single vine climbs up the left side of this deep plum shirt, dotted with small leaves in a soft rose gold hue. Growth feels organic here, since the vine curves and branches unevenly, avoiding any stiff or rigid symmetry. Botanical bleach designs like this one require a steady hand and a fine brush, since thin lines demand more control than broad splashes. Placement along one side rather than the centre keeps the design asymmetrical and modern. A paintbrush sits nearby in the photo, hinting at the brush-application method rather than spray or dip techniques. Garden lovers and anyone drawn to soft florals will find this pattern easy to wear, since the muted colour palette pairs well with neutral bottoms.
Cloud-Wash Tee
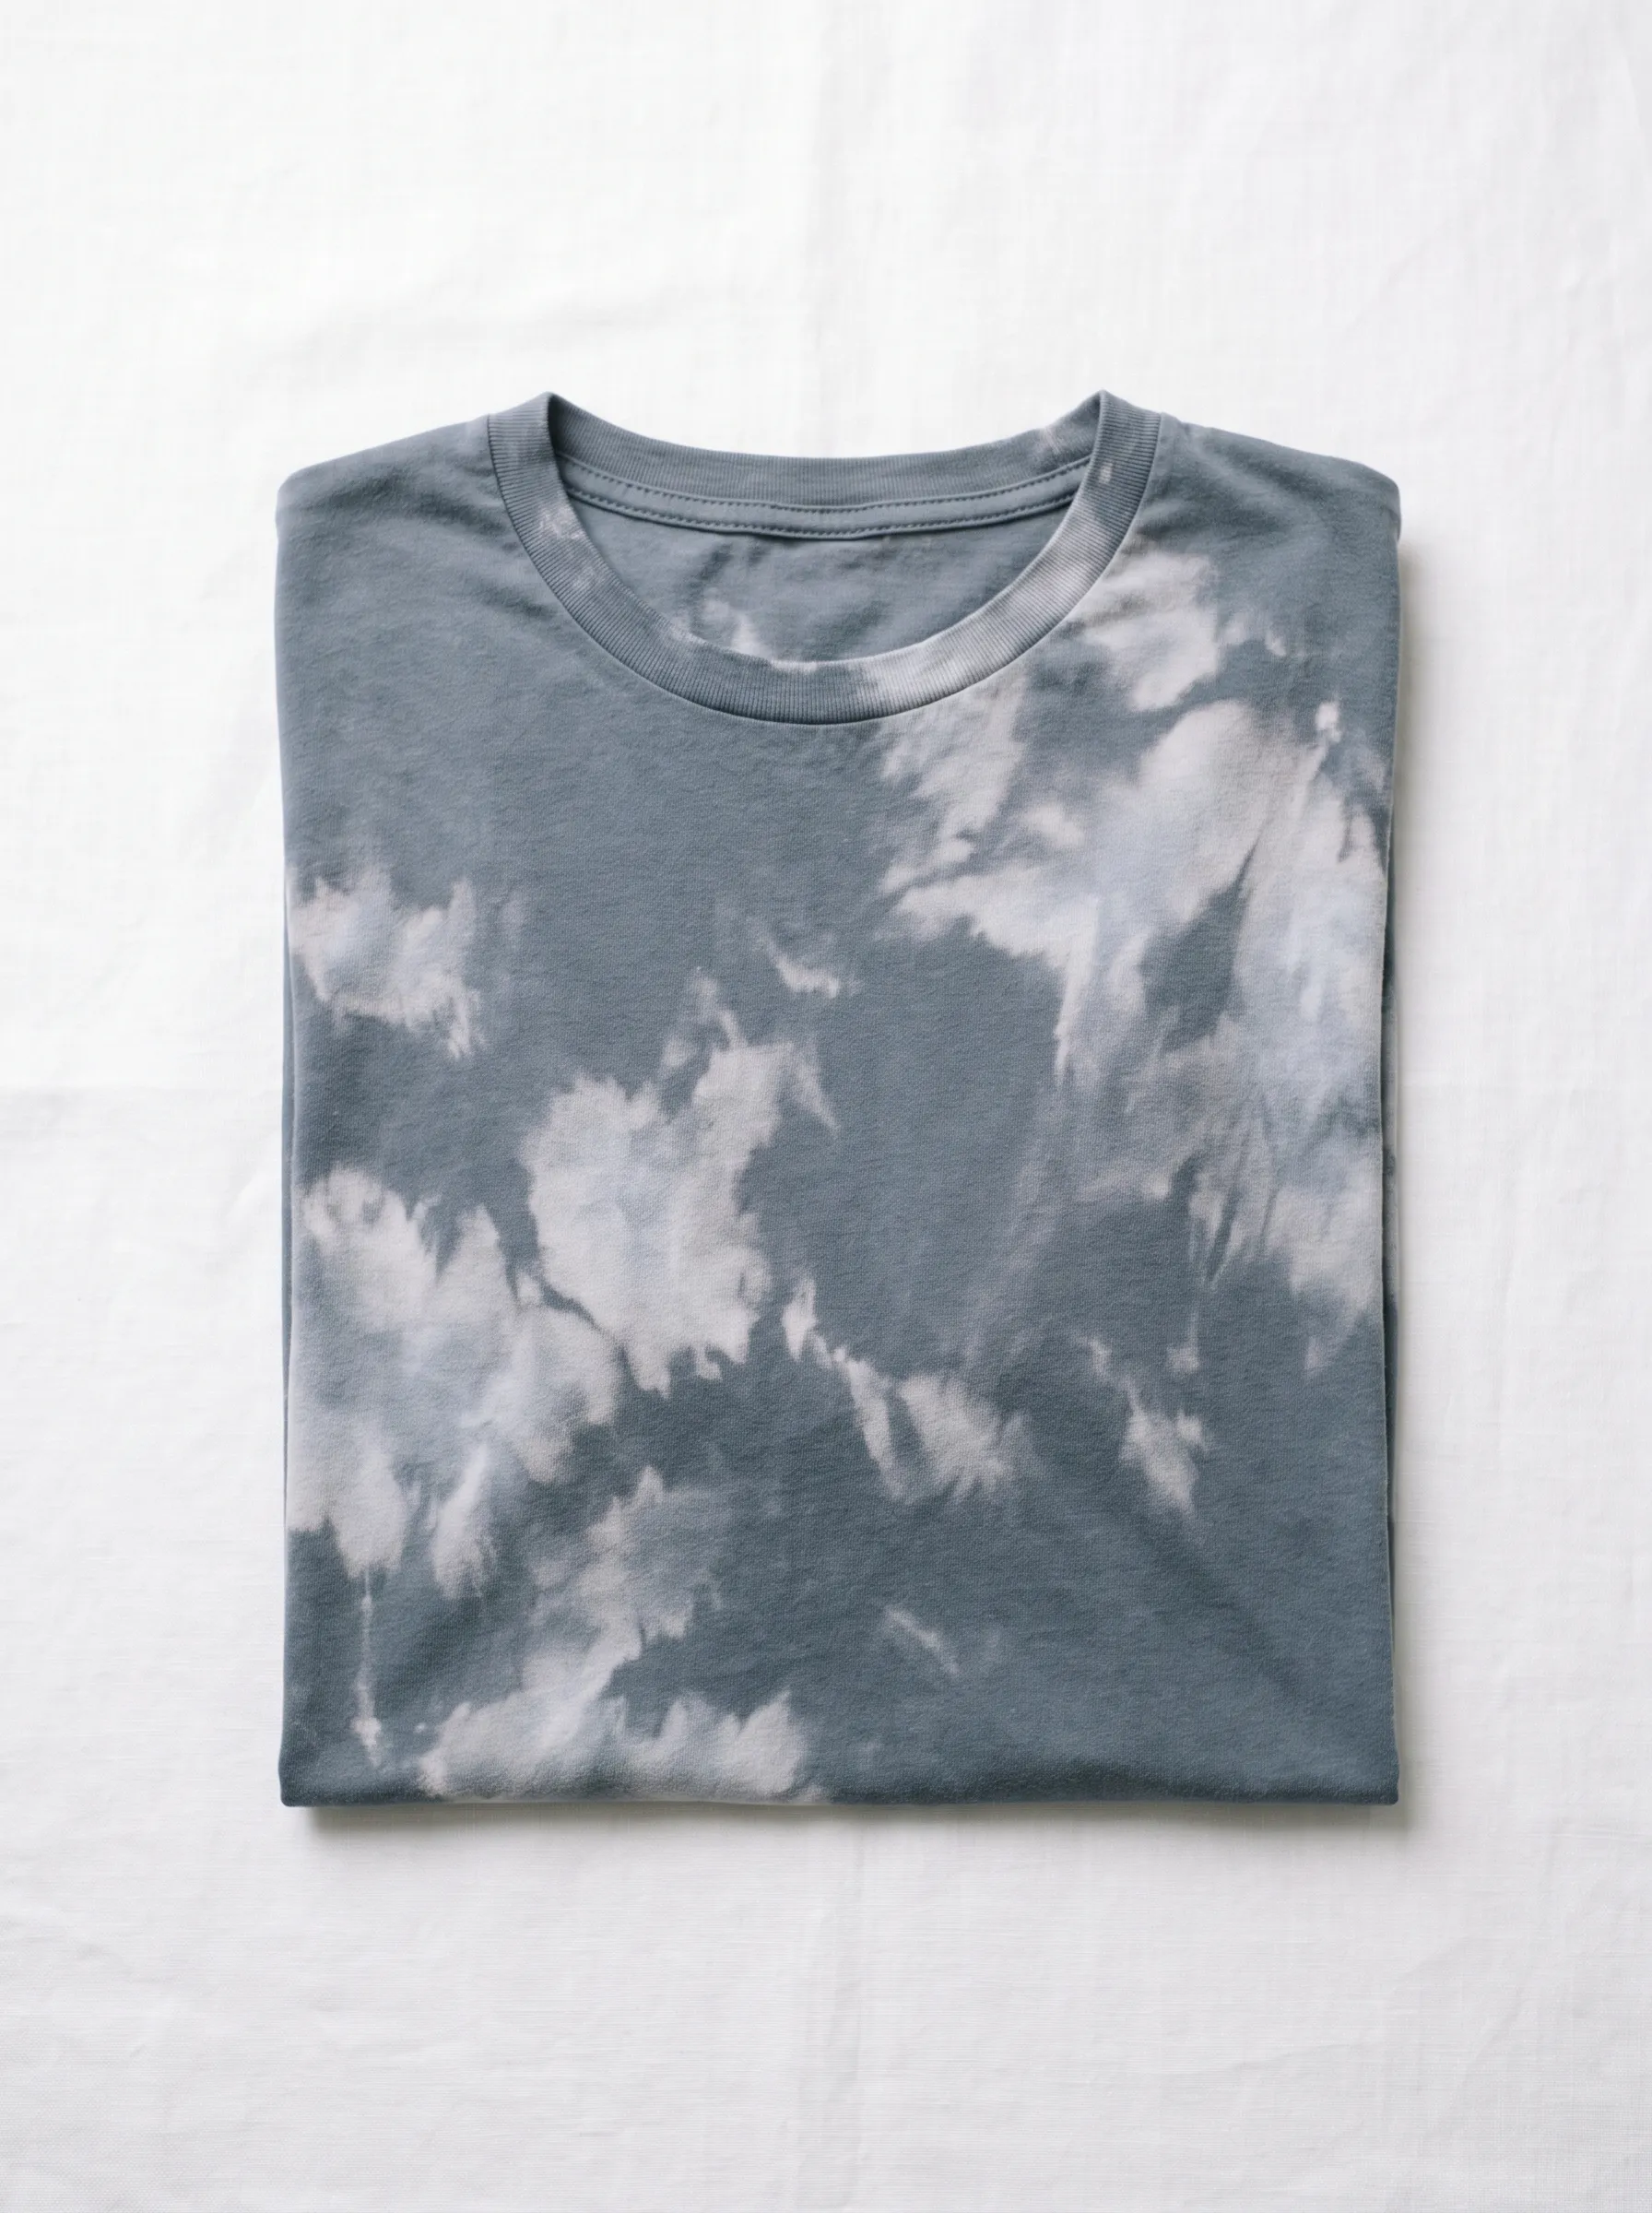
Smoky grey and white blend together across this folded shirt, creating a pattern that looks like storm clouds rolling across the sky. Soft edges dominate the design, since there's no harsh line separating light from dark, just a gradual bleeding of tones into one another. Achieving this cloud-like effect typically involves scrunching the fabric before applying bleach, letting the folds create natural, irregular blooms. Moody, atmospheric shirts like this one work well for anyone who wants texture without a specific shape or motif. Versatility comes standard with this design, since the grayscale palette matches nearly every other colour in a closet. Beginners often start with this technique, since scrunch-and-bleach methods require far less precision than stencils or freehand painting.
Denim Patchwork Tee
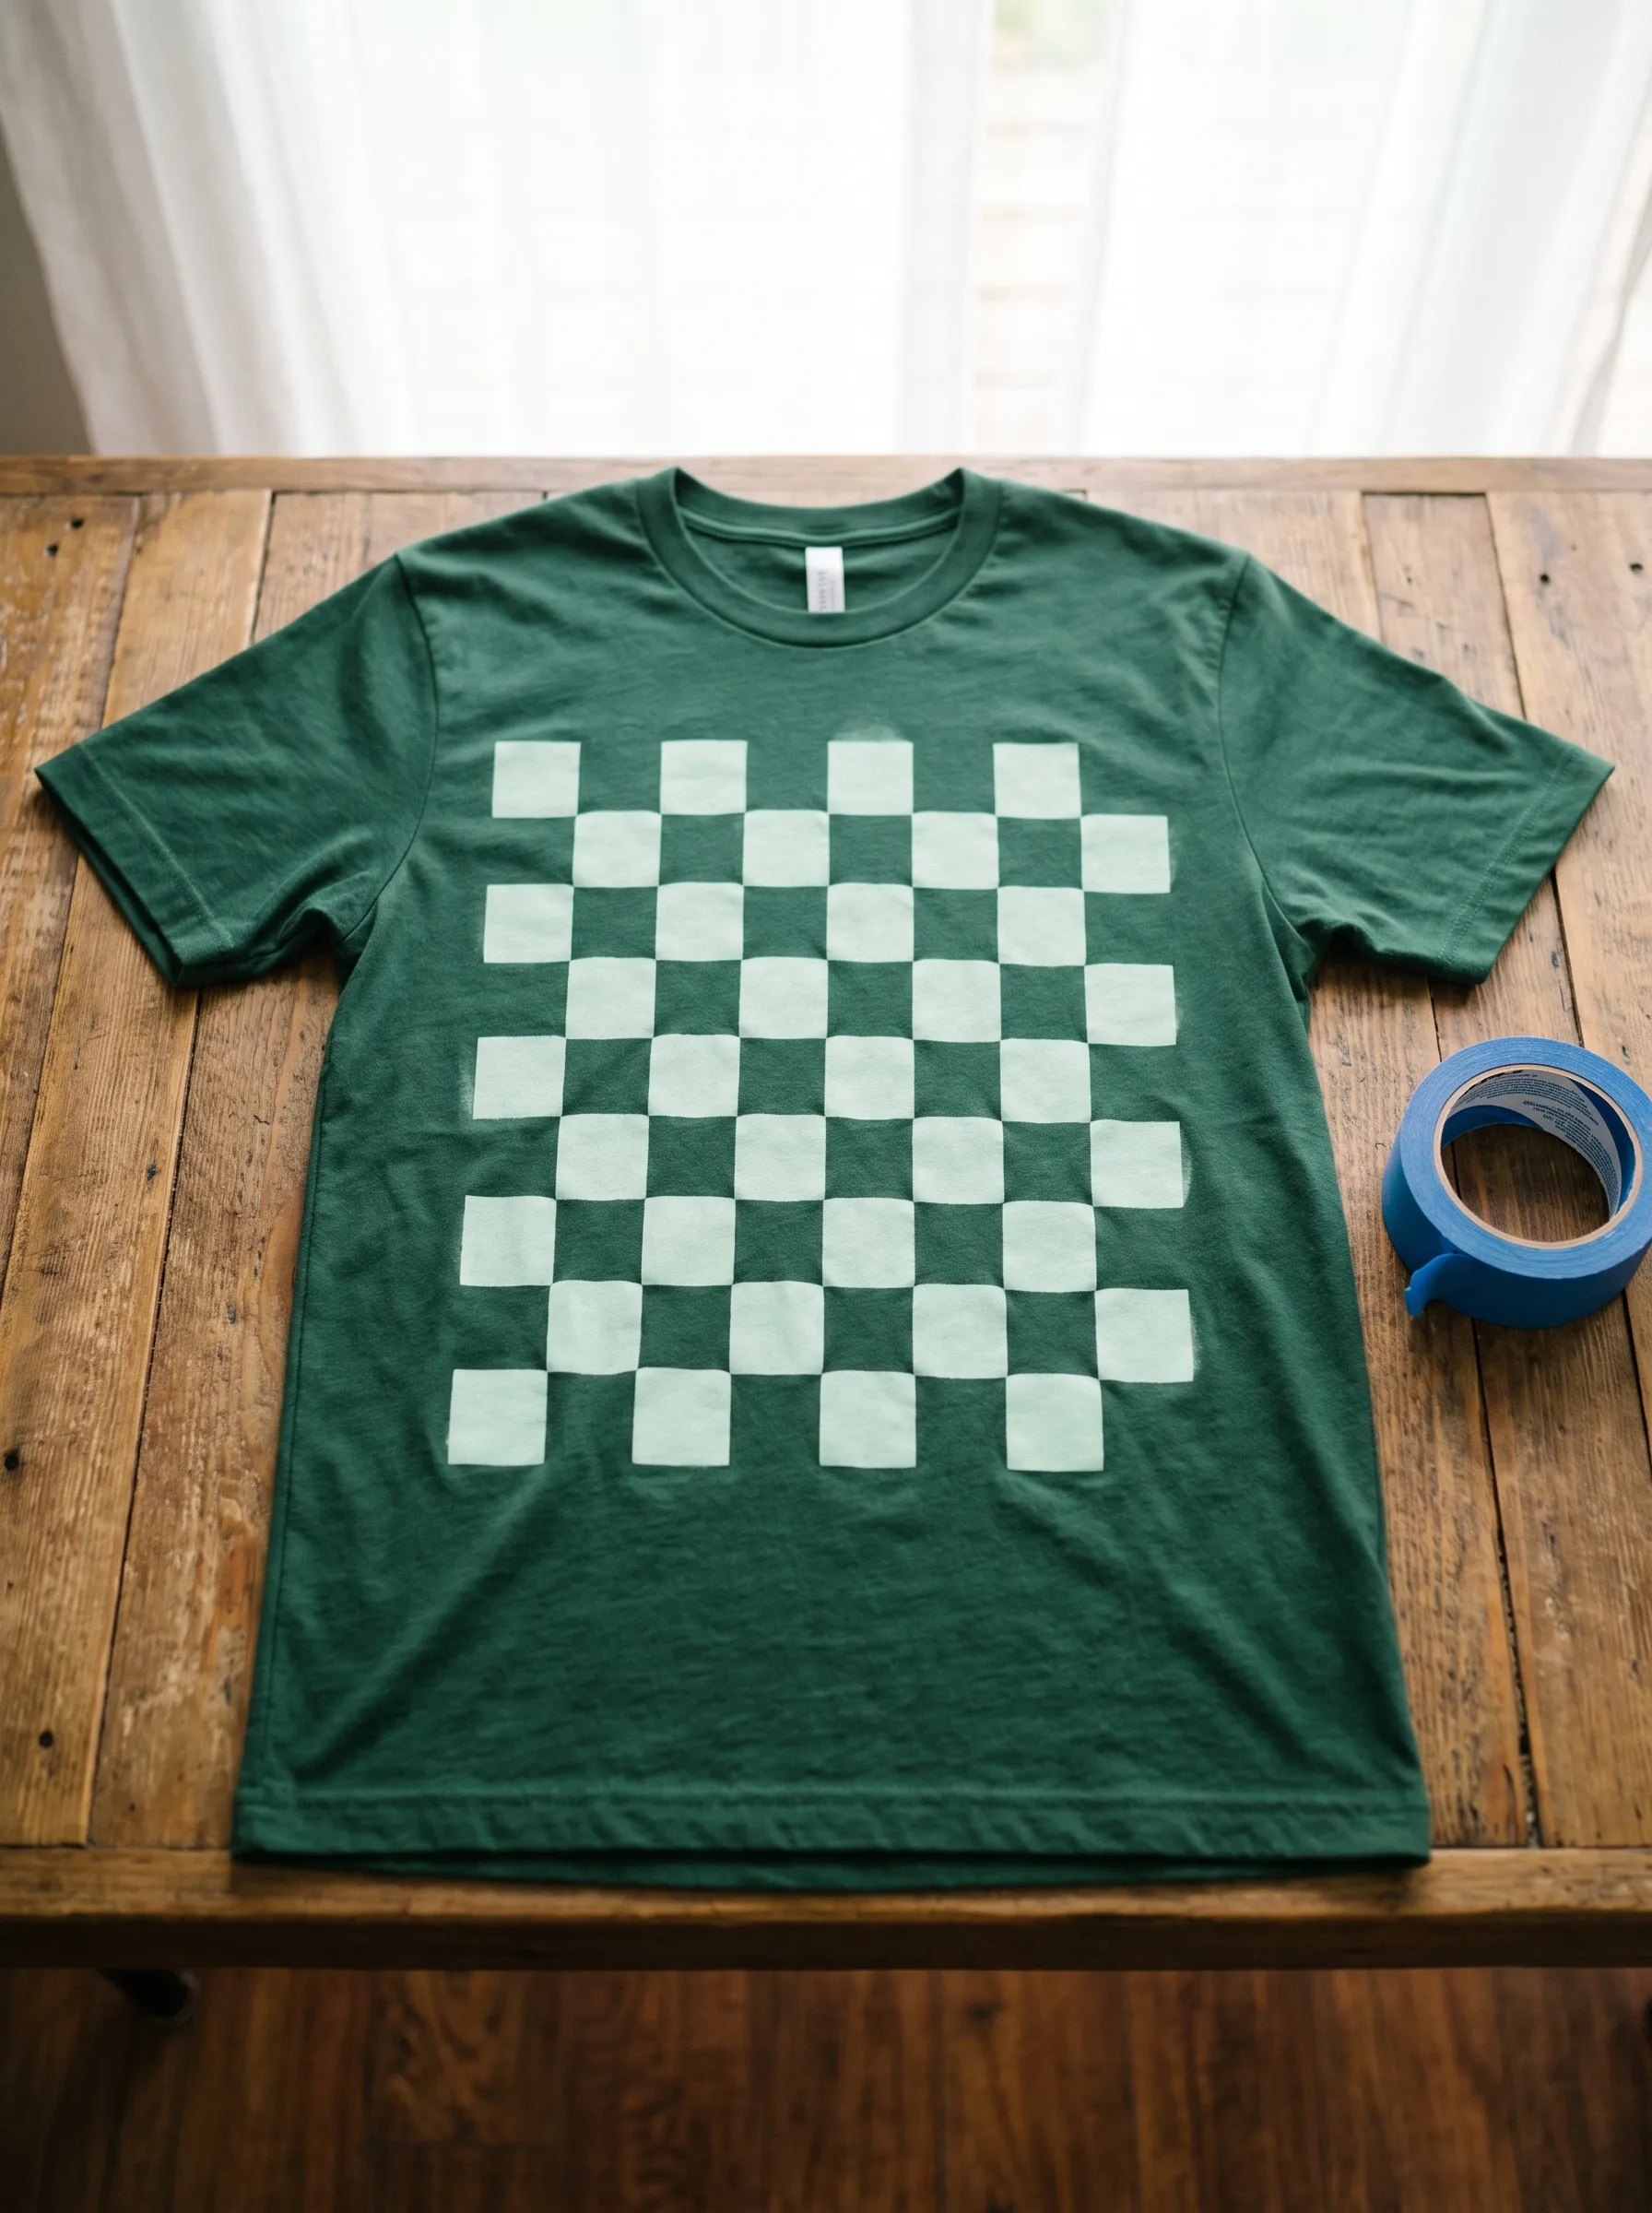
Pale green squares checker across the chest of this forest green shirt, resembling a denim patchwork quilt or a chessboard pattern. Blue painter's tape sits beside the shirt in the photo, revealing exactly how these crisp, straight lines came together. Grid patterns like this demand careful taping before bleach application, since every square needs equal spacing to look intentional rather than sloppy. Rustic wood tabletops photograph beautifully with shirts like this, since the earthy backdrop complements the deep green base colour. Checkerboard designs suit anyone drawn to retro or preppy aesthetics, since the pattern nods to vintage sportswear and skate culture alike. Painter's tape remains the most reliable tool for achieving sharp geometric lines on any bleach project.
Butterfly Symmetry Tee
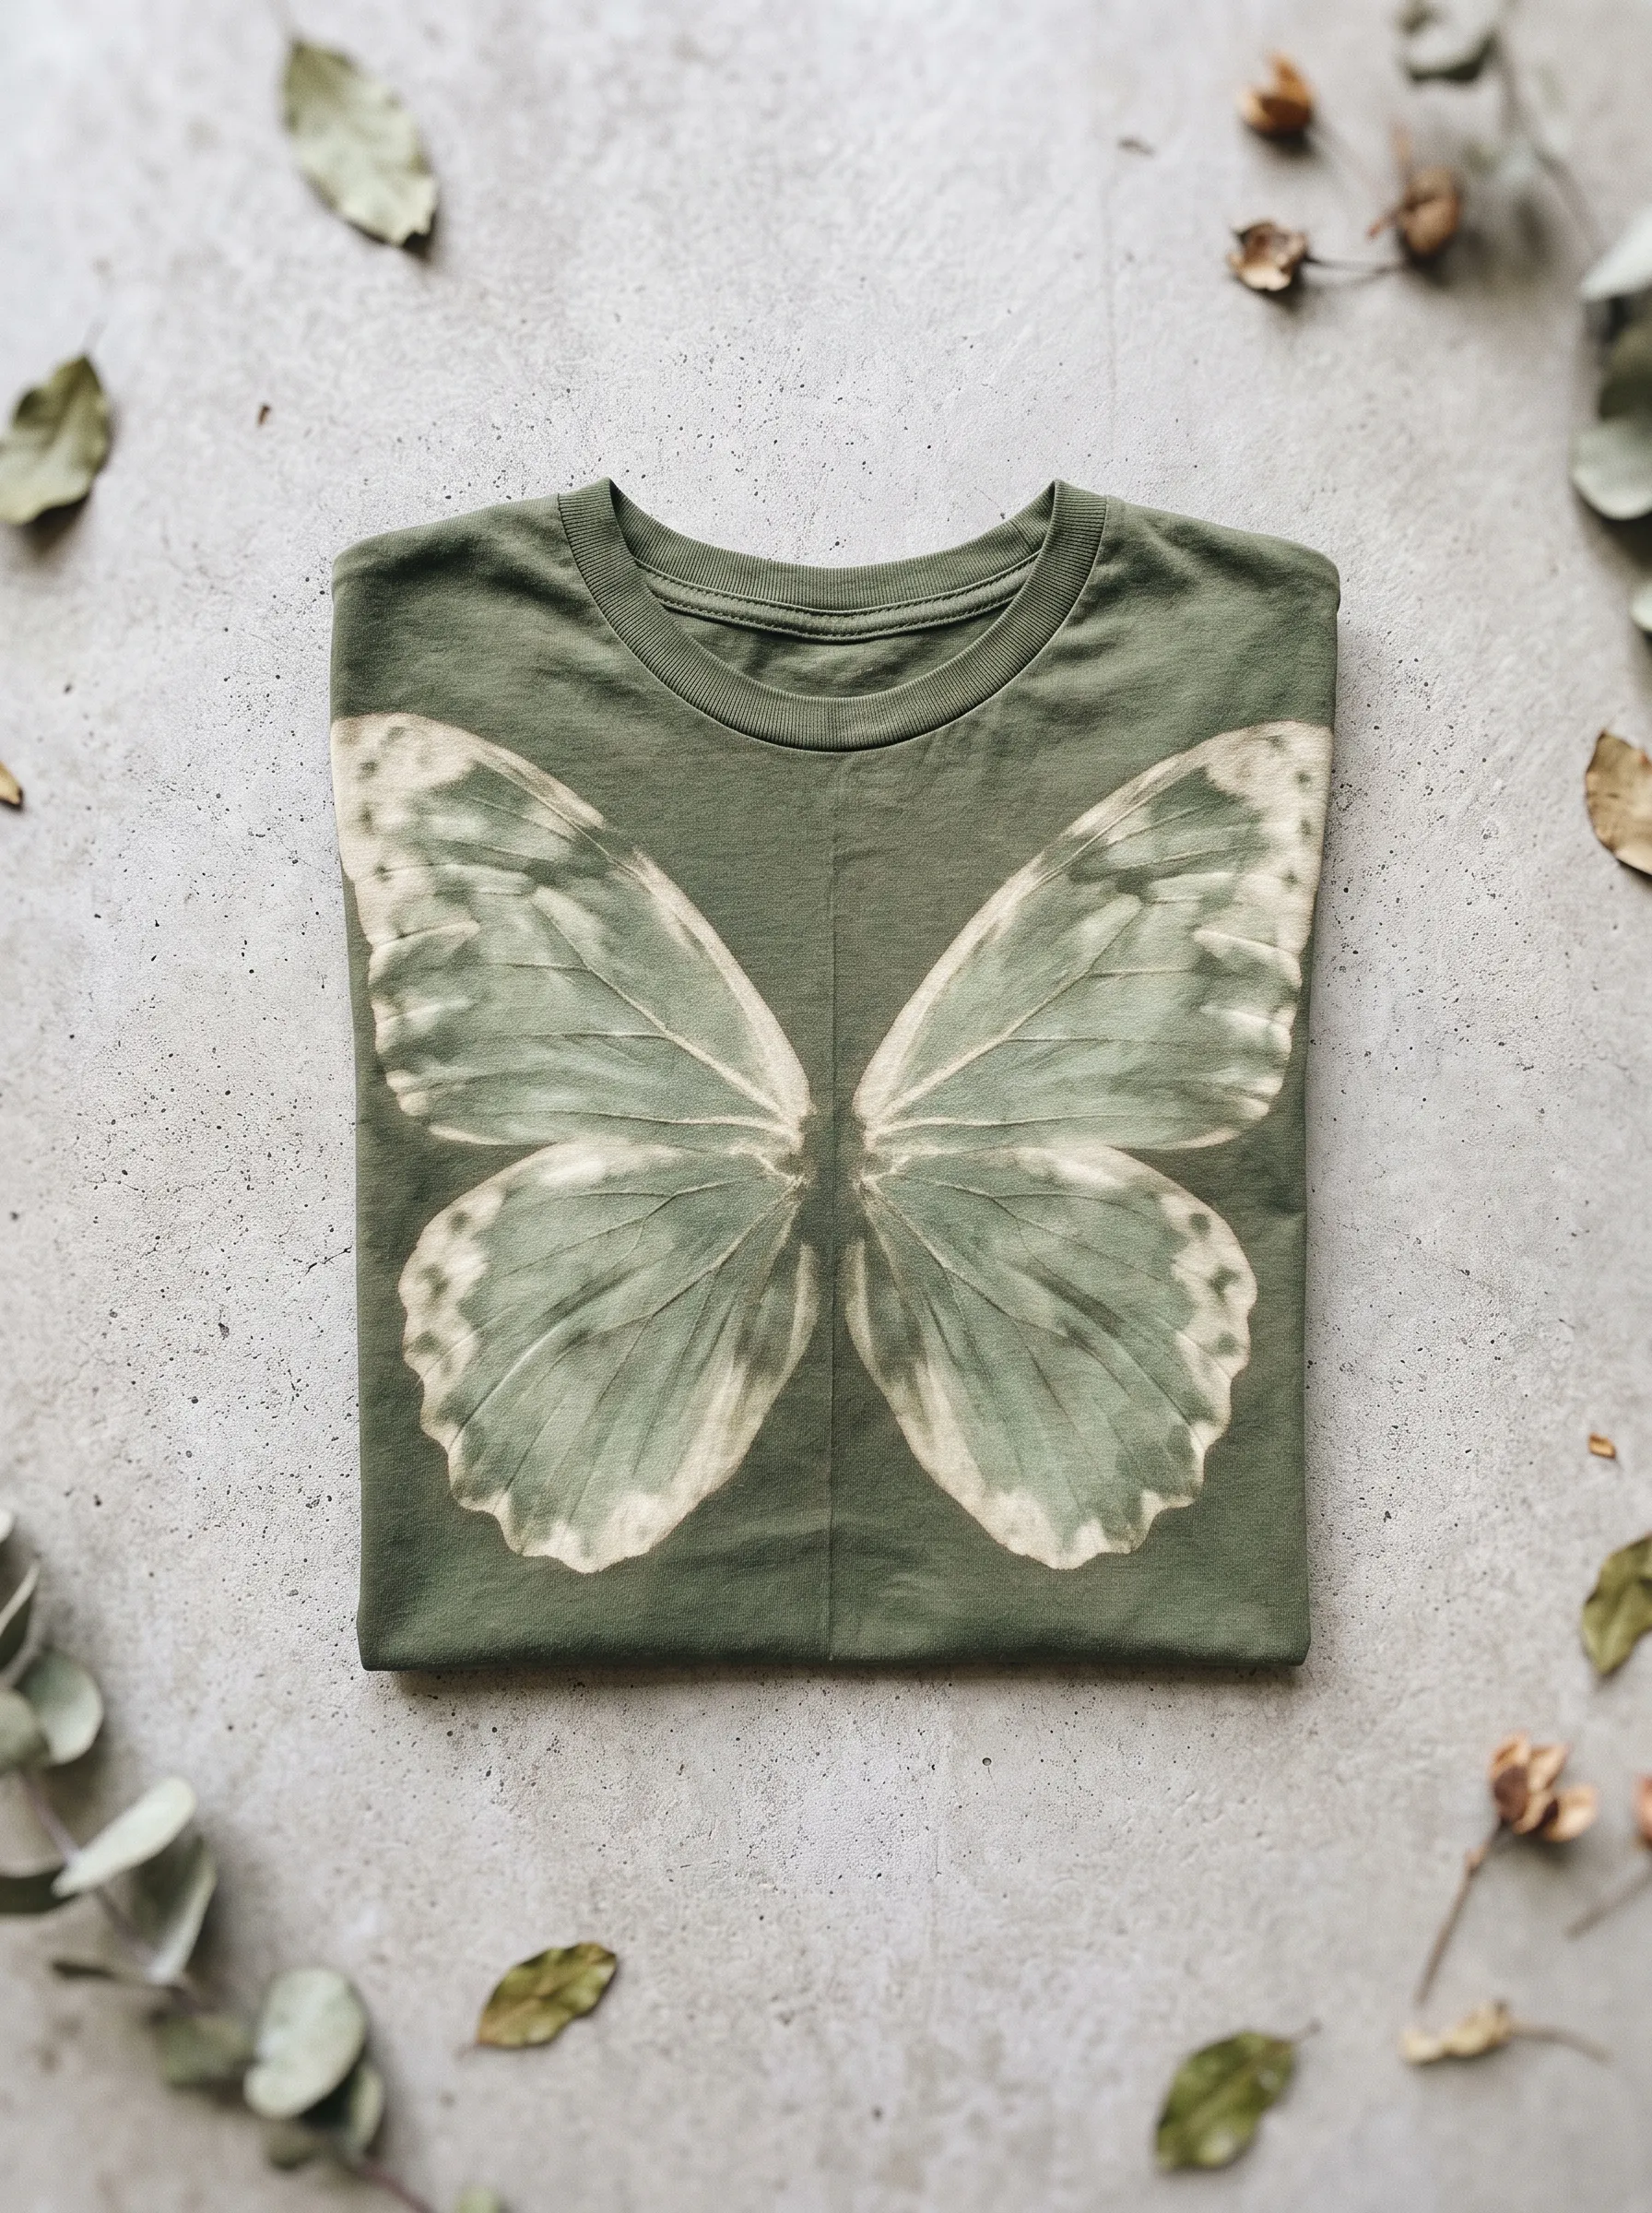
Folded neatly on a concrete surface, this olive green shirt showcases a butterfly with wings that mirror each other in flawless symmetry. Cream and sage tones blend across each wing, giving the insect a soft, almost watercolour quality. Dried leaves scattered around the shirt in the photo reinforce the nature theme running through the entire design. Butterfly patterns rank among the most popular bleach shirt ideas, largely because folding the shirt in half naturally creates a mirrored effect with minimal effort. Detail work on the wing veins takes patience, but a fine-tip bleach pen handles those thin lines well. Anyone new to bleach dyeing often starts with a butterfly, since the built-in symmetry forgives small mistakes on one side.
Denim-Wash Ombre Tee
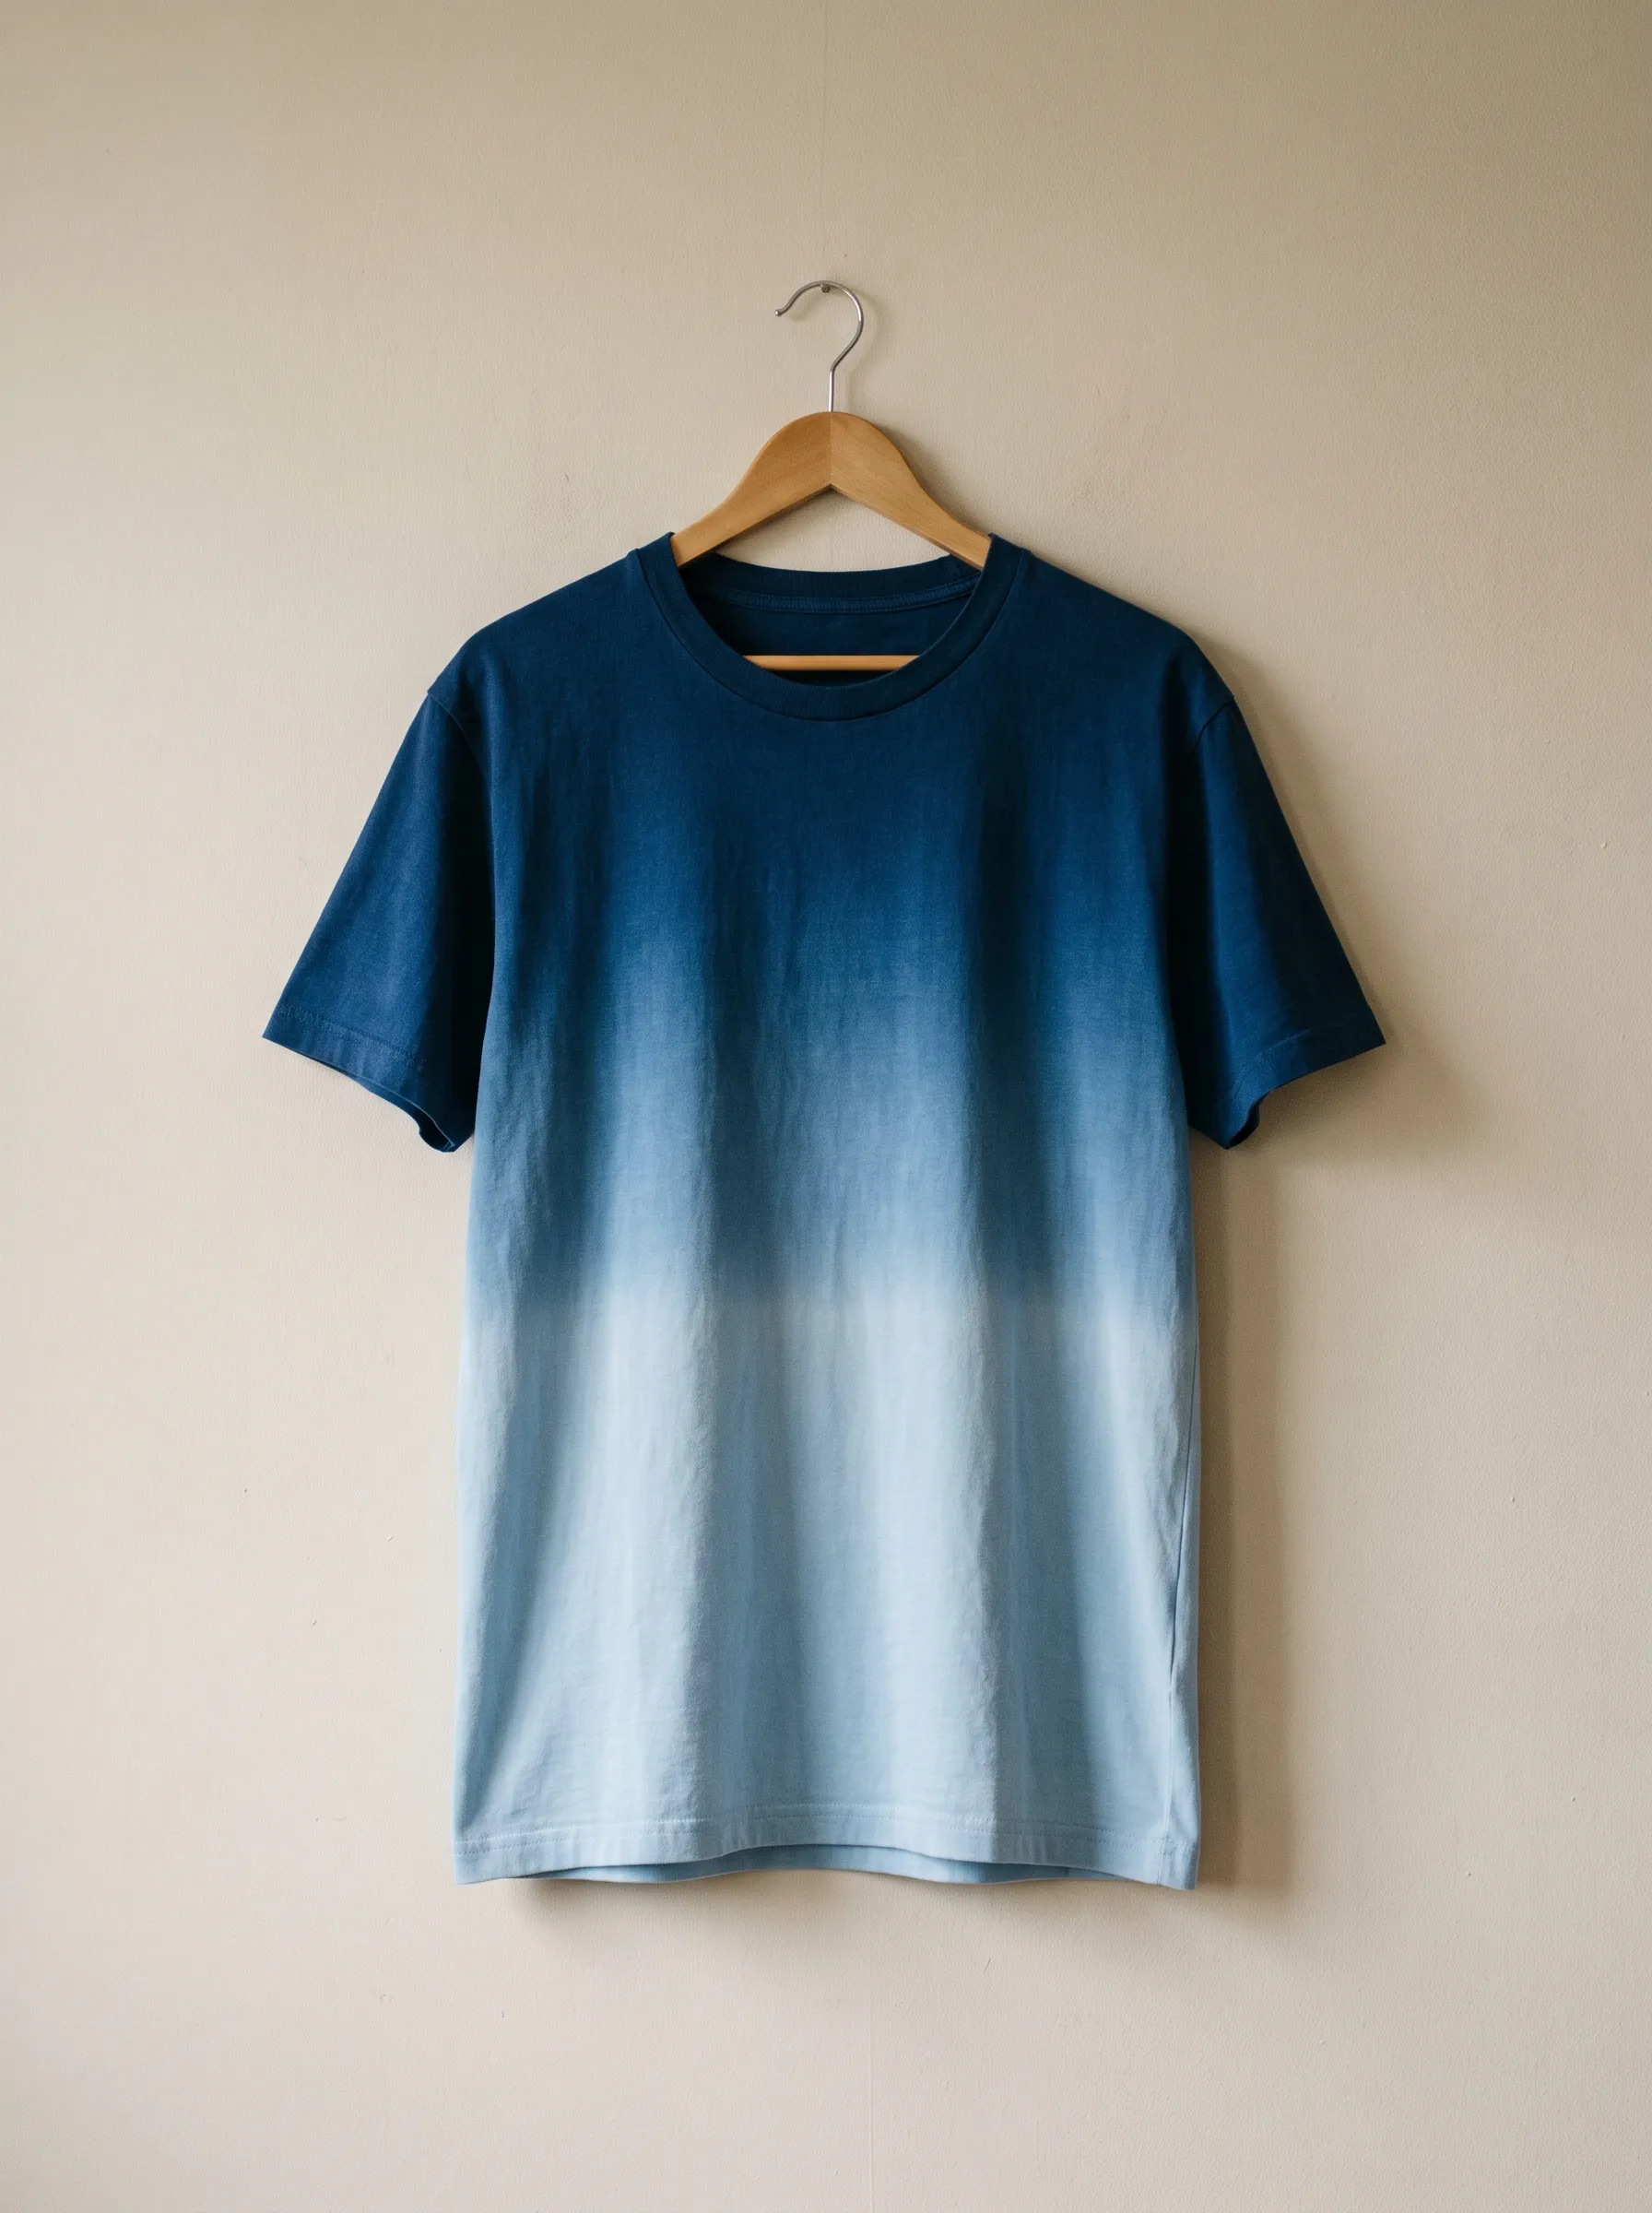
Hanging against a plain wall, this shirt transitions from deep navy at the shoulders to a soft, washed-out blue near the hem. Ombre effects like this rely on dip-dyeing, where the shirt hangs partially submerged in bleach solution, letting gravity and time control the gradient. Denim lovers will recognize this fade instantly, since it mimics the worn look of well-loved jeans. Even, gradual fading takes practice, since uneven dipping can create harsh lines instead of a smooth blend. Wooden hangers and neutral walls photograph well with shirts like this, keeping the focus entirely on the colour transition. Simple wardrobes benefit most from ombre pieces, since the design pairs with nearly anything without competing for attention.
Lace Overlay Tee
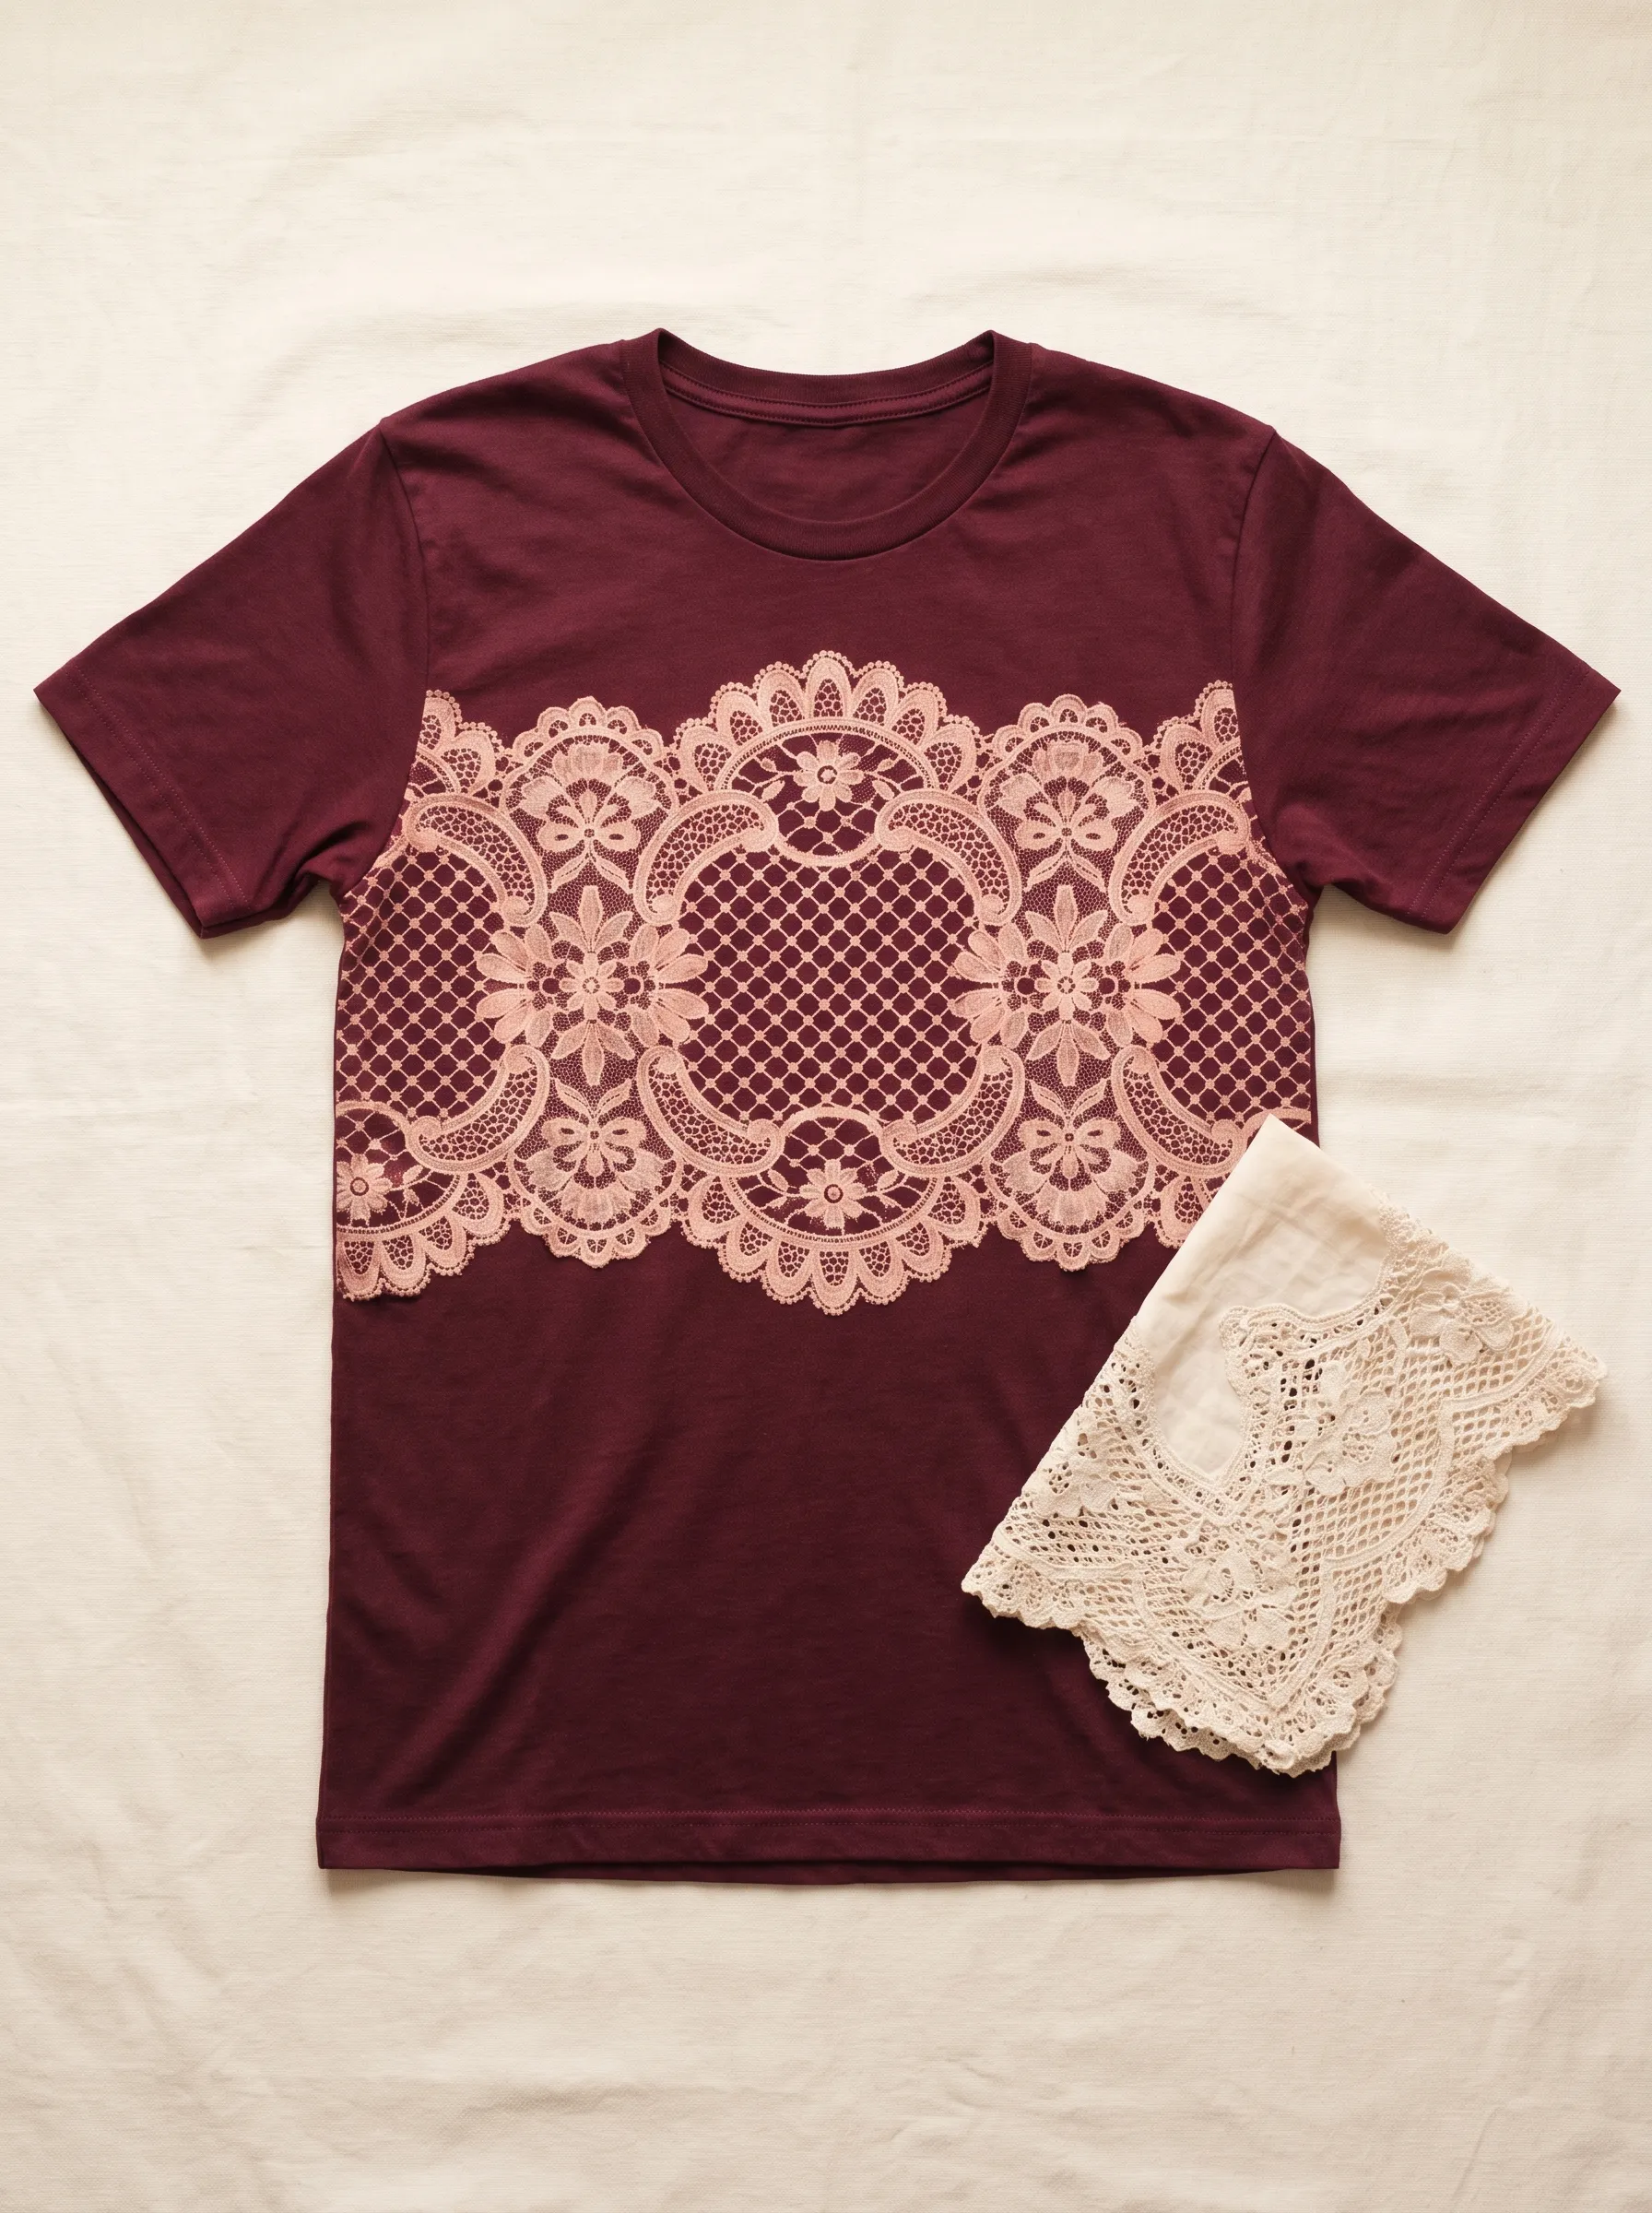
Burgundy fabric peeks through an intricate lace pattern stretched across the chest of this shirt, bleached in a soft blush pink. Floral motifs within the lace design add texture and elegance, resembling vintage doily patterns or antique tablecloths. Actual lace fabric sits beside the shirt in the photo, revealing the stencil method used to transfer such fine detail onto cotton. Delicate patterns like this require placing real lace directly onto the shirt before spraying bleach over it, letting the fabric holes act as a natural stencil. Feminine, romantic wardrobes suit this design particularly well, since the pattern leans vintage rather than modern. Achieving crisp lace detail takes a light spray rather than a heavy soak, since too much bleach blurs the intricate holes.
Constellation Bleach Tee
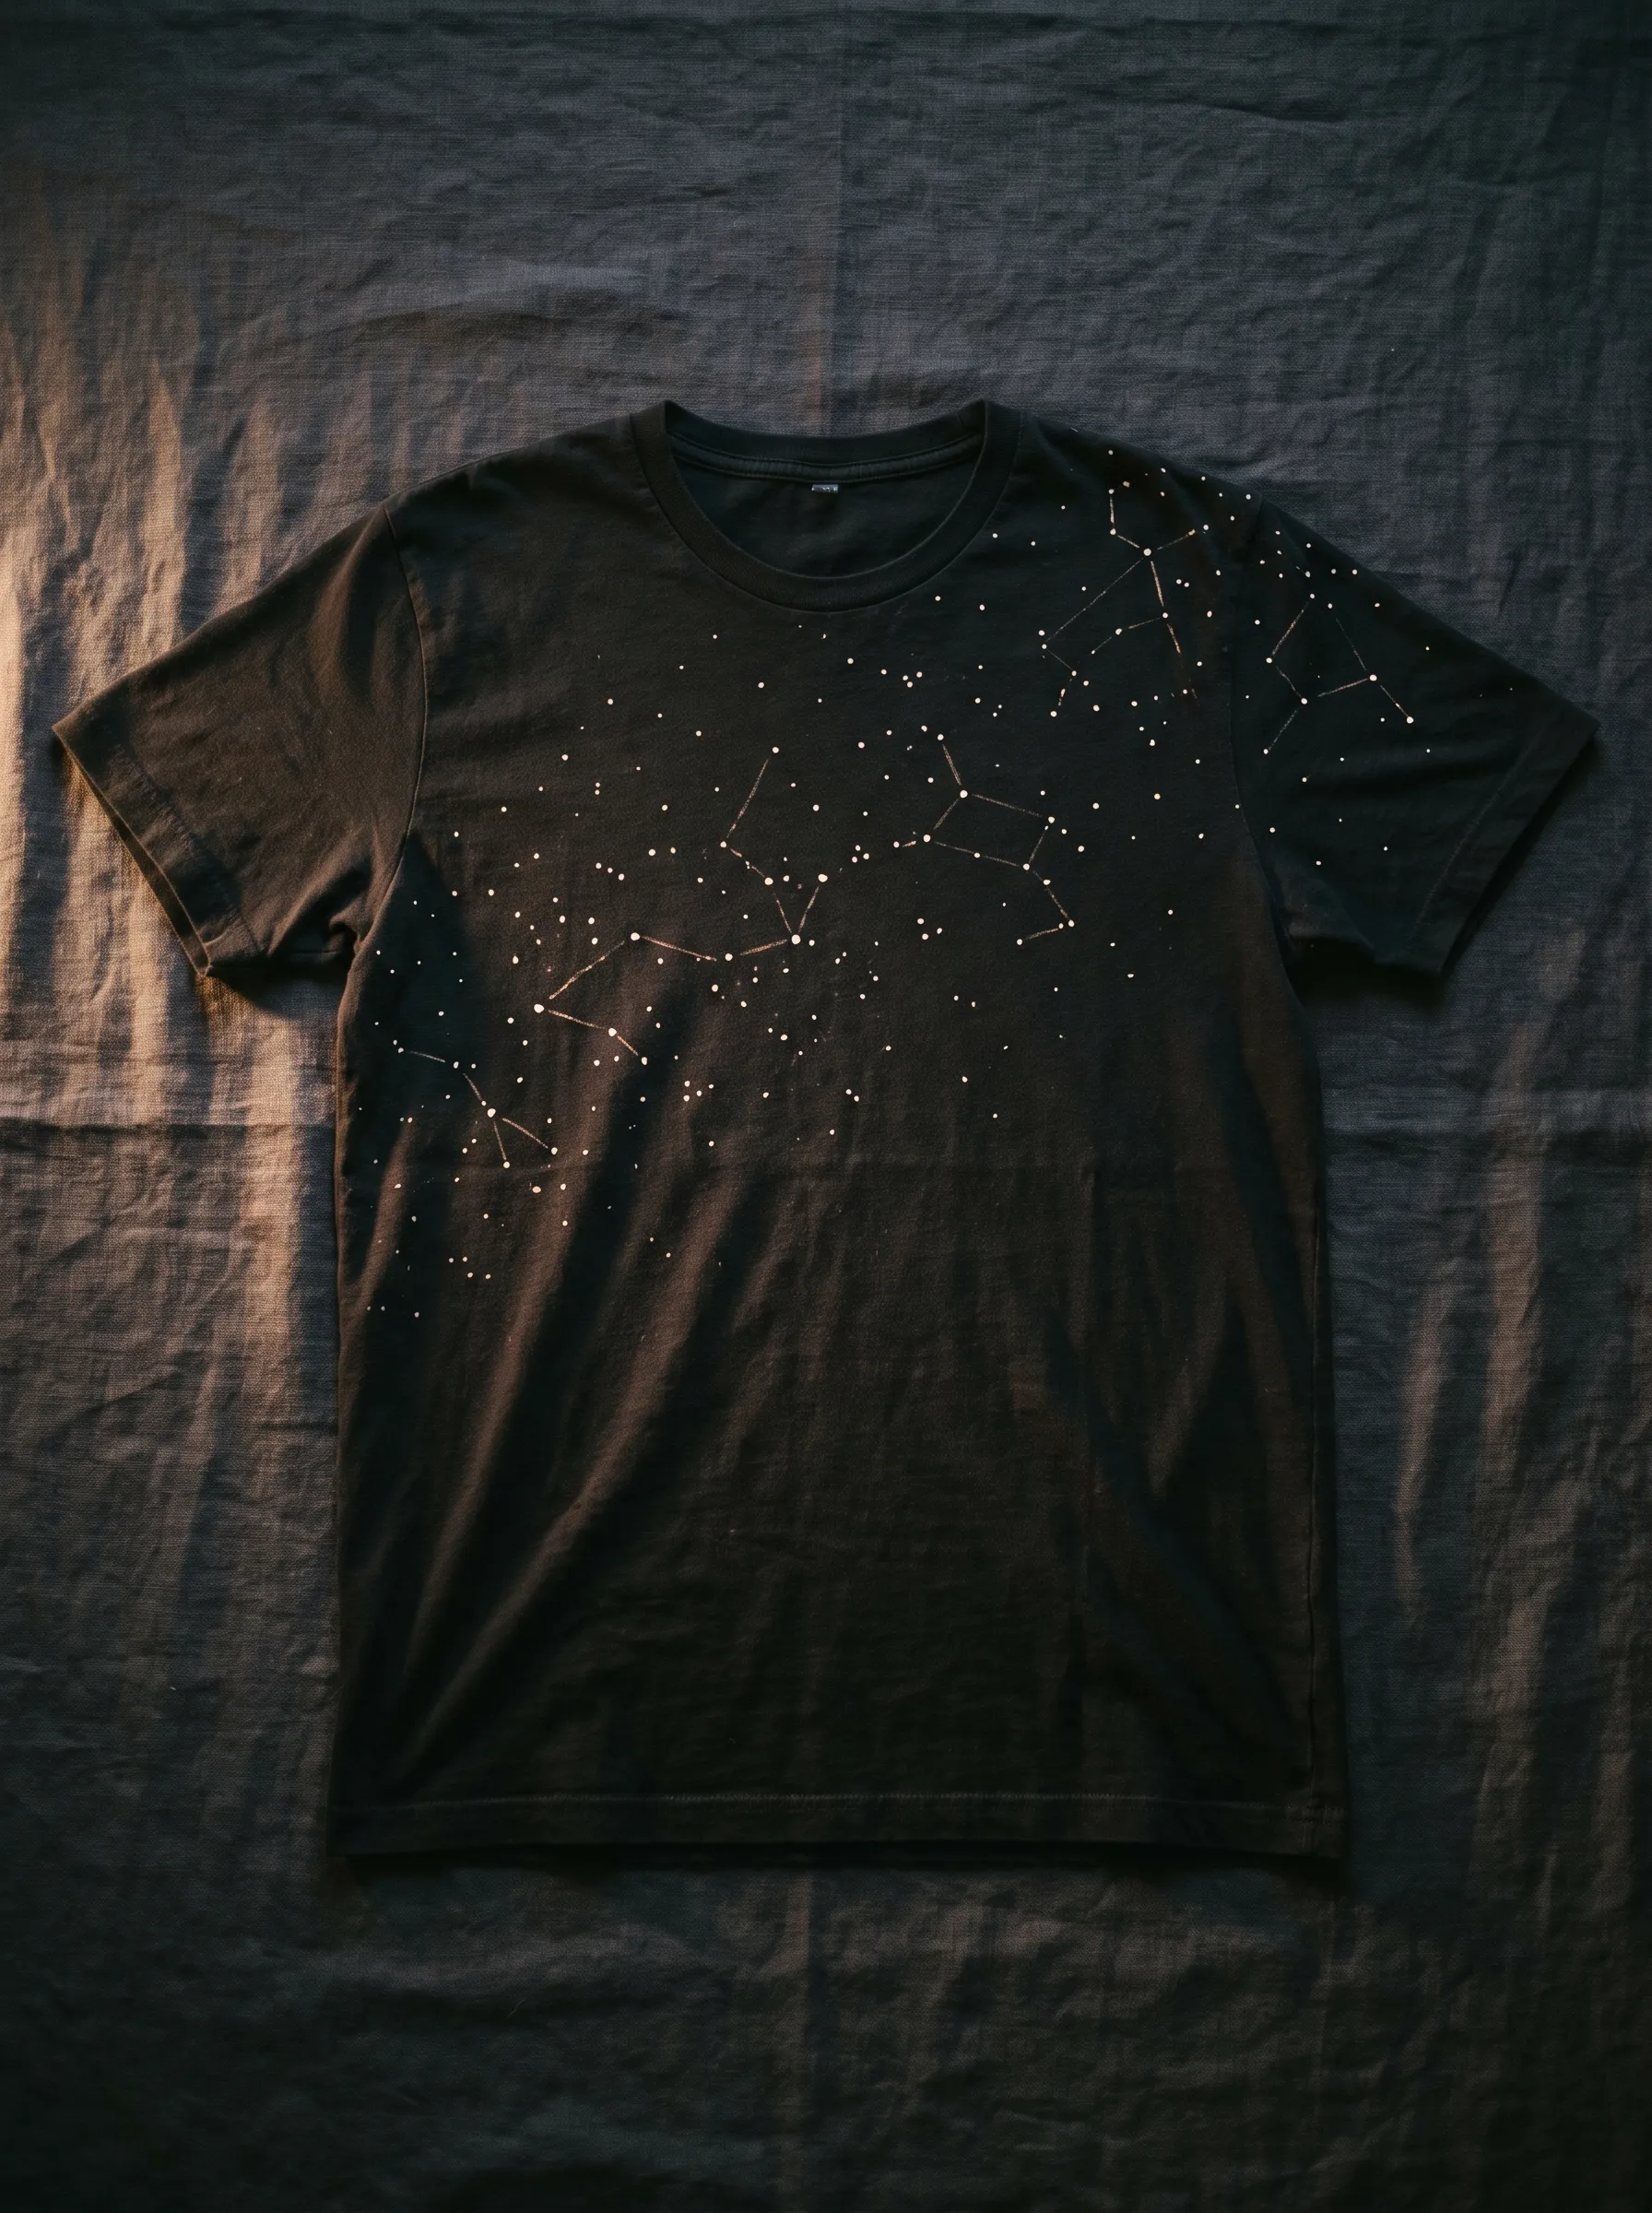
Scattered dots connect into recognizable star patterns across the shoulder and chest of this black shirt, mapping out constellations against a night sky. Faint lines link each star point, giving the design a scientific, almost celestial diagram quality. Low lighting in the photo enhances the cosmic mood, making the shirt look like it belongs under an actual night sky. Achieving pinpoint dots like these usually involves a bleach pen or fine brush, since precision matters far more than volume here. Astronomy fans and stargazers will connect with this design instantly, since it turns a simple shirt into a personal star chart. Placement across one shoulder rather than the full shirt keeps the composition balanced and avoids visual clutter.
Marbled Ocean Bleach Tee
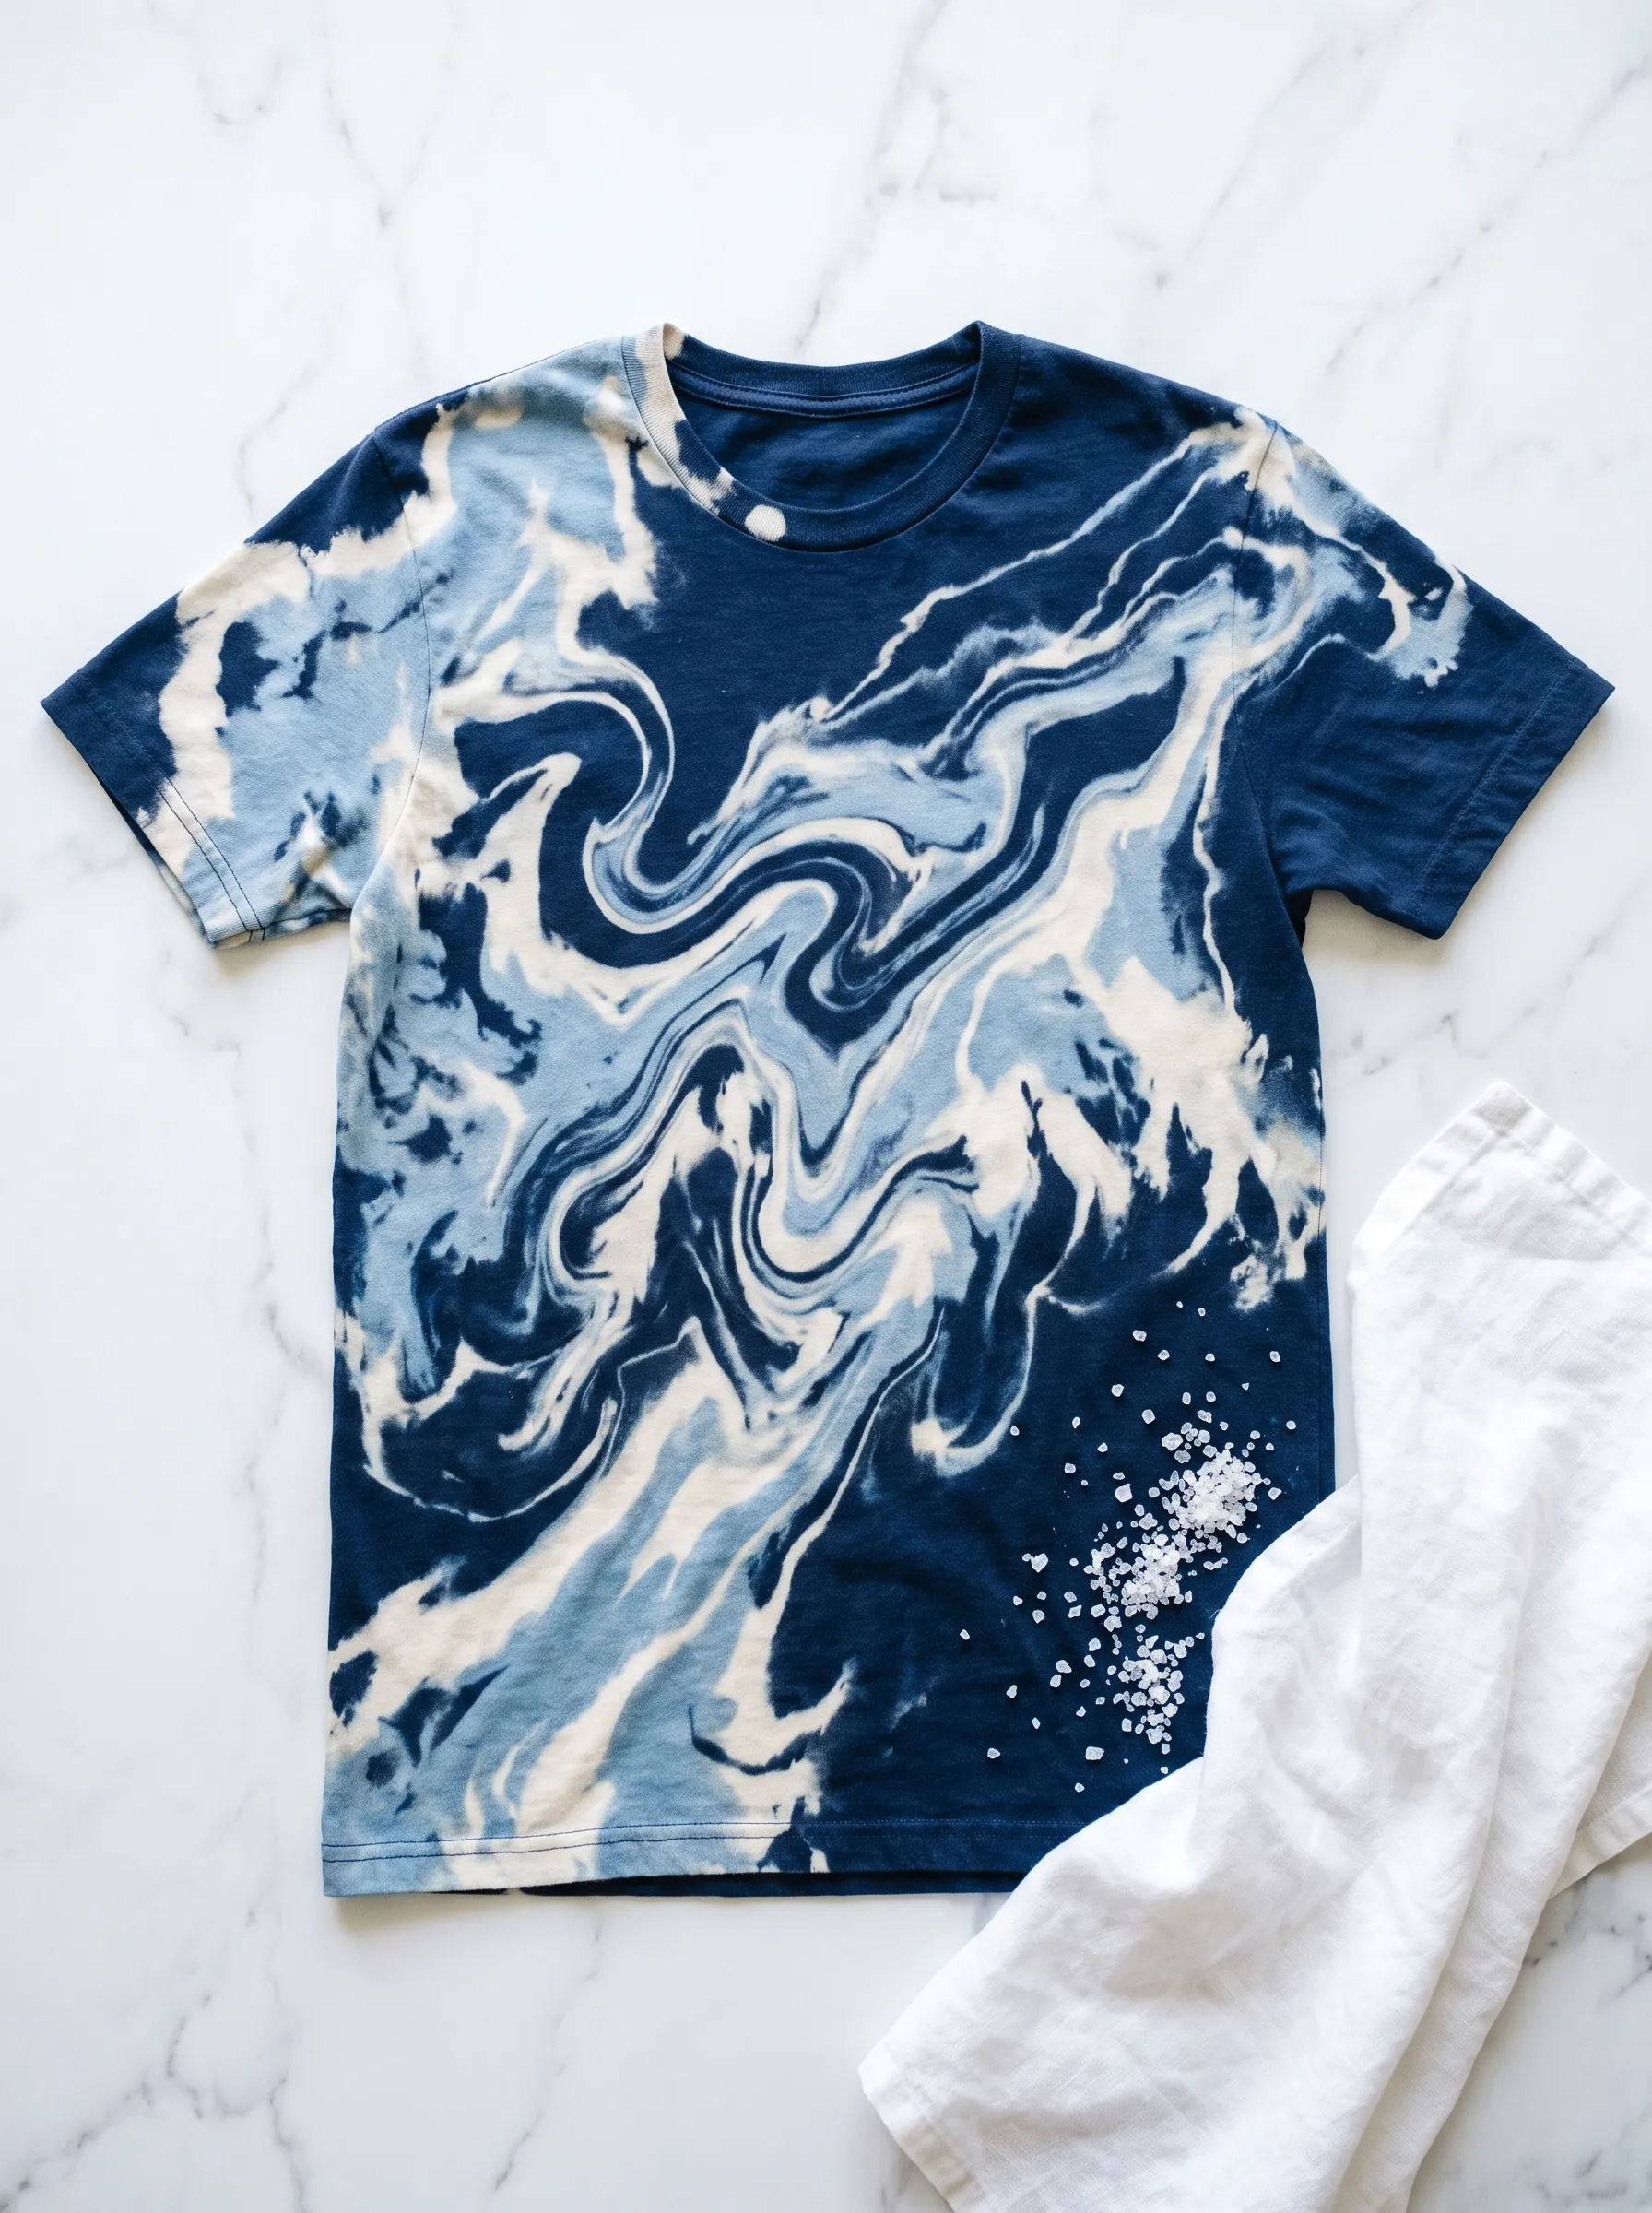
Swirling waves of navy, powder blue, and cream move across this shirt, resembling ocean currents or marbled stone. Sea salt crystals rest near the hem in the photo, hinting at the technique used to create these dramatic swirl patterns. Salt actually plays a functional role in bleach dyeing, since sprinkling it onto wet fabric pulls colour outward and creates those organic, veined lines. Marble effects rank among the more advanced bleach techniques, since achieving natural-looking swirls requires practice with fabric folding and bleach saturation. Ocean lovers and fans of abstract art will appreciate how unpredictable this method looks, since no two swirls turn out identical. White linen paired nearby in the photo keeps the styling clean and lets the marbled pattern take centre stage.
Botanical Silhouette Shirt
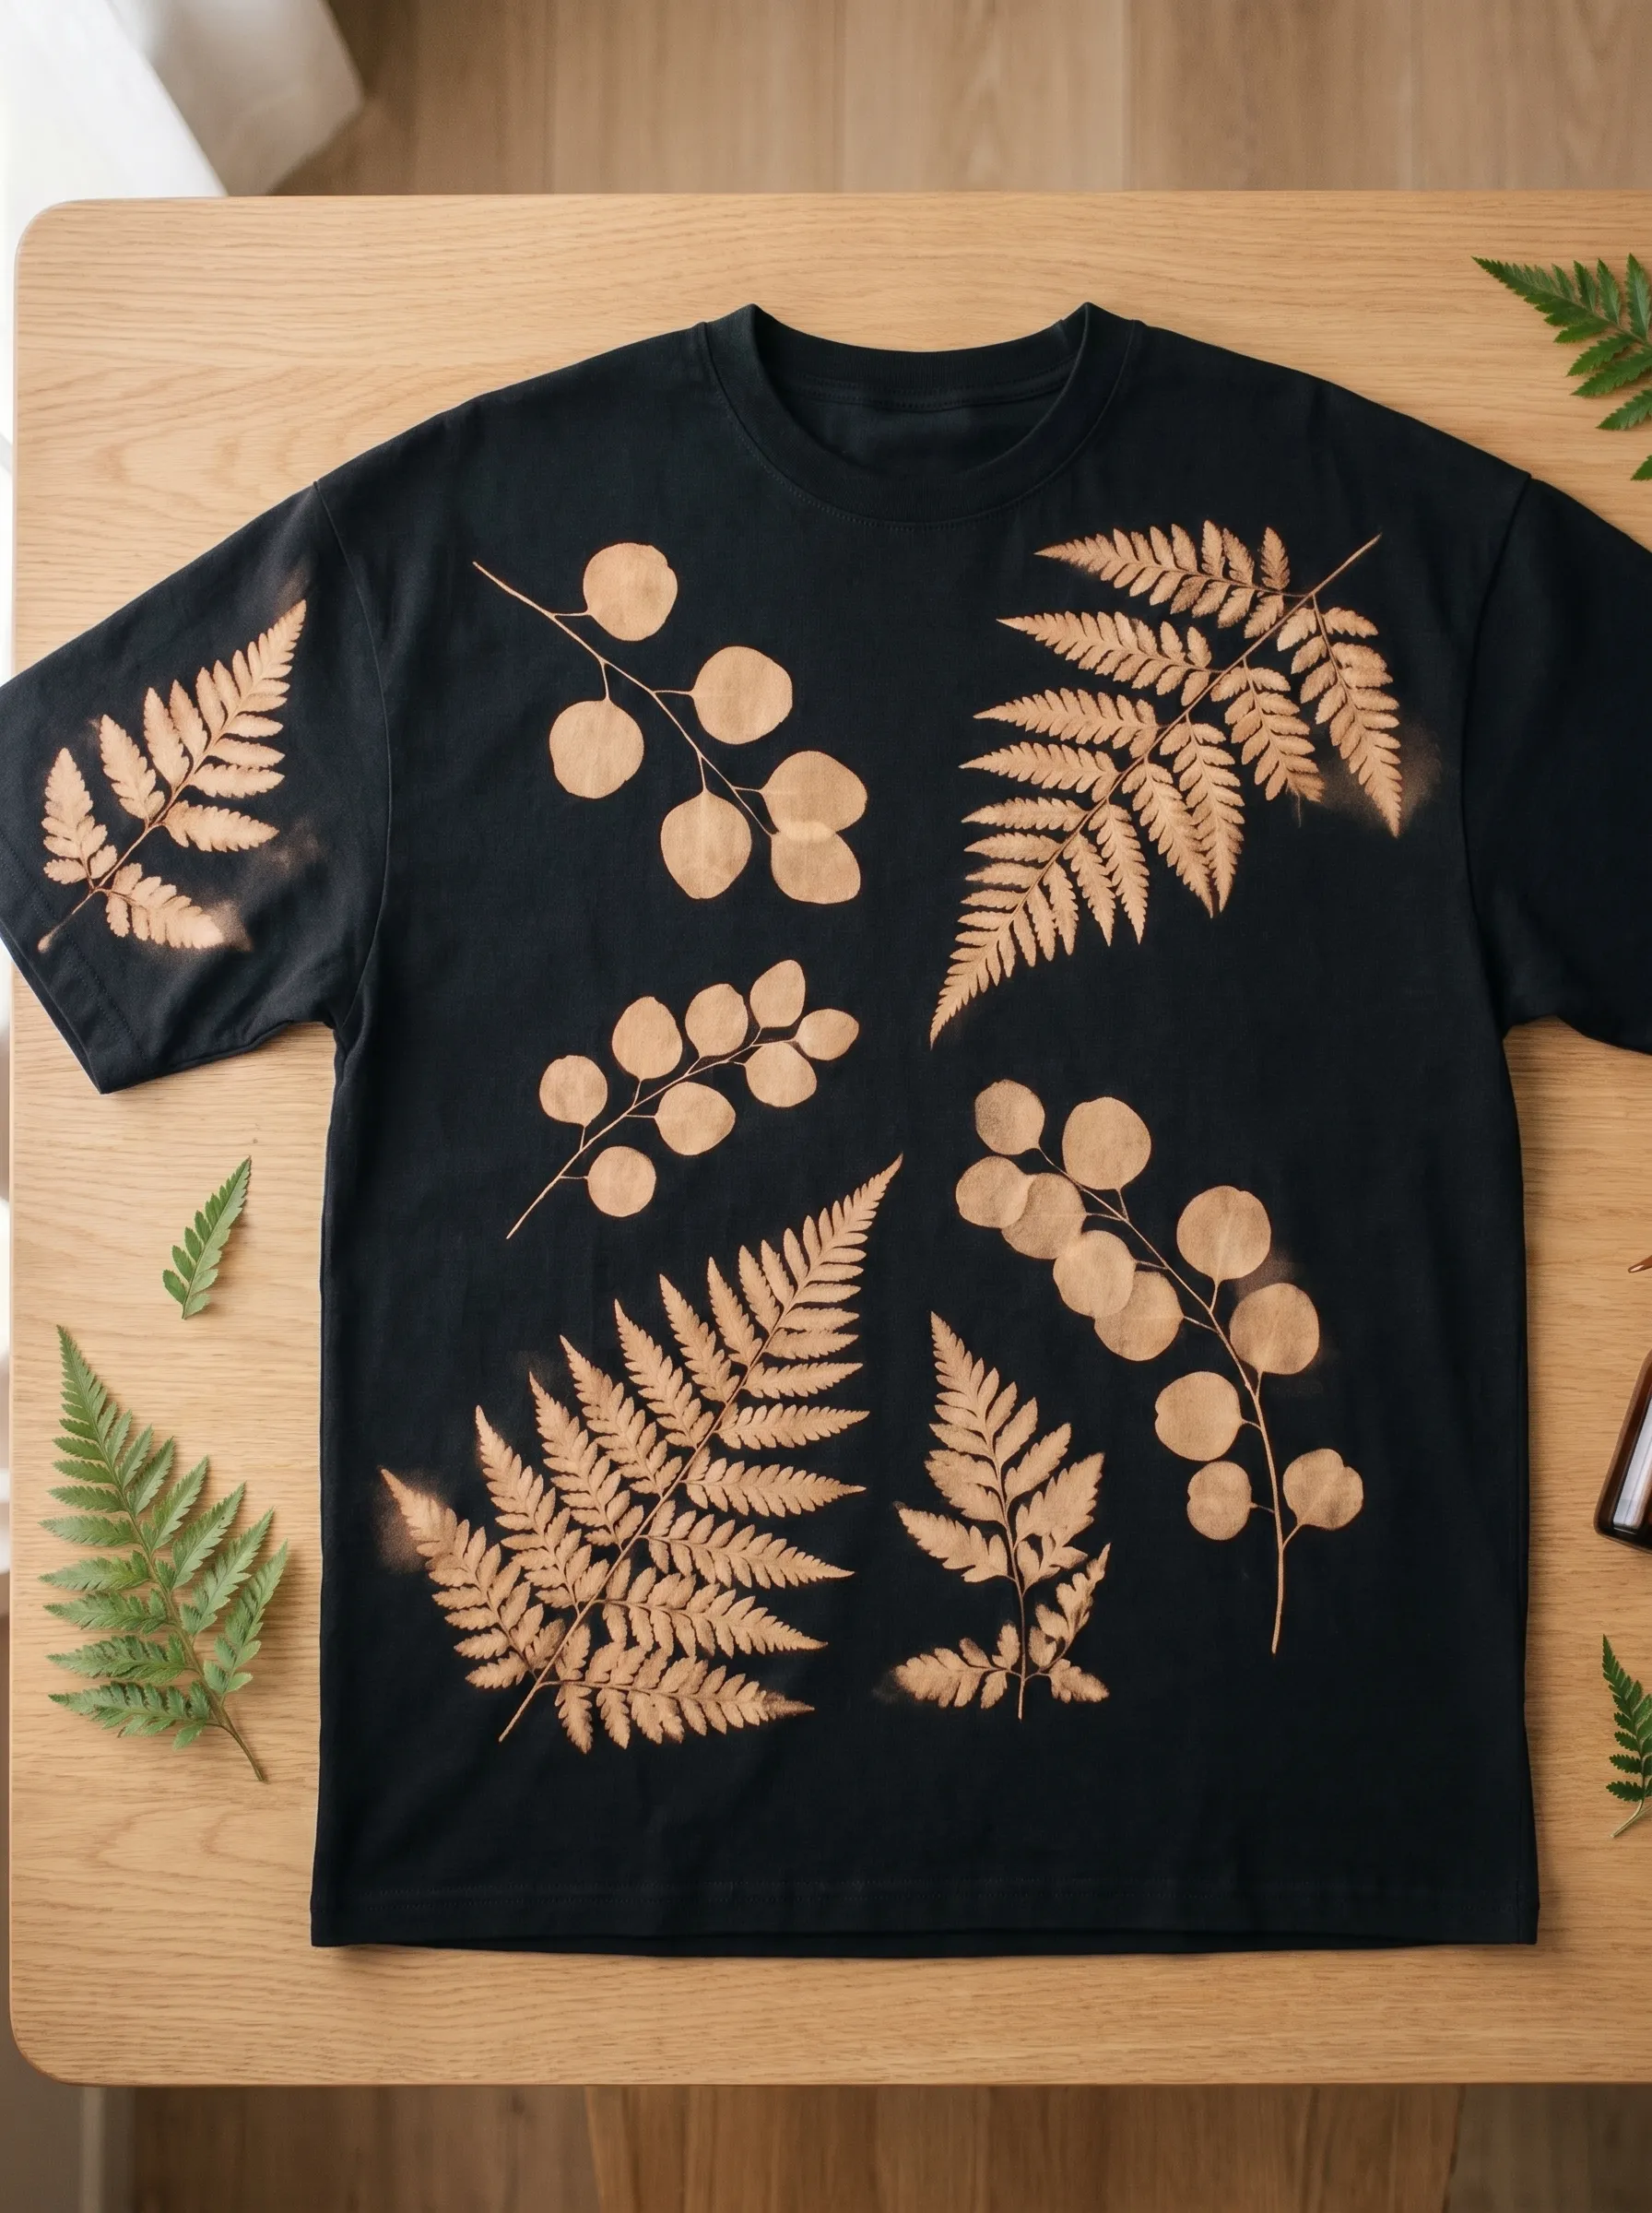
Pressed leaves and fern fronds create golden brown silhouettes across this black shirt, laid out in a scattered, natural arrangement. Real ferns and eucalyptus leaves sit beside the shirt in the photo, revealing the exact plants used to create each botanical print. Sun printing techniques often produce results like this, where leaves get placed directly onto bleach-soaked fabric and left to react with the fibres underneath. Organic, earthy designs like this one work well for anyone who wants a nature theme without looking too literal or cartoonish. Foraging for interesting leaf shapes becomes part of the creative process here, since varied fern and eucalyptus shapes add visual variety across the shirt. Botanical bleach prints suit casual, outdoorsy wardrobes especially well, since the muted gold tones read as effortless rather than crafted.
Bleach Shirt Design FAQs: Your Questions Answered
Q1: What kind of bleach works best for shirt designs?
A1: Gel bleach offers the most control for stencils and fine lines, since it stays put instead of spreading. Liquid bleach mixed with water suits broader effects like ombre fades or scrunch dyeing. Spray bottles work well for misting large areas evenly without soaking the fabric completely.
Q2: Can you bleach a shirt that already has a print on it?
A2: Yes, but results depend on the ink type. Plastisol prints often resist bleach and stay intact, creating a fun contrast against a lightened background. Water-based inks tend to fade or distort unevenly, so testing a small hidden spot first saves a shirt from disappointing results.
Q3: How long should bleach sit on fabric before rinsing?
A3: Most designs need five to fifteen minutes, depending on how dramatic the fade should look. Darker shirts often require longer exposure to reach a visible contrast. Checking colour progress every few minutes prevents overbleaching, since fabric can weaken or develop holes if left too long.
Q4: Does bleaching damage the fabric over time?
A4: Repeated bleach exposure does weaken cotton fibres gradually, making shirts feel thinner after several washes. Rinsing thoroughly and neutralizing with a mixture of water and baking soda right after bleaching helps slow that breakdown. Air drying instead of machine drying also extends a bleached shirt's lifespan.
Q5: What is the easiest bleach shirt design for a beginner?
A5: Scrunch and spray techniques, like the cloud wash effect, forgive mistakes better than stencils or freehand painting. Bunching fabric loosely and misting bleach across the surface creates soft, random patterns without needing precise lines. Folding a shirt in half for symmetrical shapes also works well for first attempts.
Q6: Can bleached shirts be worn in any season?
A6: Absolutely, since colour choice and pattern determine the seasonal feel more than the technique itself. Deep navy or black bases with subtle fading suit fall and winter wardrobes. Lighter pastel fades or bright ombre effects lean toward spring and summer, especially in cotton blends that breathe well.
Your Next Bleach Shirt Design Starts with One Blank Tee
A bleached shirt says something a printed one rarely does. It shows effort, patience, and a willingness to make something nobody else owns. Every fade, swirl, and stencil carries a little bit of personal taste, whether that means moody greys or a bright summer gingham fade.
Grab a friend who loves DIY projects and send this their way. Save it too, since a rainy afternoon or an old shirt begging for a second life will come around sooner than expected.