12 Easy Bleach Painted Shirt Ideas to Try at Home
How to use this guide
Choose ideas based on the materials, time, skill level, and finish you can realistically manage. For any dye, bleach, paint, or alteration project, test on a spare piece first and follow the product safety instructions.
A plain t-shirt sitting in your dresser costs almost nothing, yet a bottle of bleach can turn it into something you'd pay sixty dollars for at a boutique. Bleach painting works differently from dye. Instead of adding colour, you strip it away, and the fabric reveals patterns that no printer or screen press could replicate exactly. Every twist, dip, or brushstroke reacts with the dye in the shirt, so each project produces a design that stays unrepeatable even if you try to copy it twice.
This article walks through twelve bleach painting techniques suited for someone who has never touched a bleach pen or spray bottle before. You'll find dip methods, stencil work, freehand painting, and folding techniques, each explained with the tools and steps needed to recreate them. Some projects take twenty minutes; others ask for more patience and a steady hand. Whether you're prepping for a DIY gift, a band shirt redesign, or a weekend project with leftover cotton tees, these ideas cover a wide range of skill levels and finished looks.
Bleach Dipped Sleeve Accent
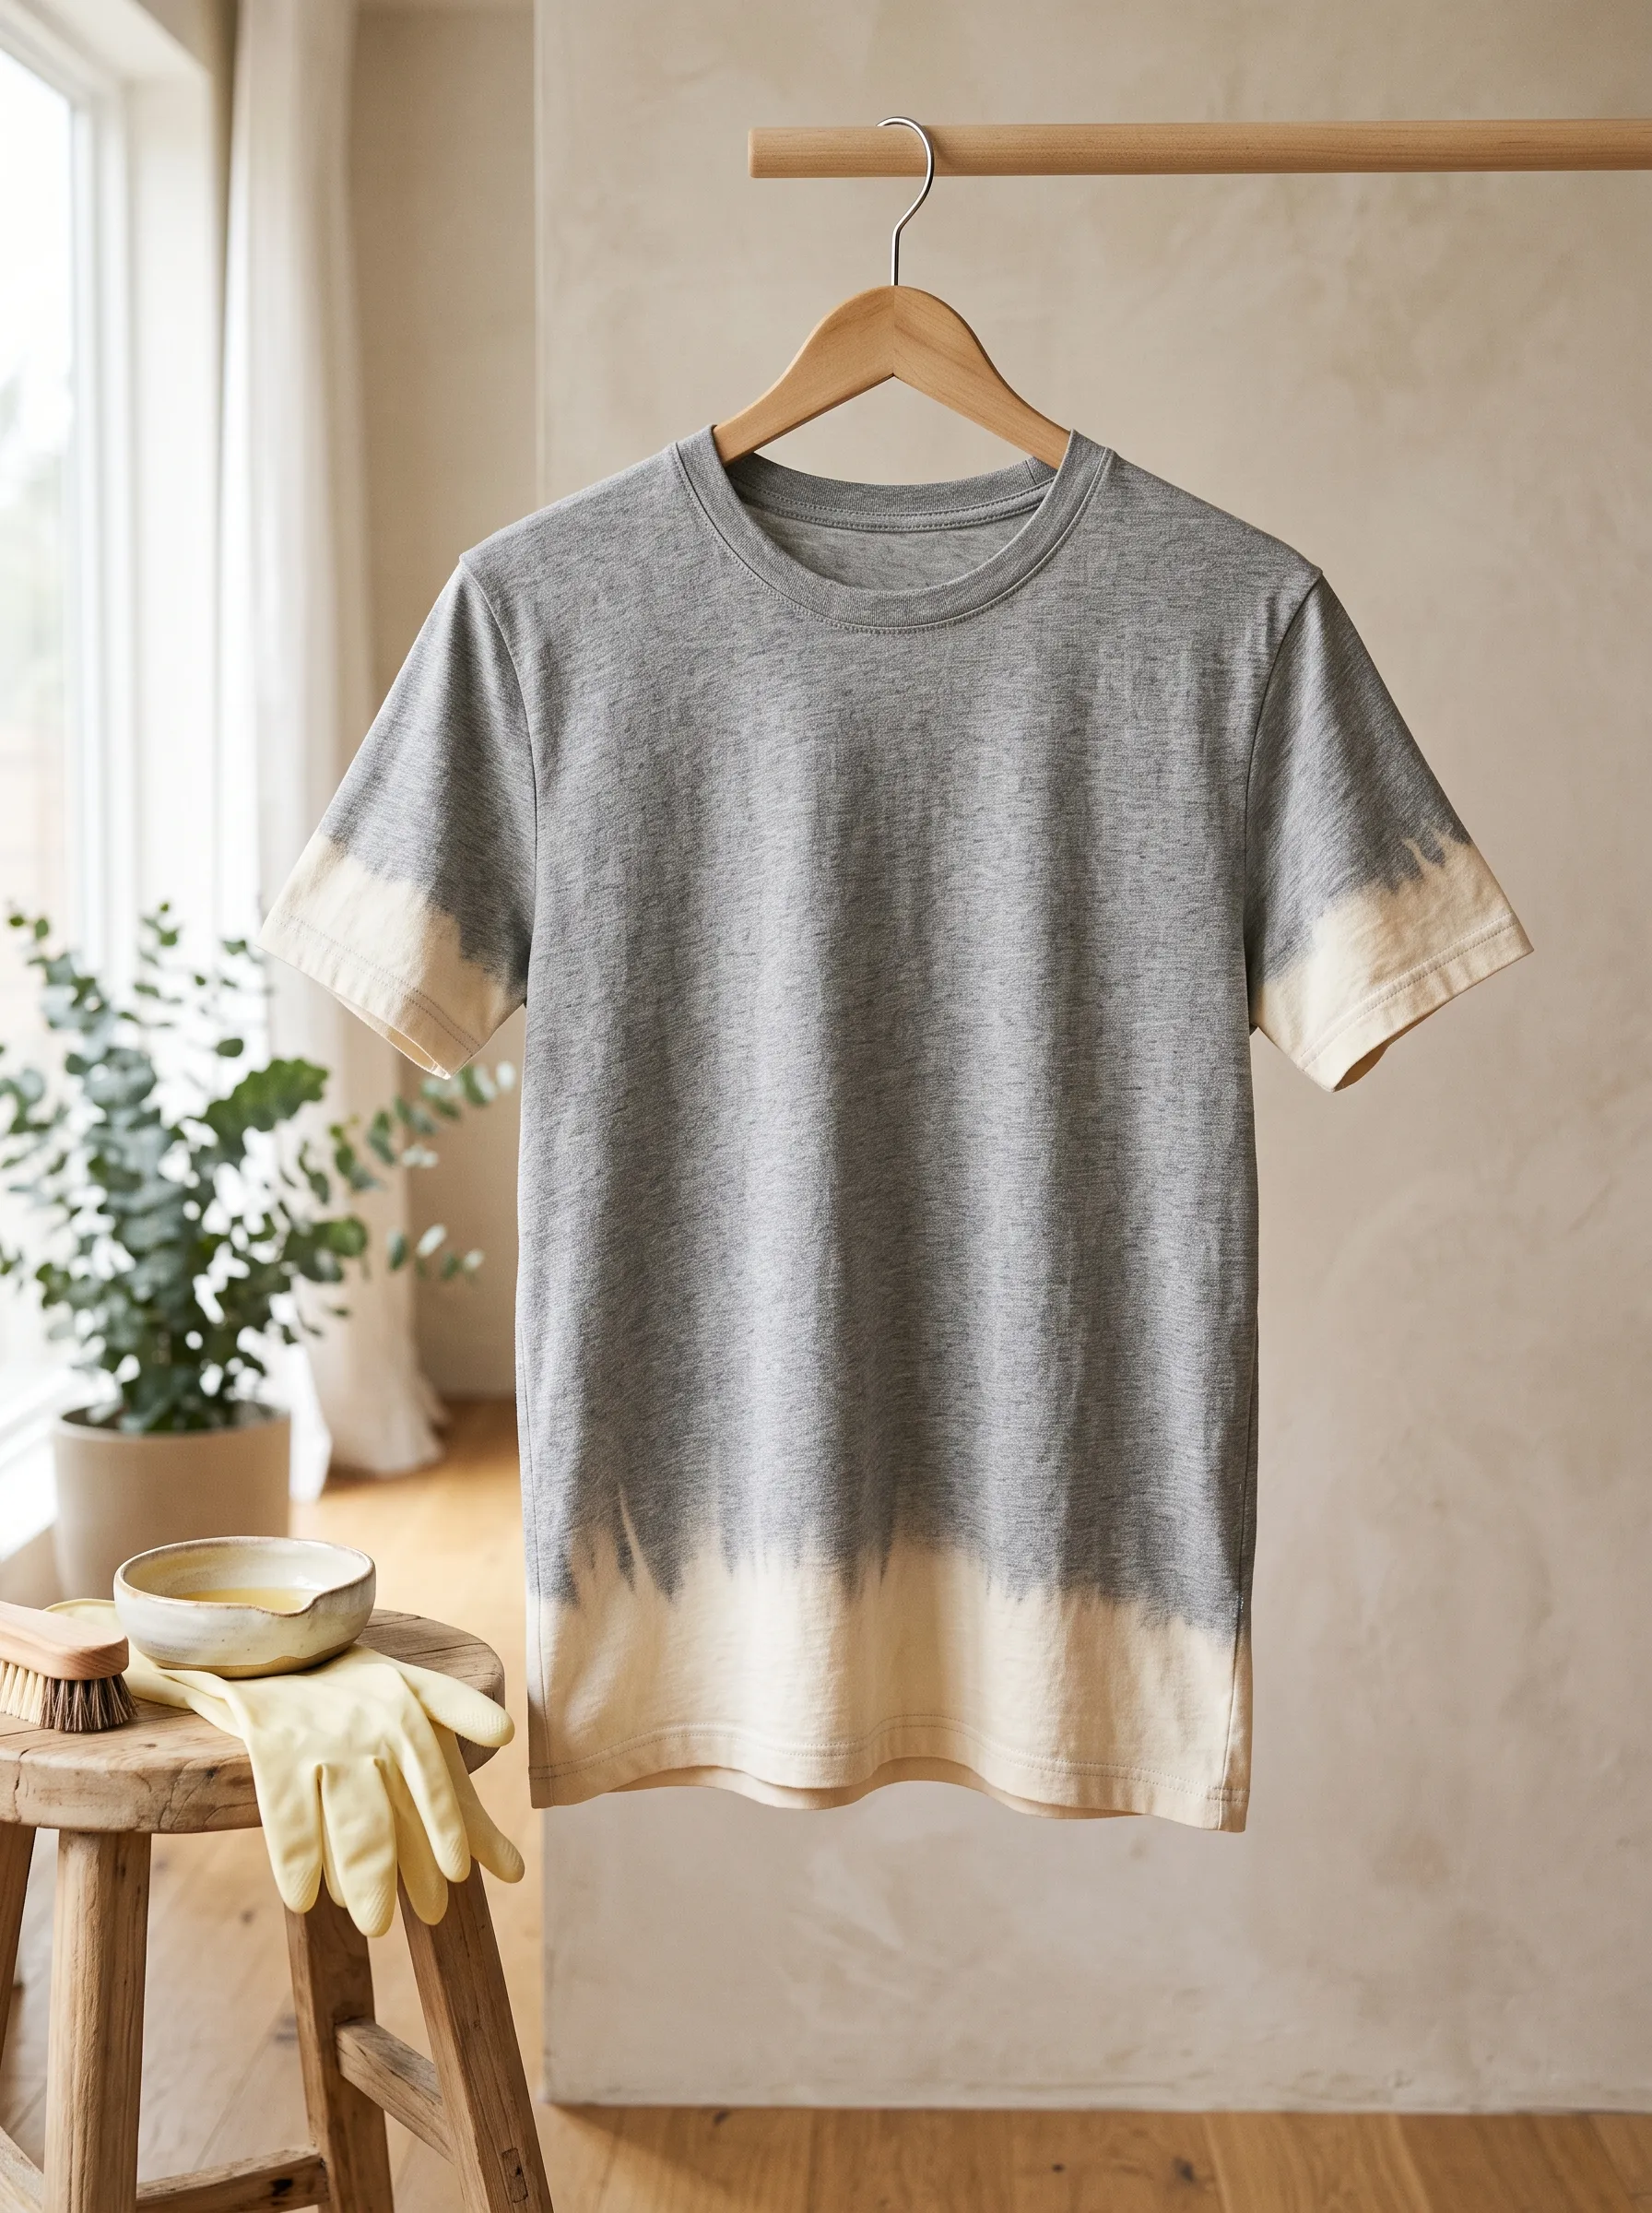
This heather grey tee shows what happens when you dip only the sleeve hems and bottom edge into a bleach solution. The cuffs fade into a soft cream while the rest of the shirt keeps its original grey tone. A clean gradient line forms where the fabric met the bleach bath. Beginners like this technique because it needs no stencils or freehand skill. You simply fold the shirt, dip the edges, and wait. Rubber gloves and a small bowl are all the supplies required. The result looks intentional and modern, working well for casual wear or layering. This project takes under thirty minutes and teaches you how bleach interacts with dyed cotton before you try anything more advanced.
Marble Effect Bleach Pour
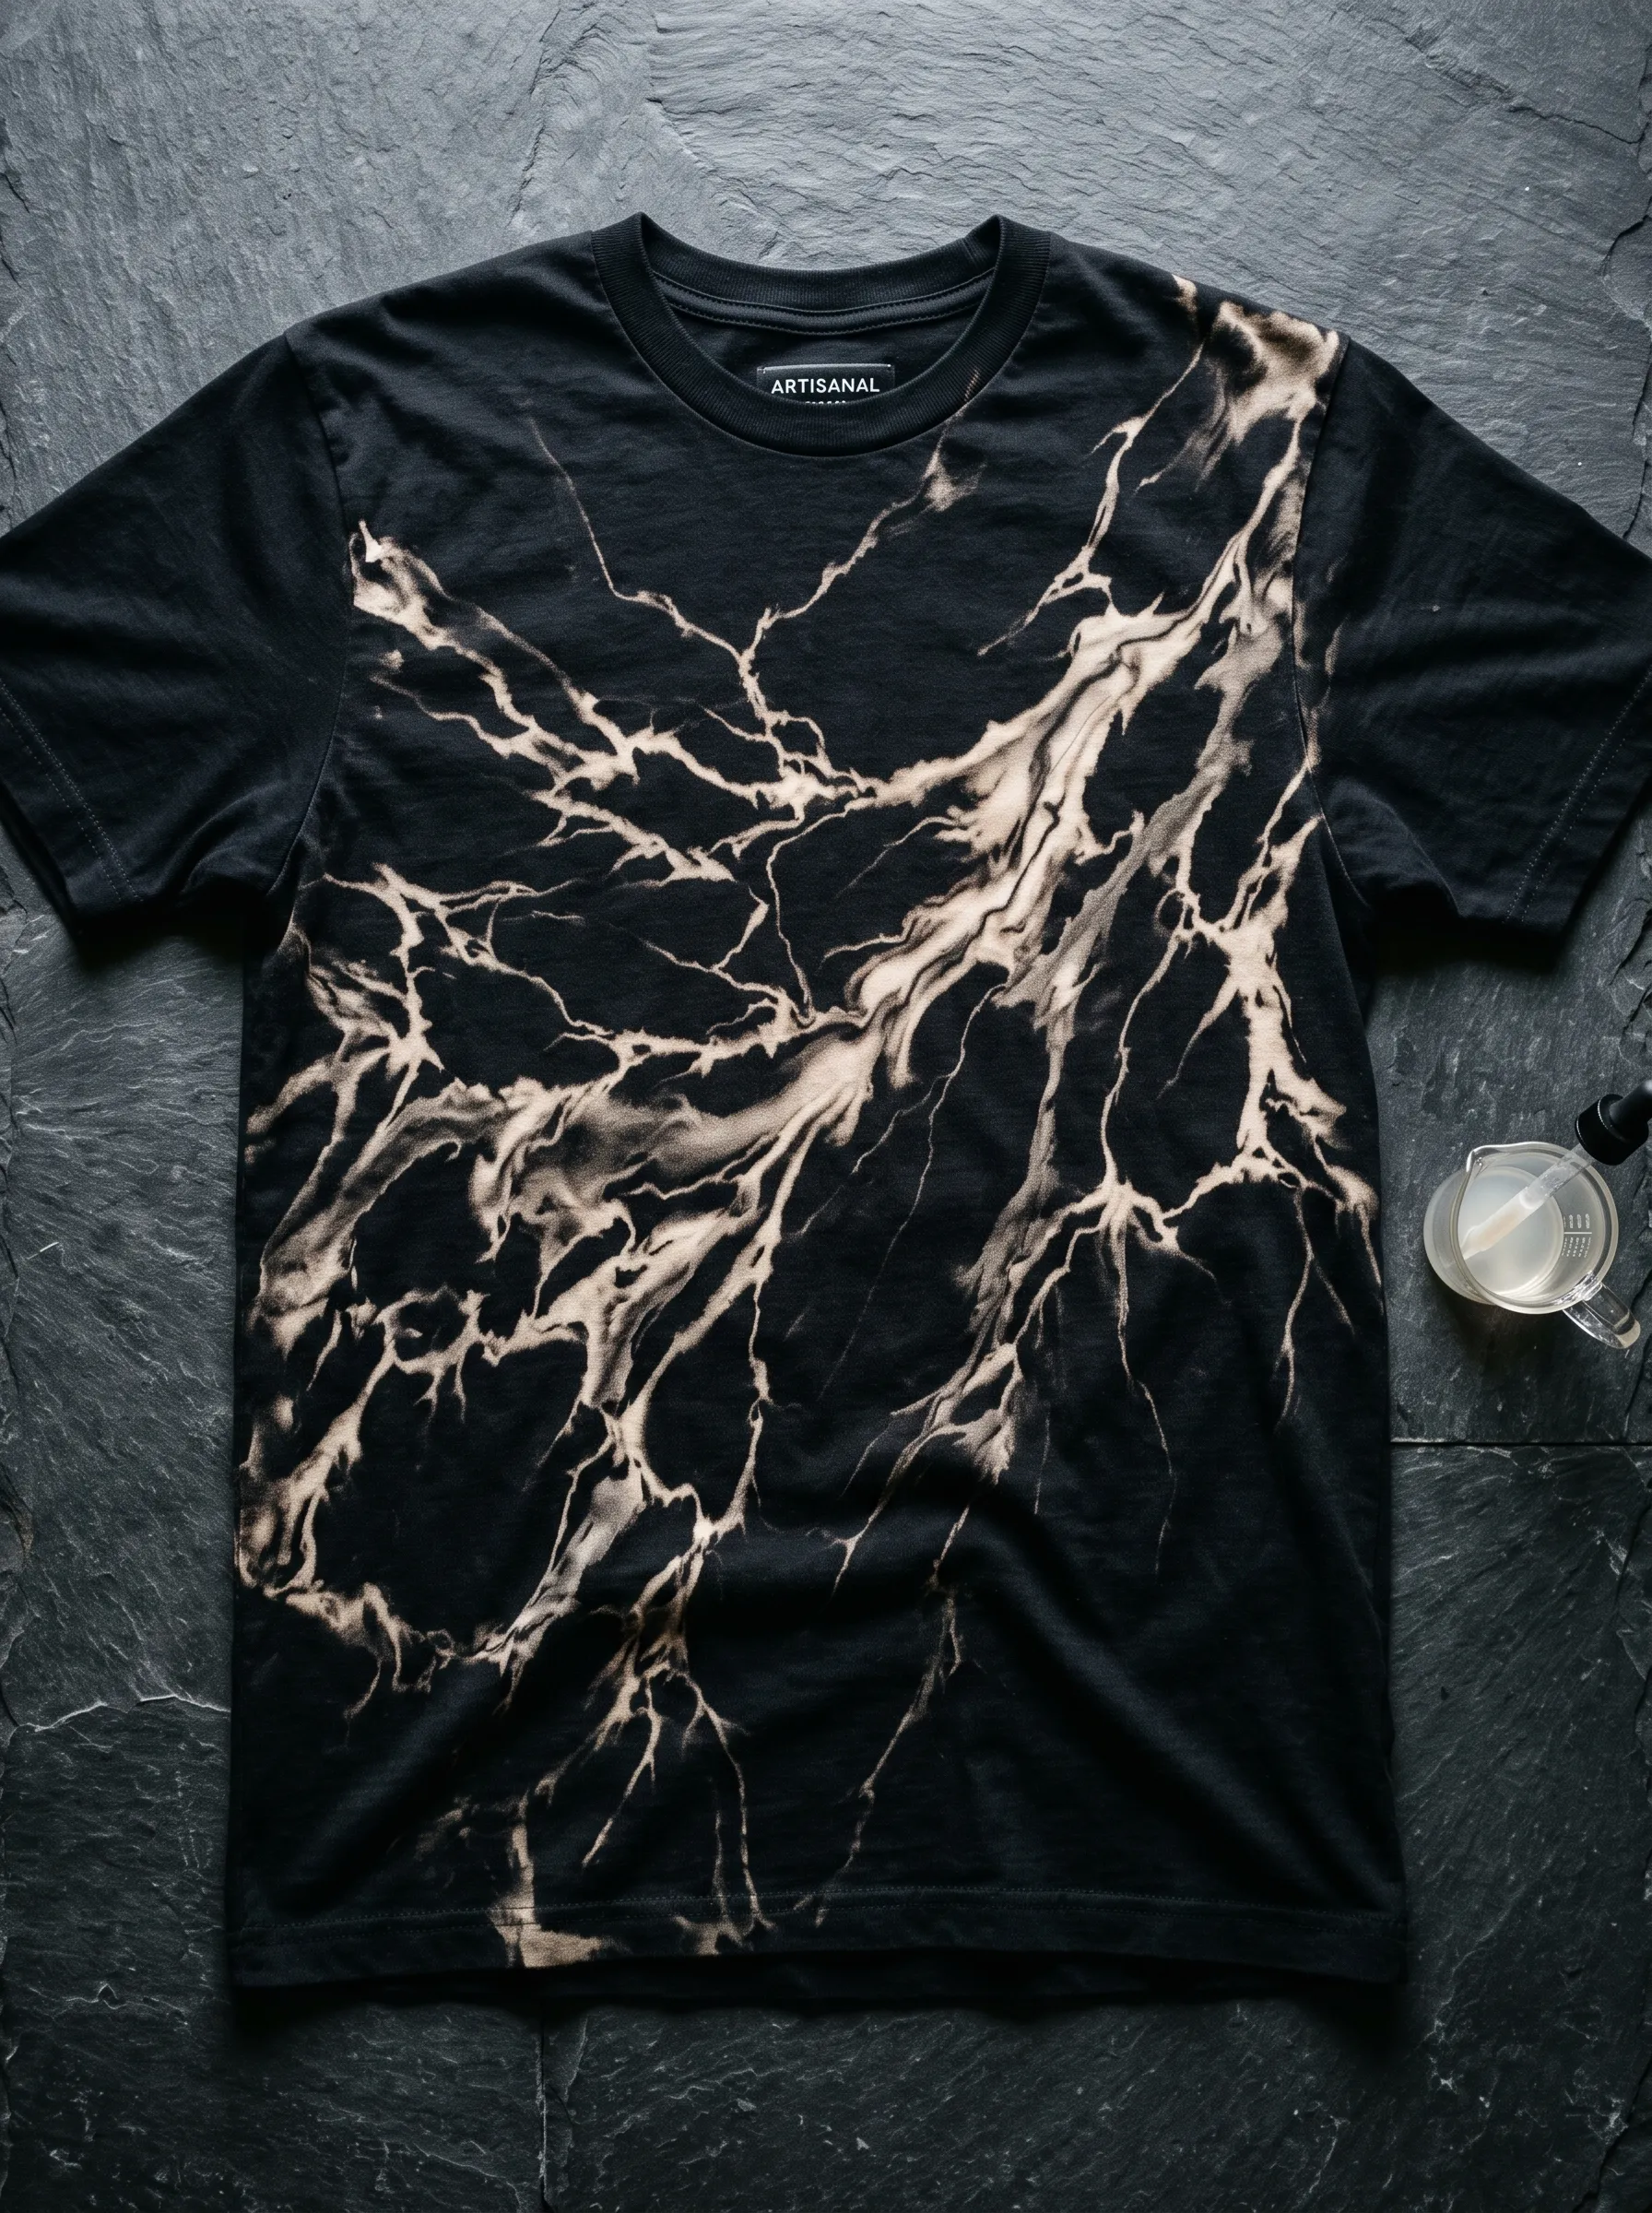
Black cotton turns into a dramatic marbled canvas once bleach gets poured and scrunched across the fabric. Veins of tan and cream spread outward like cracked stone. Achieving this pattern involves twisting the shirt into a loose ball, then applying diluted bleach with a dropper or spray bottle. The crumpled folds create natural pathways for the bleach to travel, mimicking the veining found in real marble. No two shirts turn out the same, which makes this a favourite among crafters who want one-of-a-kind pieces. Letting the fabric sit bunched up for several minutes before rinsing helps the pattern develop fully. This method suits anyone who enjoys unpredictable, organic results over precise designs.
Monogram Bleach Stencil
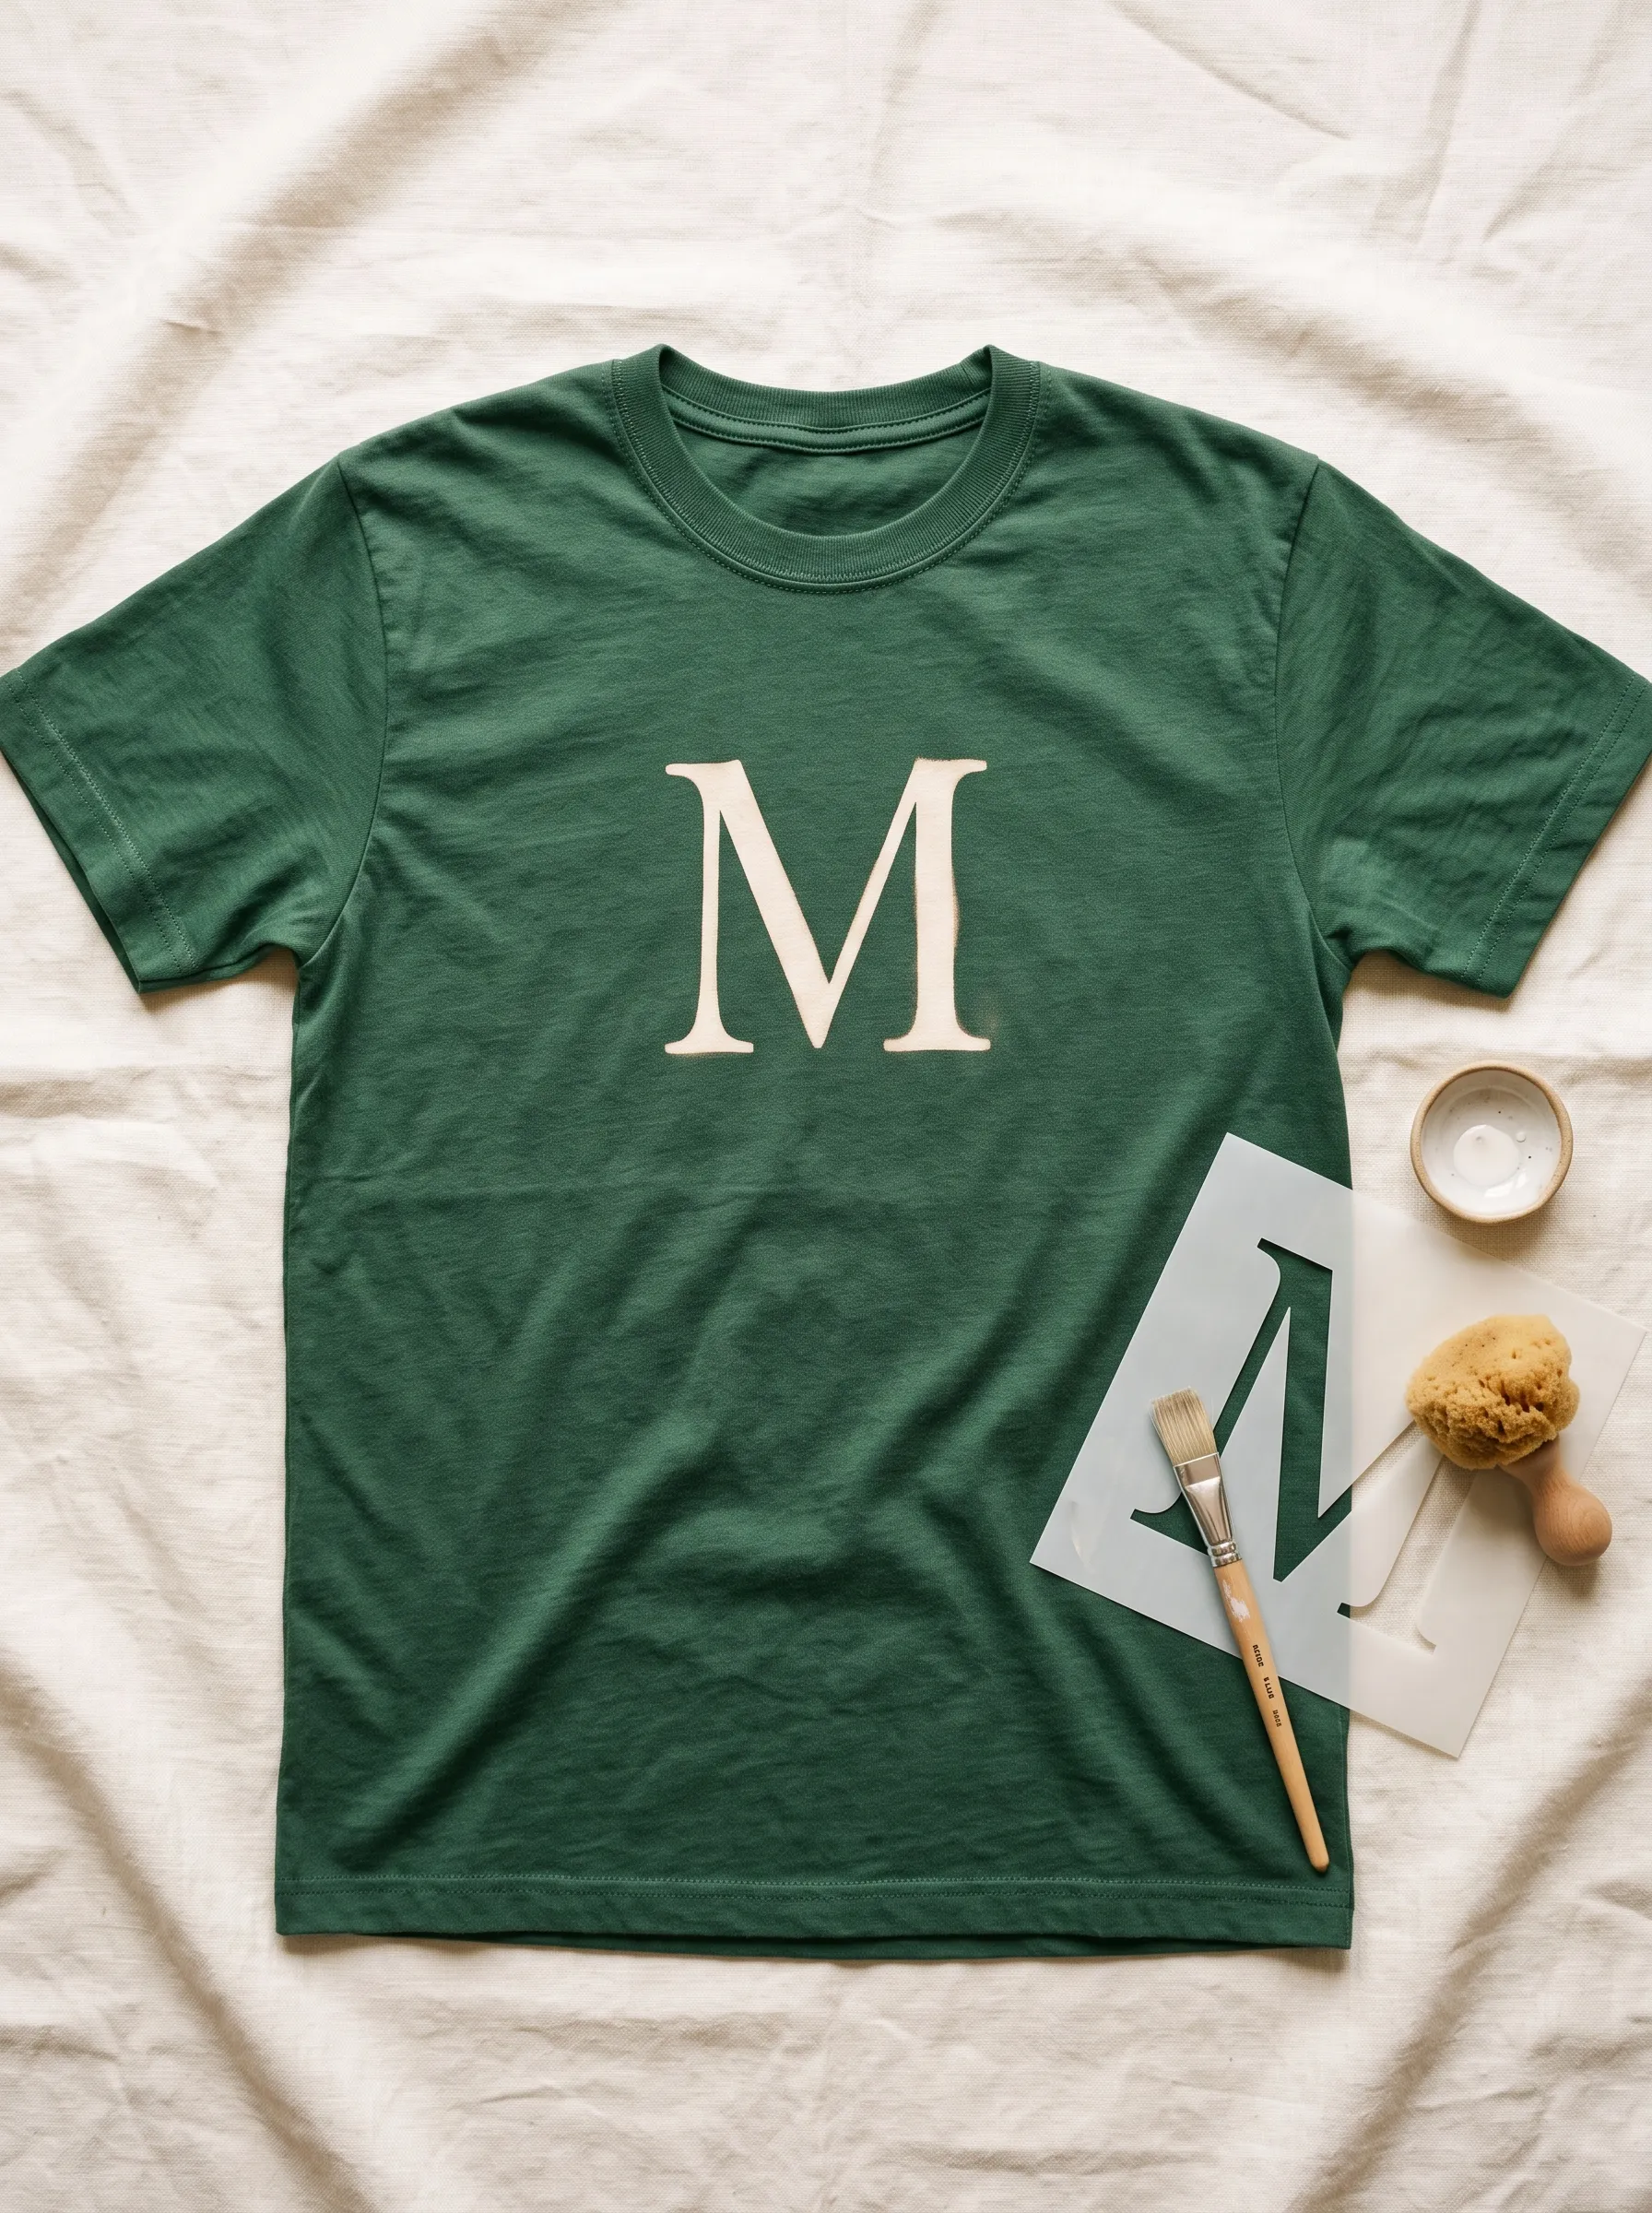
A single bold letter M sits at the chest of this forest green shirt, created using a plastic stencil and a sponge dauber. Stencil work gives beginners a reliable way to add personalized designs without freehand painting skills. The letter appears in a warm cream shade against the deep green base, giving the shirt a preppy, custom feel. Sponges dab bleach gel through the stencil opening, keeping edges crisp and preventing bleed. This project works great for gifts, team shirts, or family initials. Letting the bleach sit for the recommended time before rinsing keeps the letter sharp. Stencils can be reused for matching sets, making this technique both practical and repeatable.
Constellation Line Art
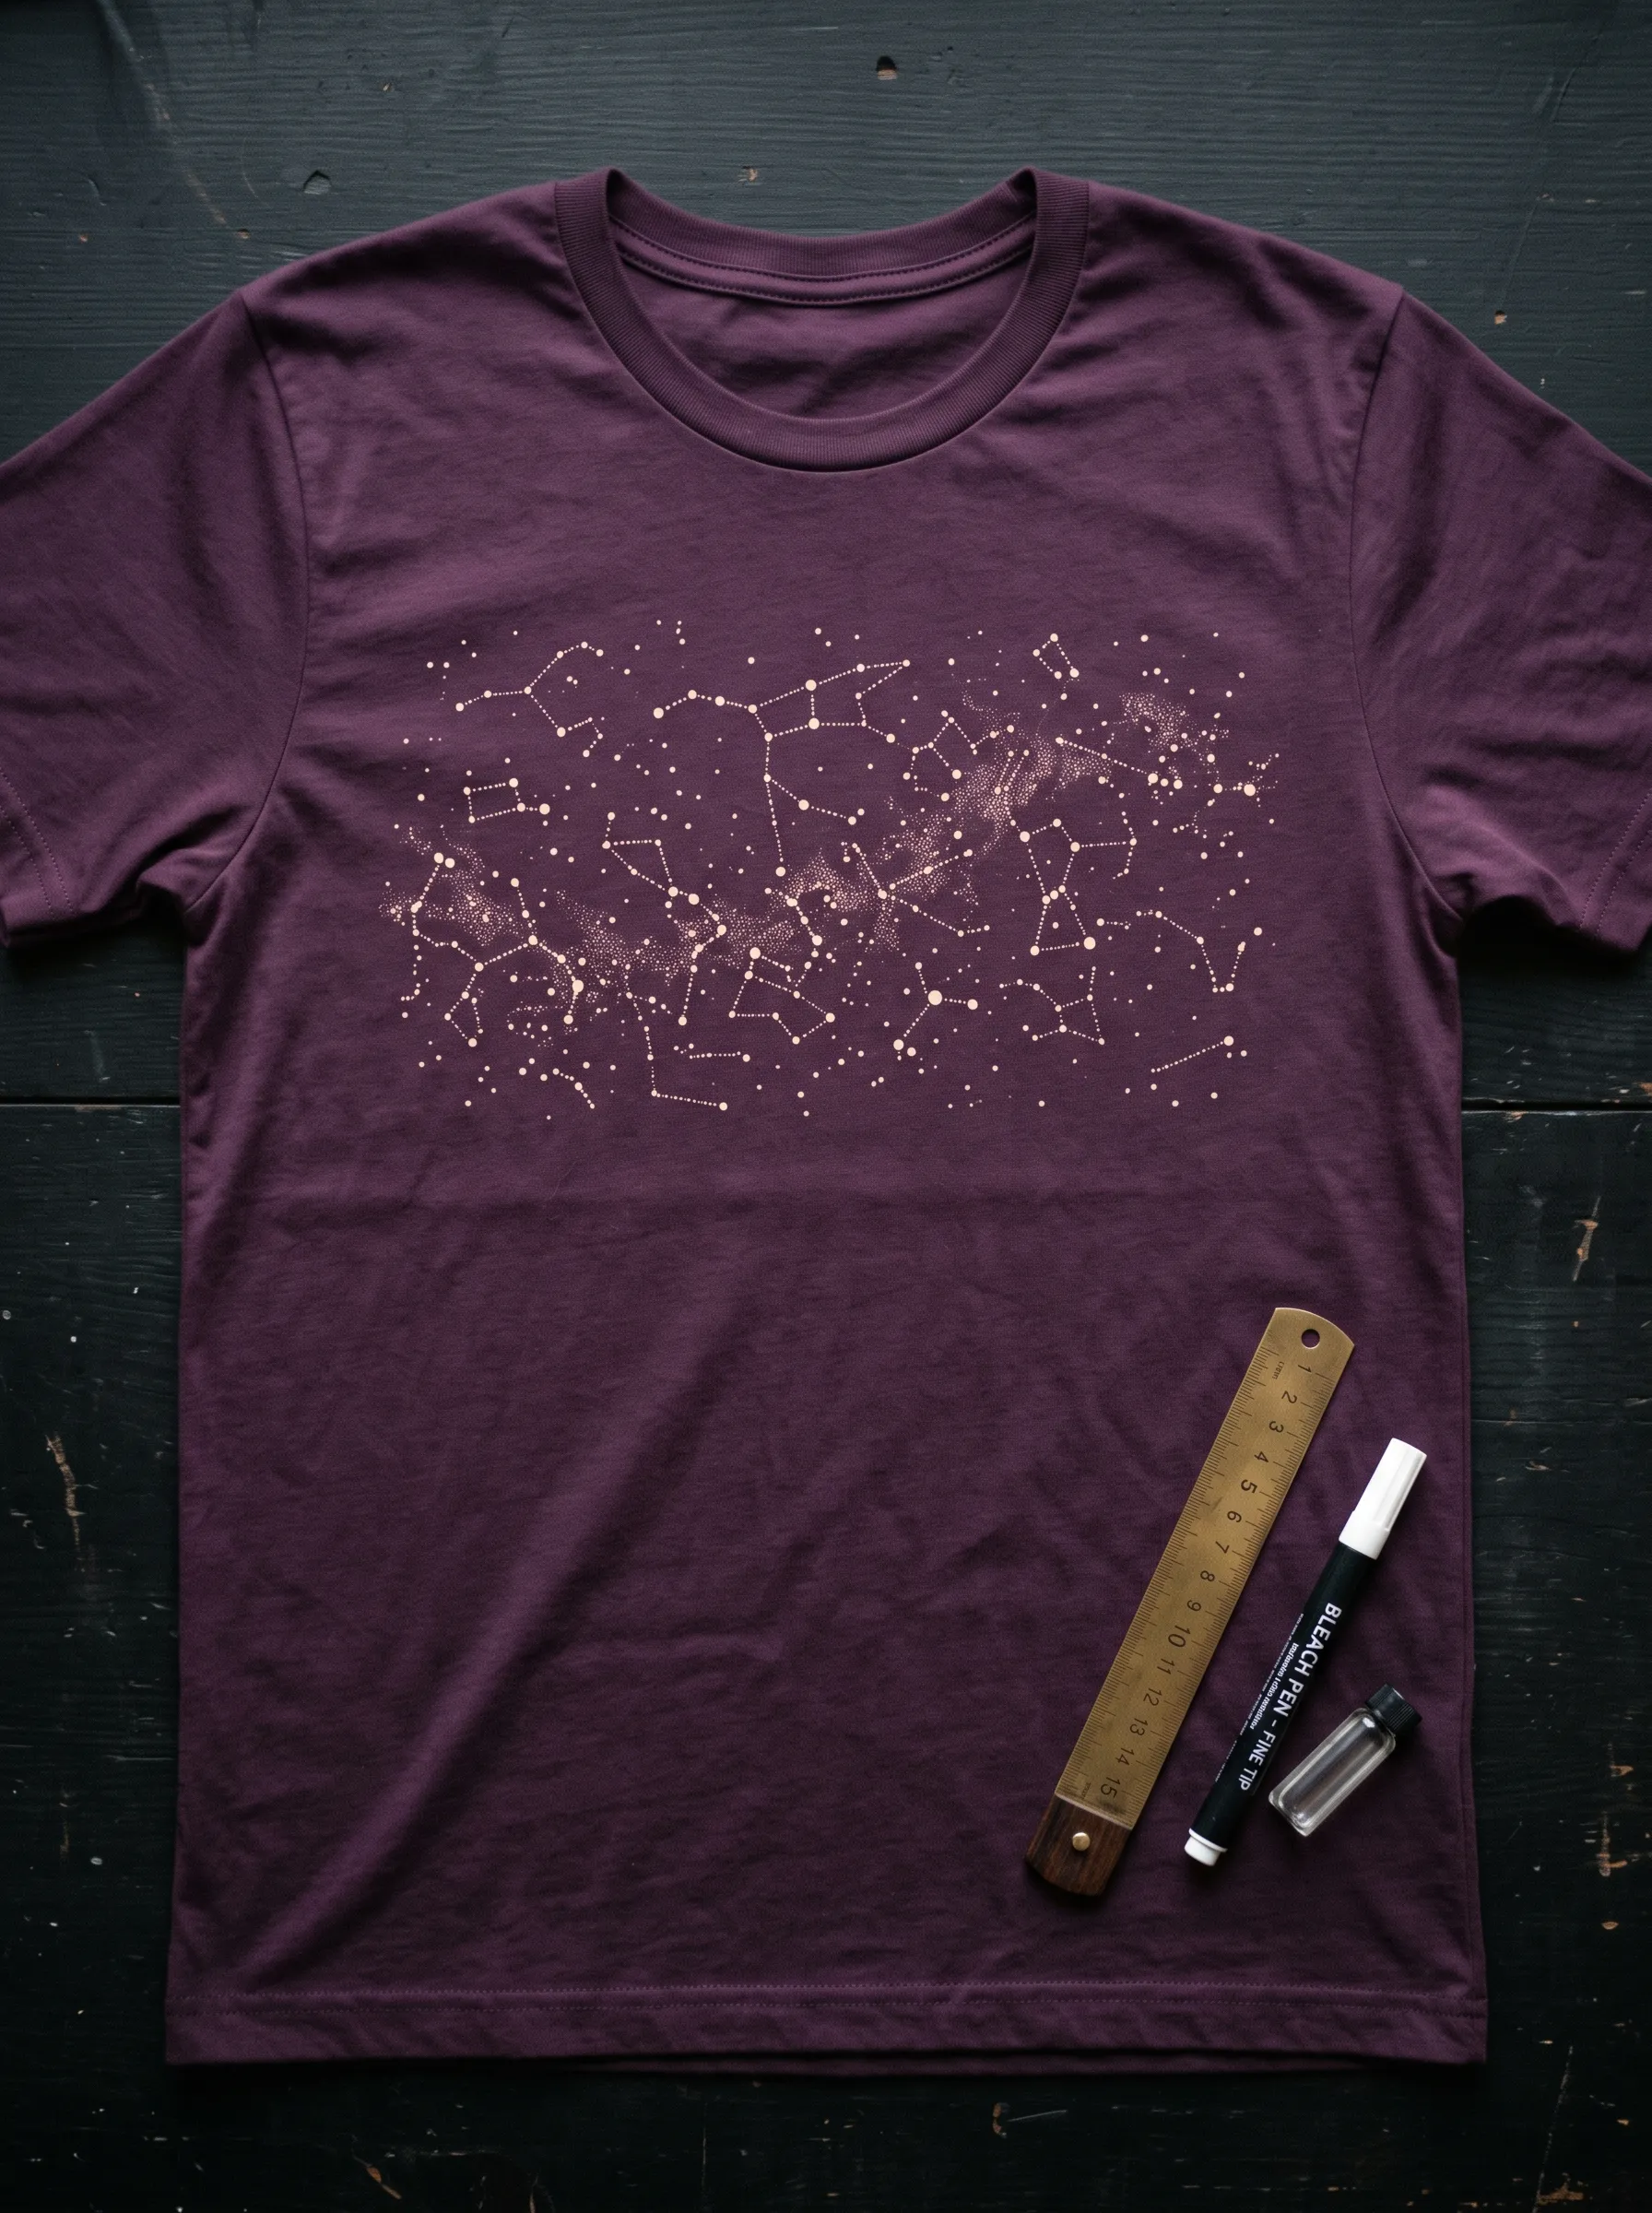
Deep plum fabric becomes a night sky map with this delicate design, featuring dotted stars connected by thin bleach lines. A fine tip bleach pen allows for precise control, letting you sketch constellations freehand or trace a printed reference. Small dots scattered around the connected lines mimic scattered stars, adding depth to the composition. This project requires patience since the pen moves slowly across fabric, but the payoff is a wearable piece of night sky art. Rulers help keep proportions even if you want symmetry. Anyone interested in astronomy or minimalist line work will enjoy how this design turns a plain shirt into something personal and thoughtful.
Freehand Floral Bleach Painting
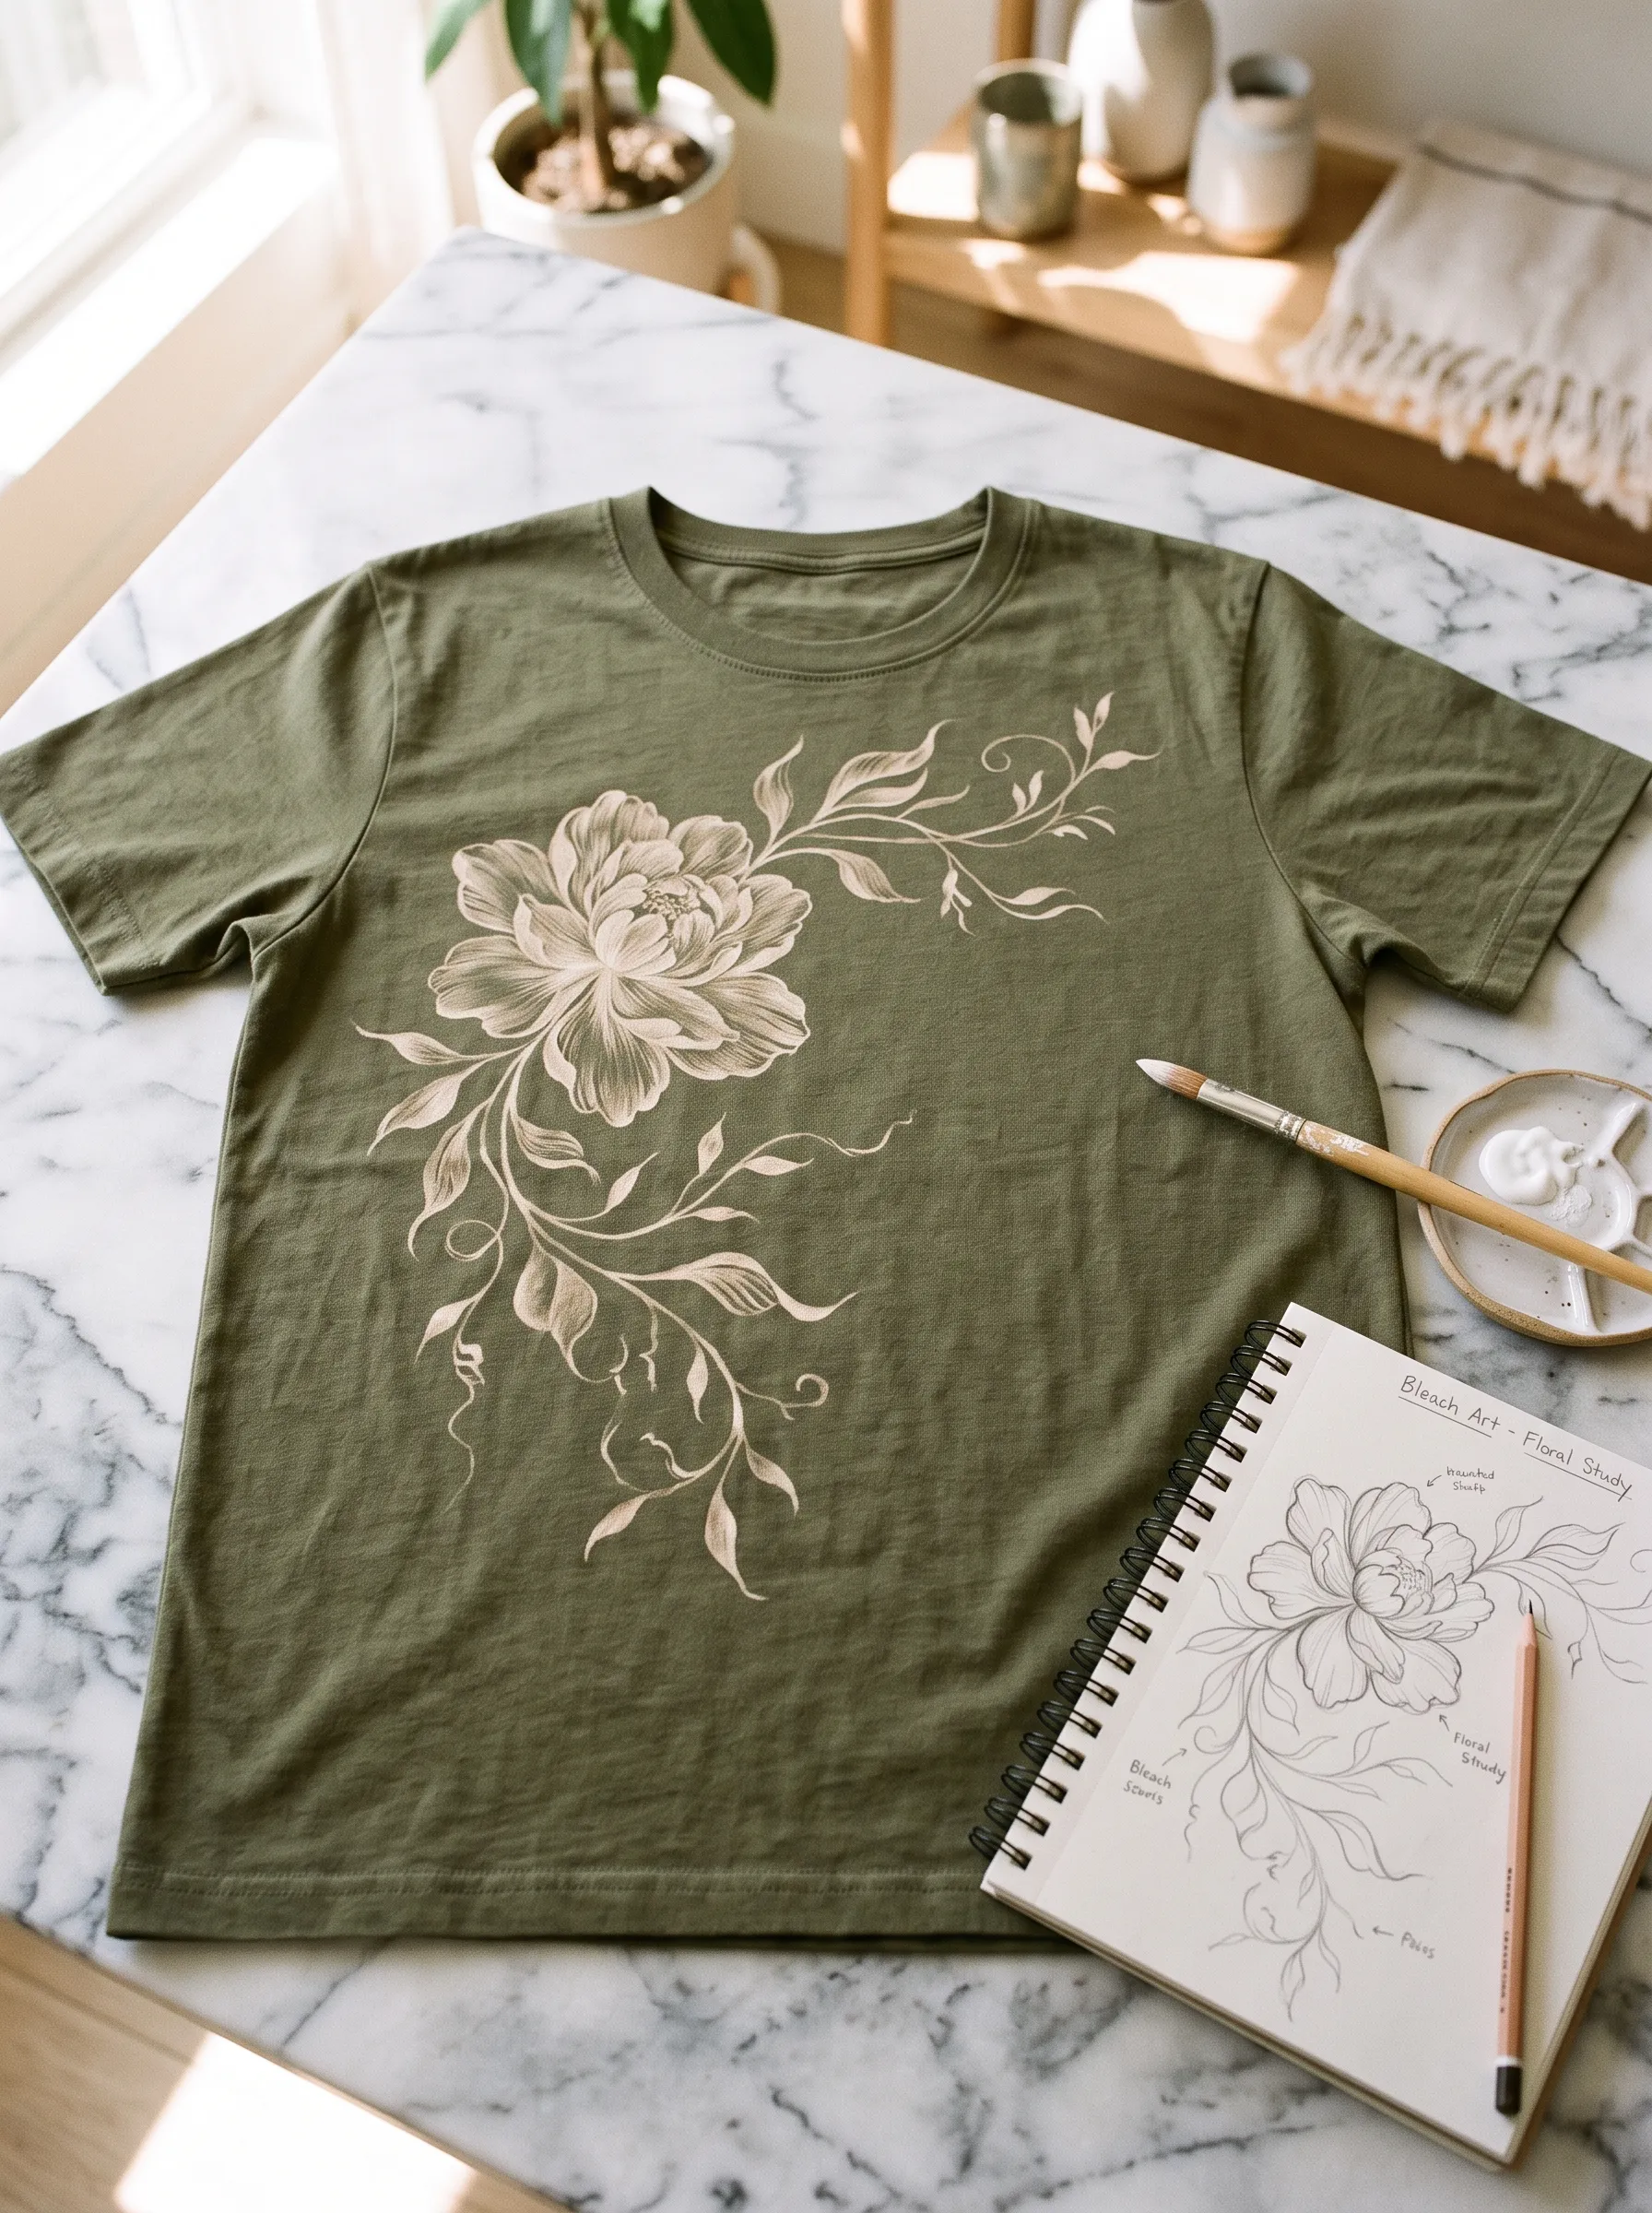
Olive green cotton hosts a flowing peony design, painted freehand with a fine brush dipped in bleach solution. Petals curl outward from a full bloom at the shoulder, trailing into slender vines and leaves down the front. This project asks for more confidence than stencil work since every line comes from a steady hand rather than a guide. Sketching the design lightly with a fabric pencil first helps beginners map out proportions before committing bleach to cloth. Layering light strokes builds up the fade gradually, giving petals a soft, illustrated look. Botanical themes like this one work well for anyone wanting a feminine, artistic shirt that feels handmade rather than mass produced.
Geometric Triangle Grid
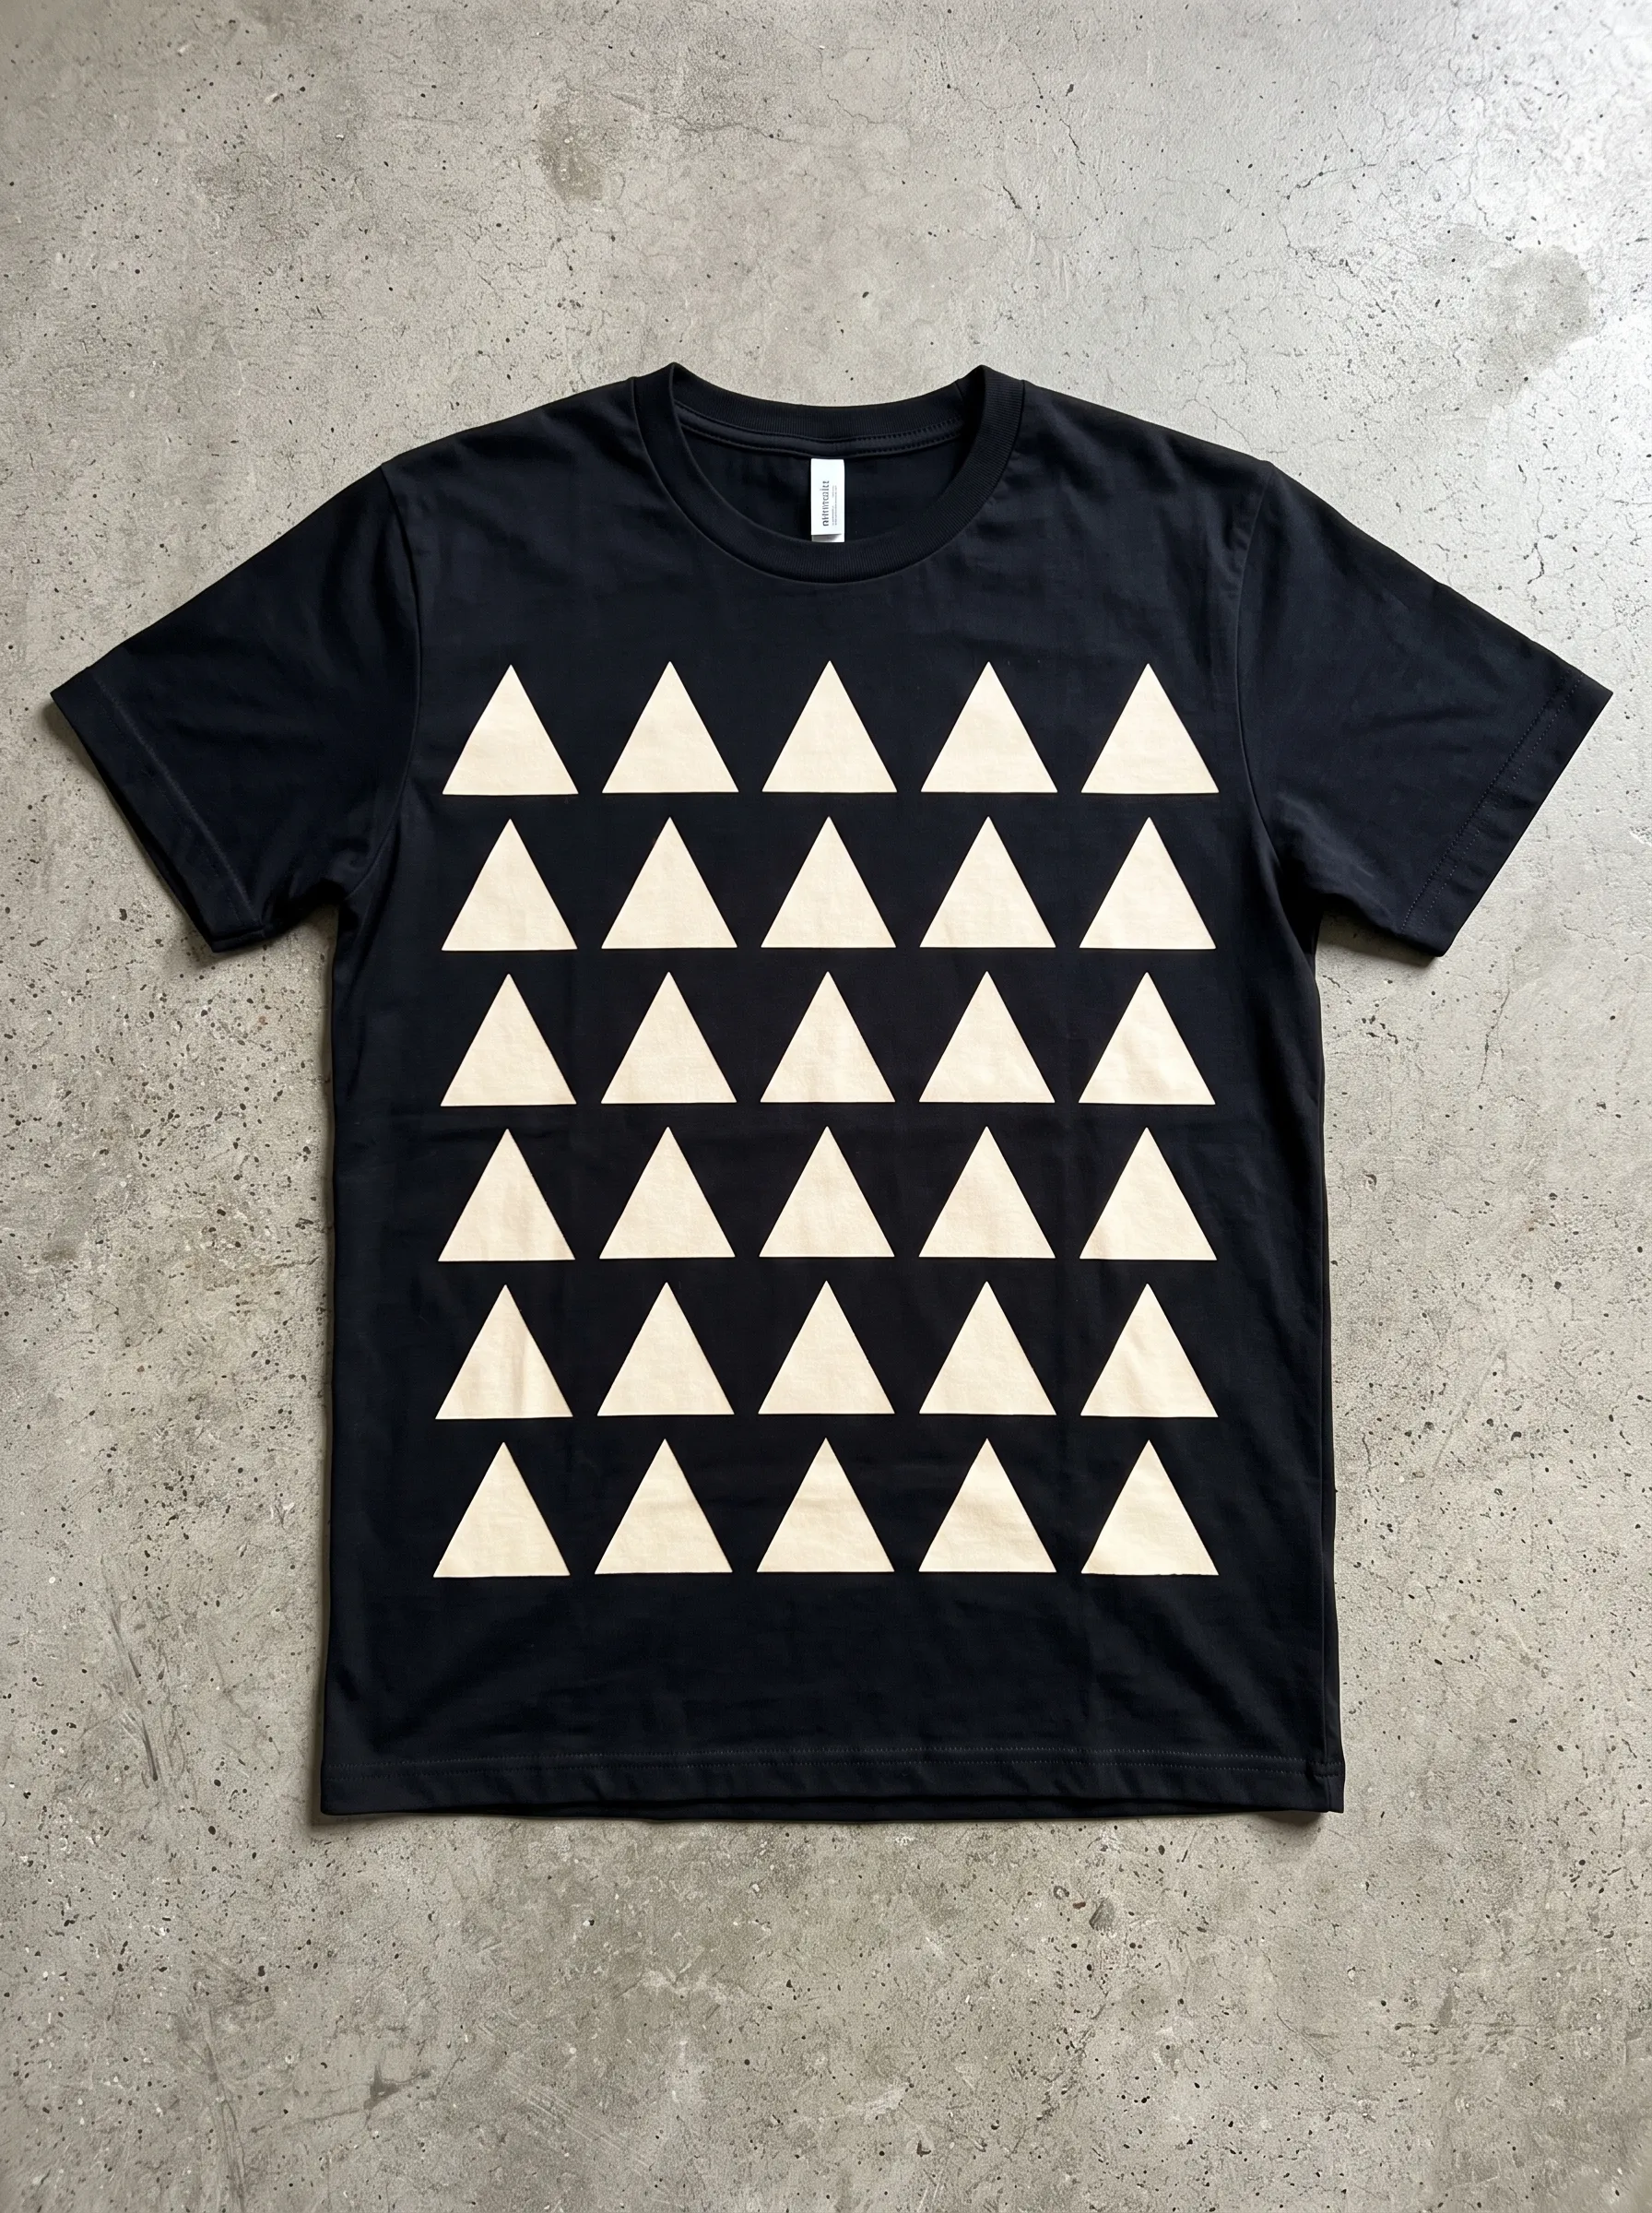
Rows of cream triangles march across this black shirt in a tidy, repeating grid. Painter's tape or a simple triangle stencil keeps each shape consistent, giving the design a graphic, almost printed quality. Spacing triangles evenly takes some planning, so measuring with a ruler before applying bleach helps avoid crooked rows. This pattern suits beginners who prefer structure over freehand painting, since taped edges naturally produce clean lines. Once bleach sets and gets rinsed, the shapes stay crisp and bold. Geometric designs like this one photograph well and appeal to anyone drawn to modern, minimalist fashion rather than florals or abstract splatters.
Polka Dot Bleach Stencil
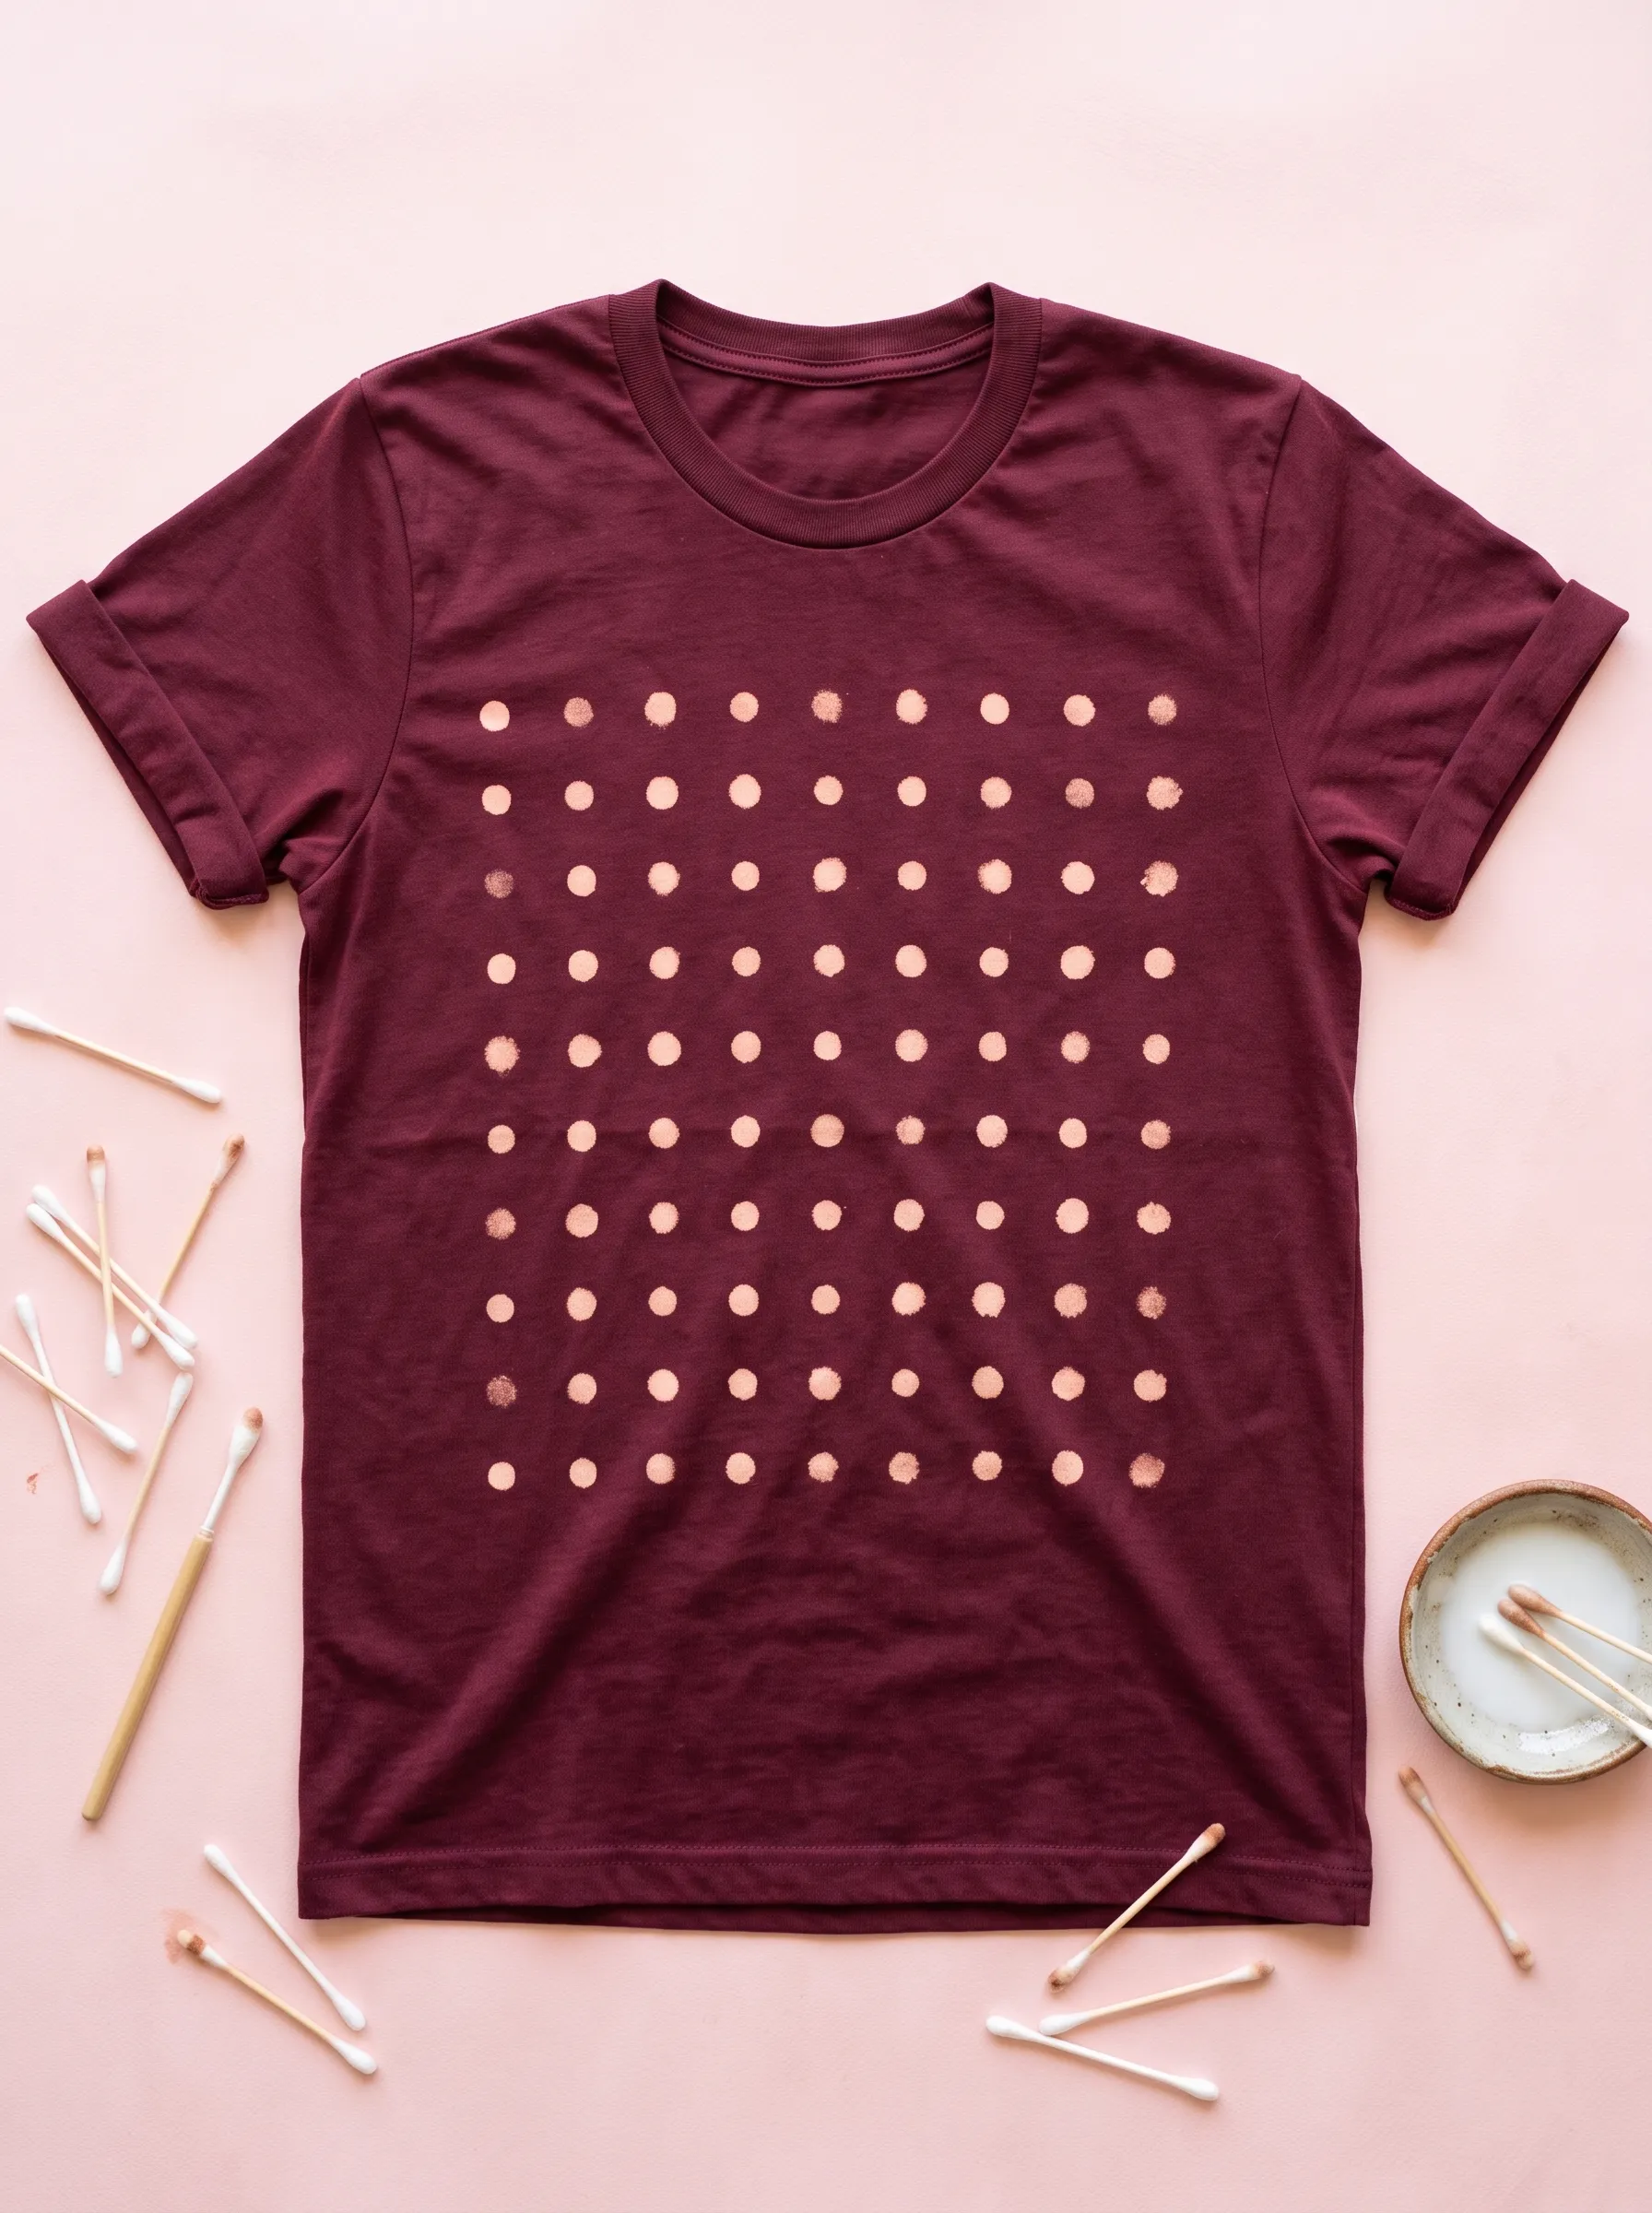
Rows of soft pink dots cover the front of this maroon shirt, applied with cotton swabs dipped in bleach. Each dot varies slightly in size and intensity, giving the pattern a handmade charm rather than a machine printed look. Swabs work well for beginners since they control the amount of bleach applied and prevent drips. Spacing dots in even rows takes a light pencil guide, though some crafters prefer a looser, scattered arrangement. This project costs very little since household swabs replace specialty tools. Polka dots suit playful, casual shirts and work equally well scattered across the whole front or grouped into a smaller block pattern.
Ombre Dip Bleach Hem
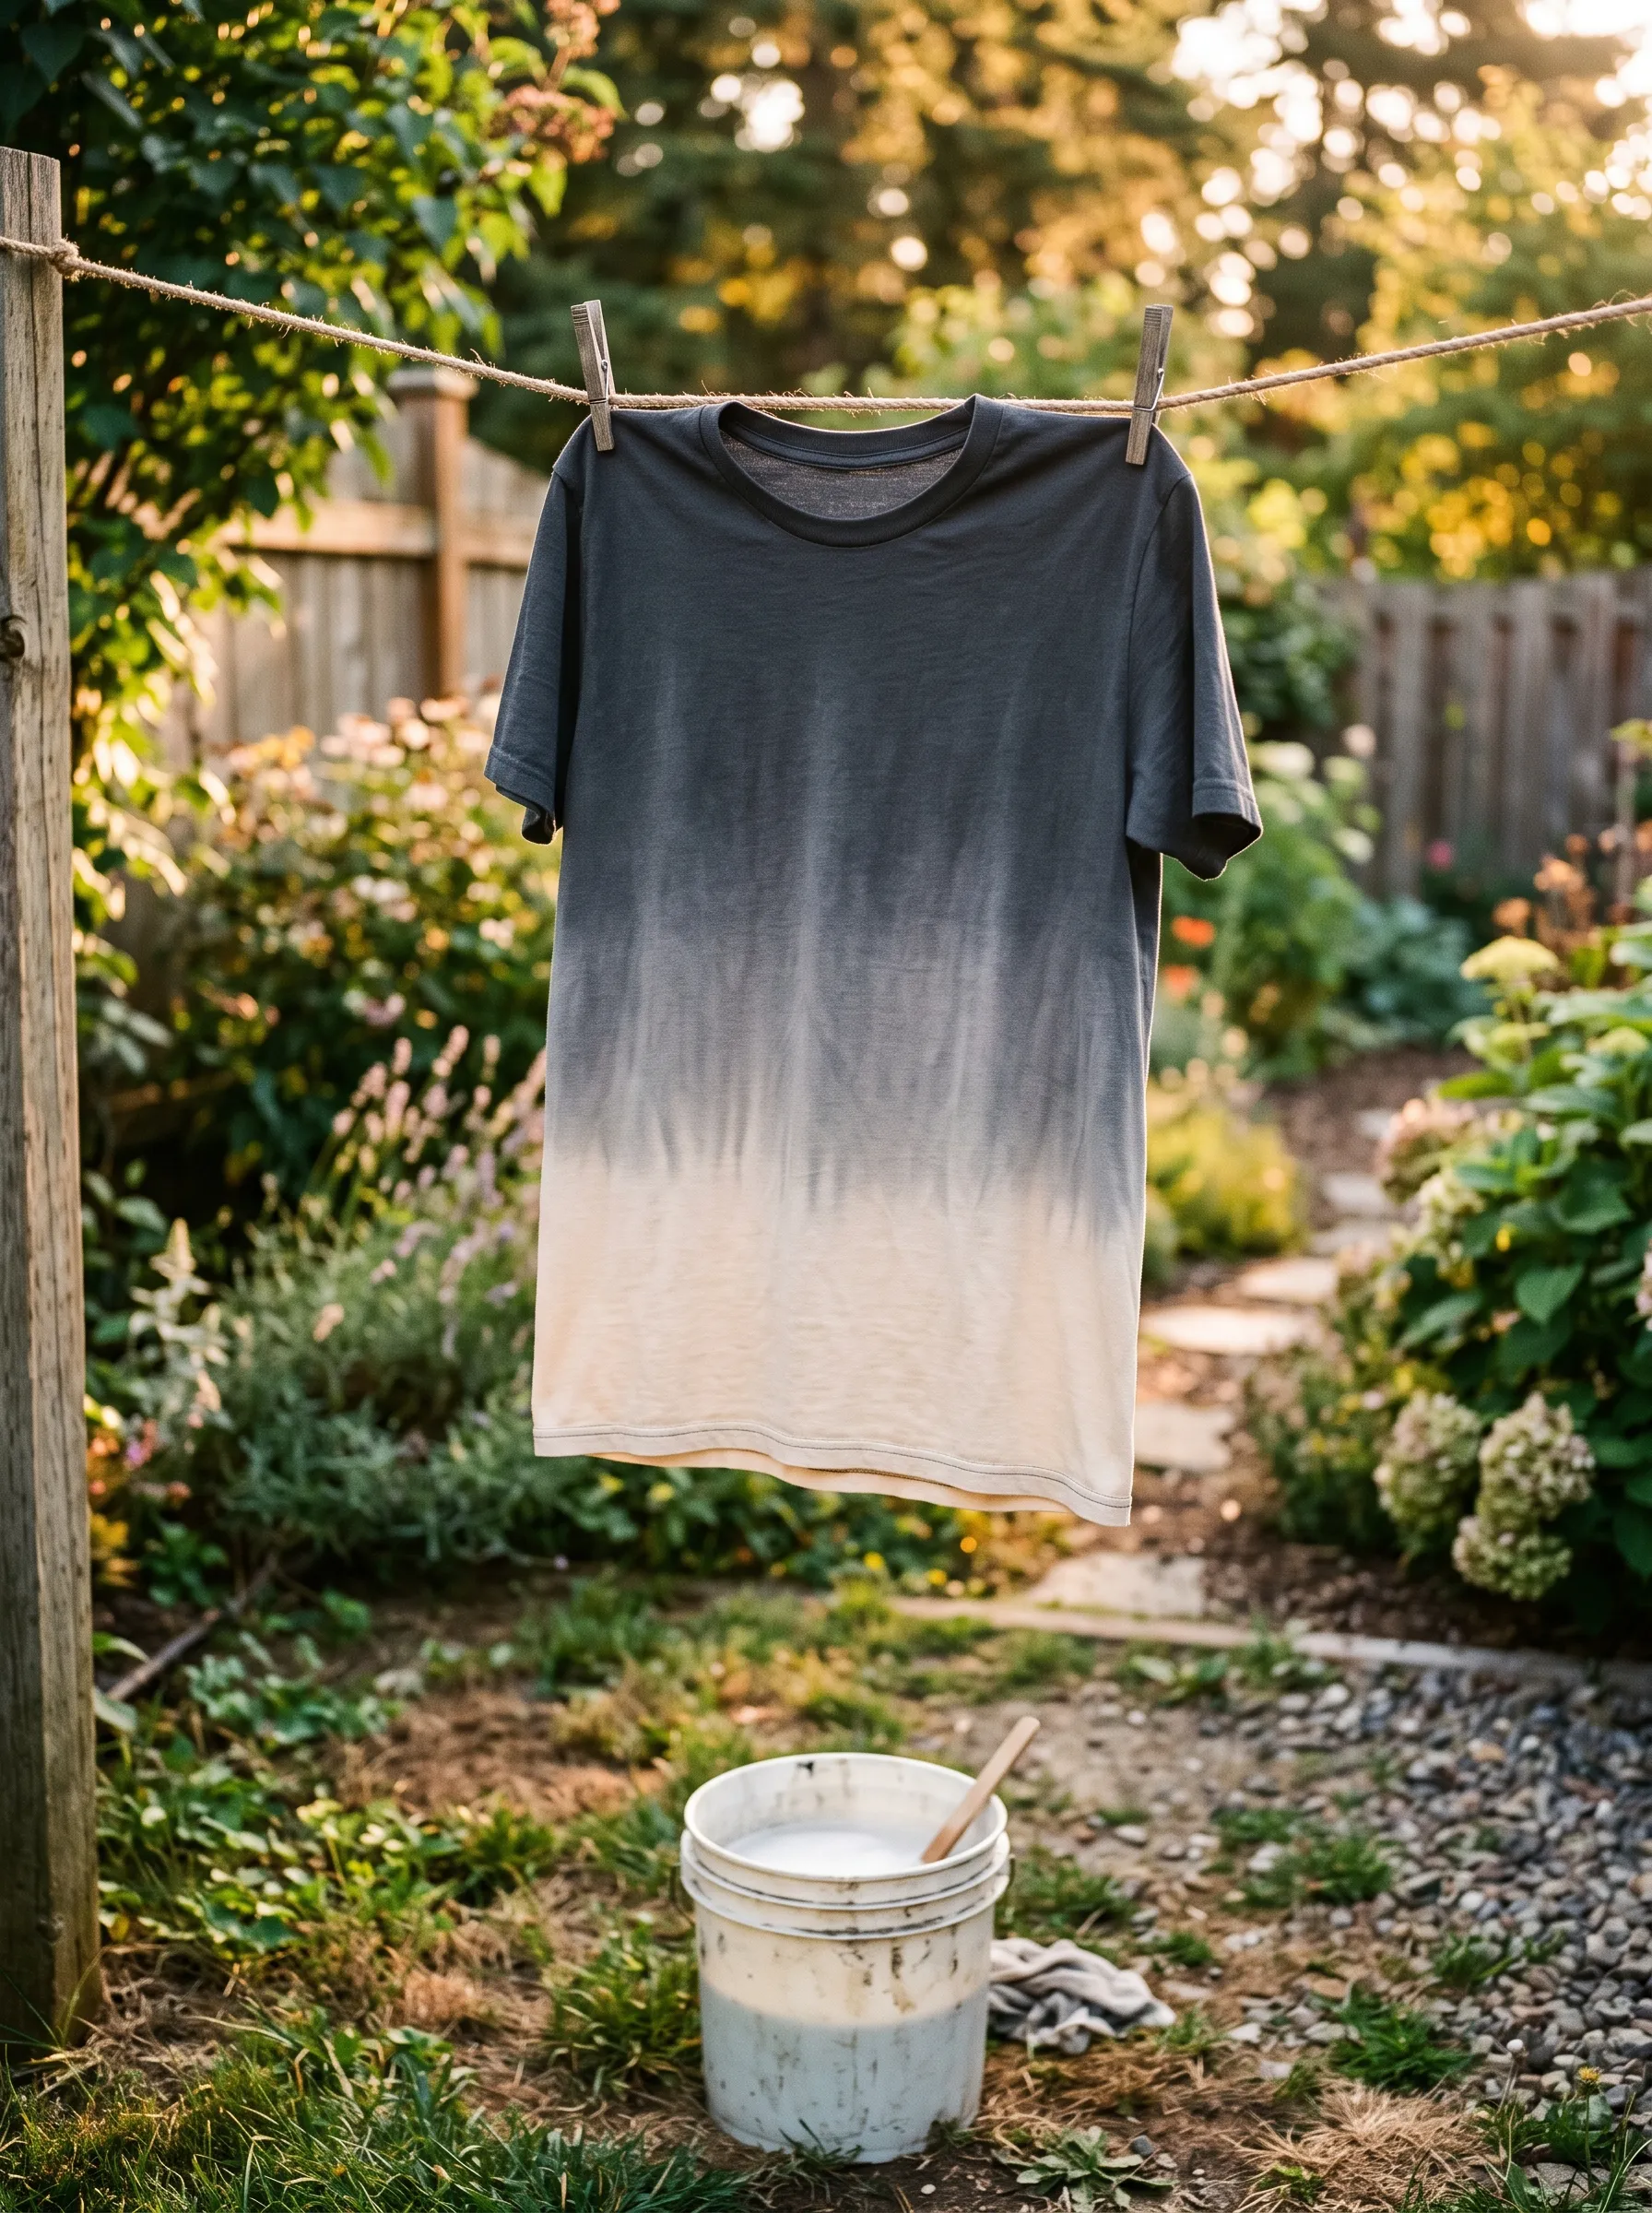
Hanging outdoors to dry, this charcoal shirt fades gradually into a pale cream near the hemline, created through a dip technique. The shirt gets lowered into a bleach bucket in stages, allowing the top portion less exposure than the bottom. This staggered dipping produces the smooth gradient seen here, without any hard lines. Beginners find this project forgiving since slight unevenness only adds to the natural, sun-bleached look. A large bucket and something to prop the shirt above the liquid make the process manageable at home. Rinsing thoroughly once the desired fade appears stops the bleach from continuing to lighten the fabric further.
Tie Dye Bleach Spiral
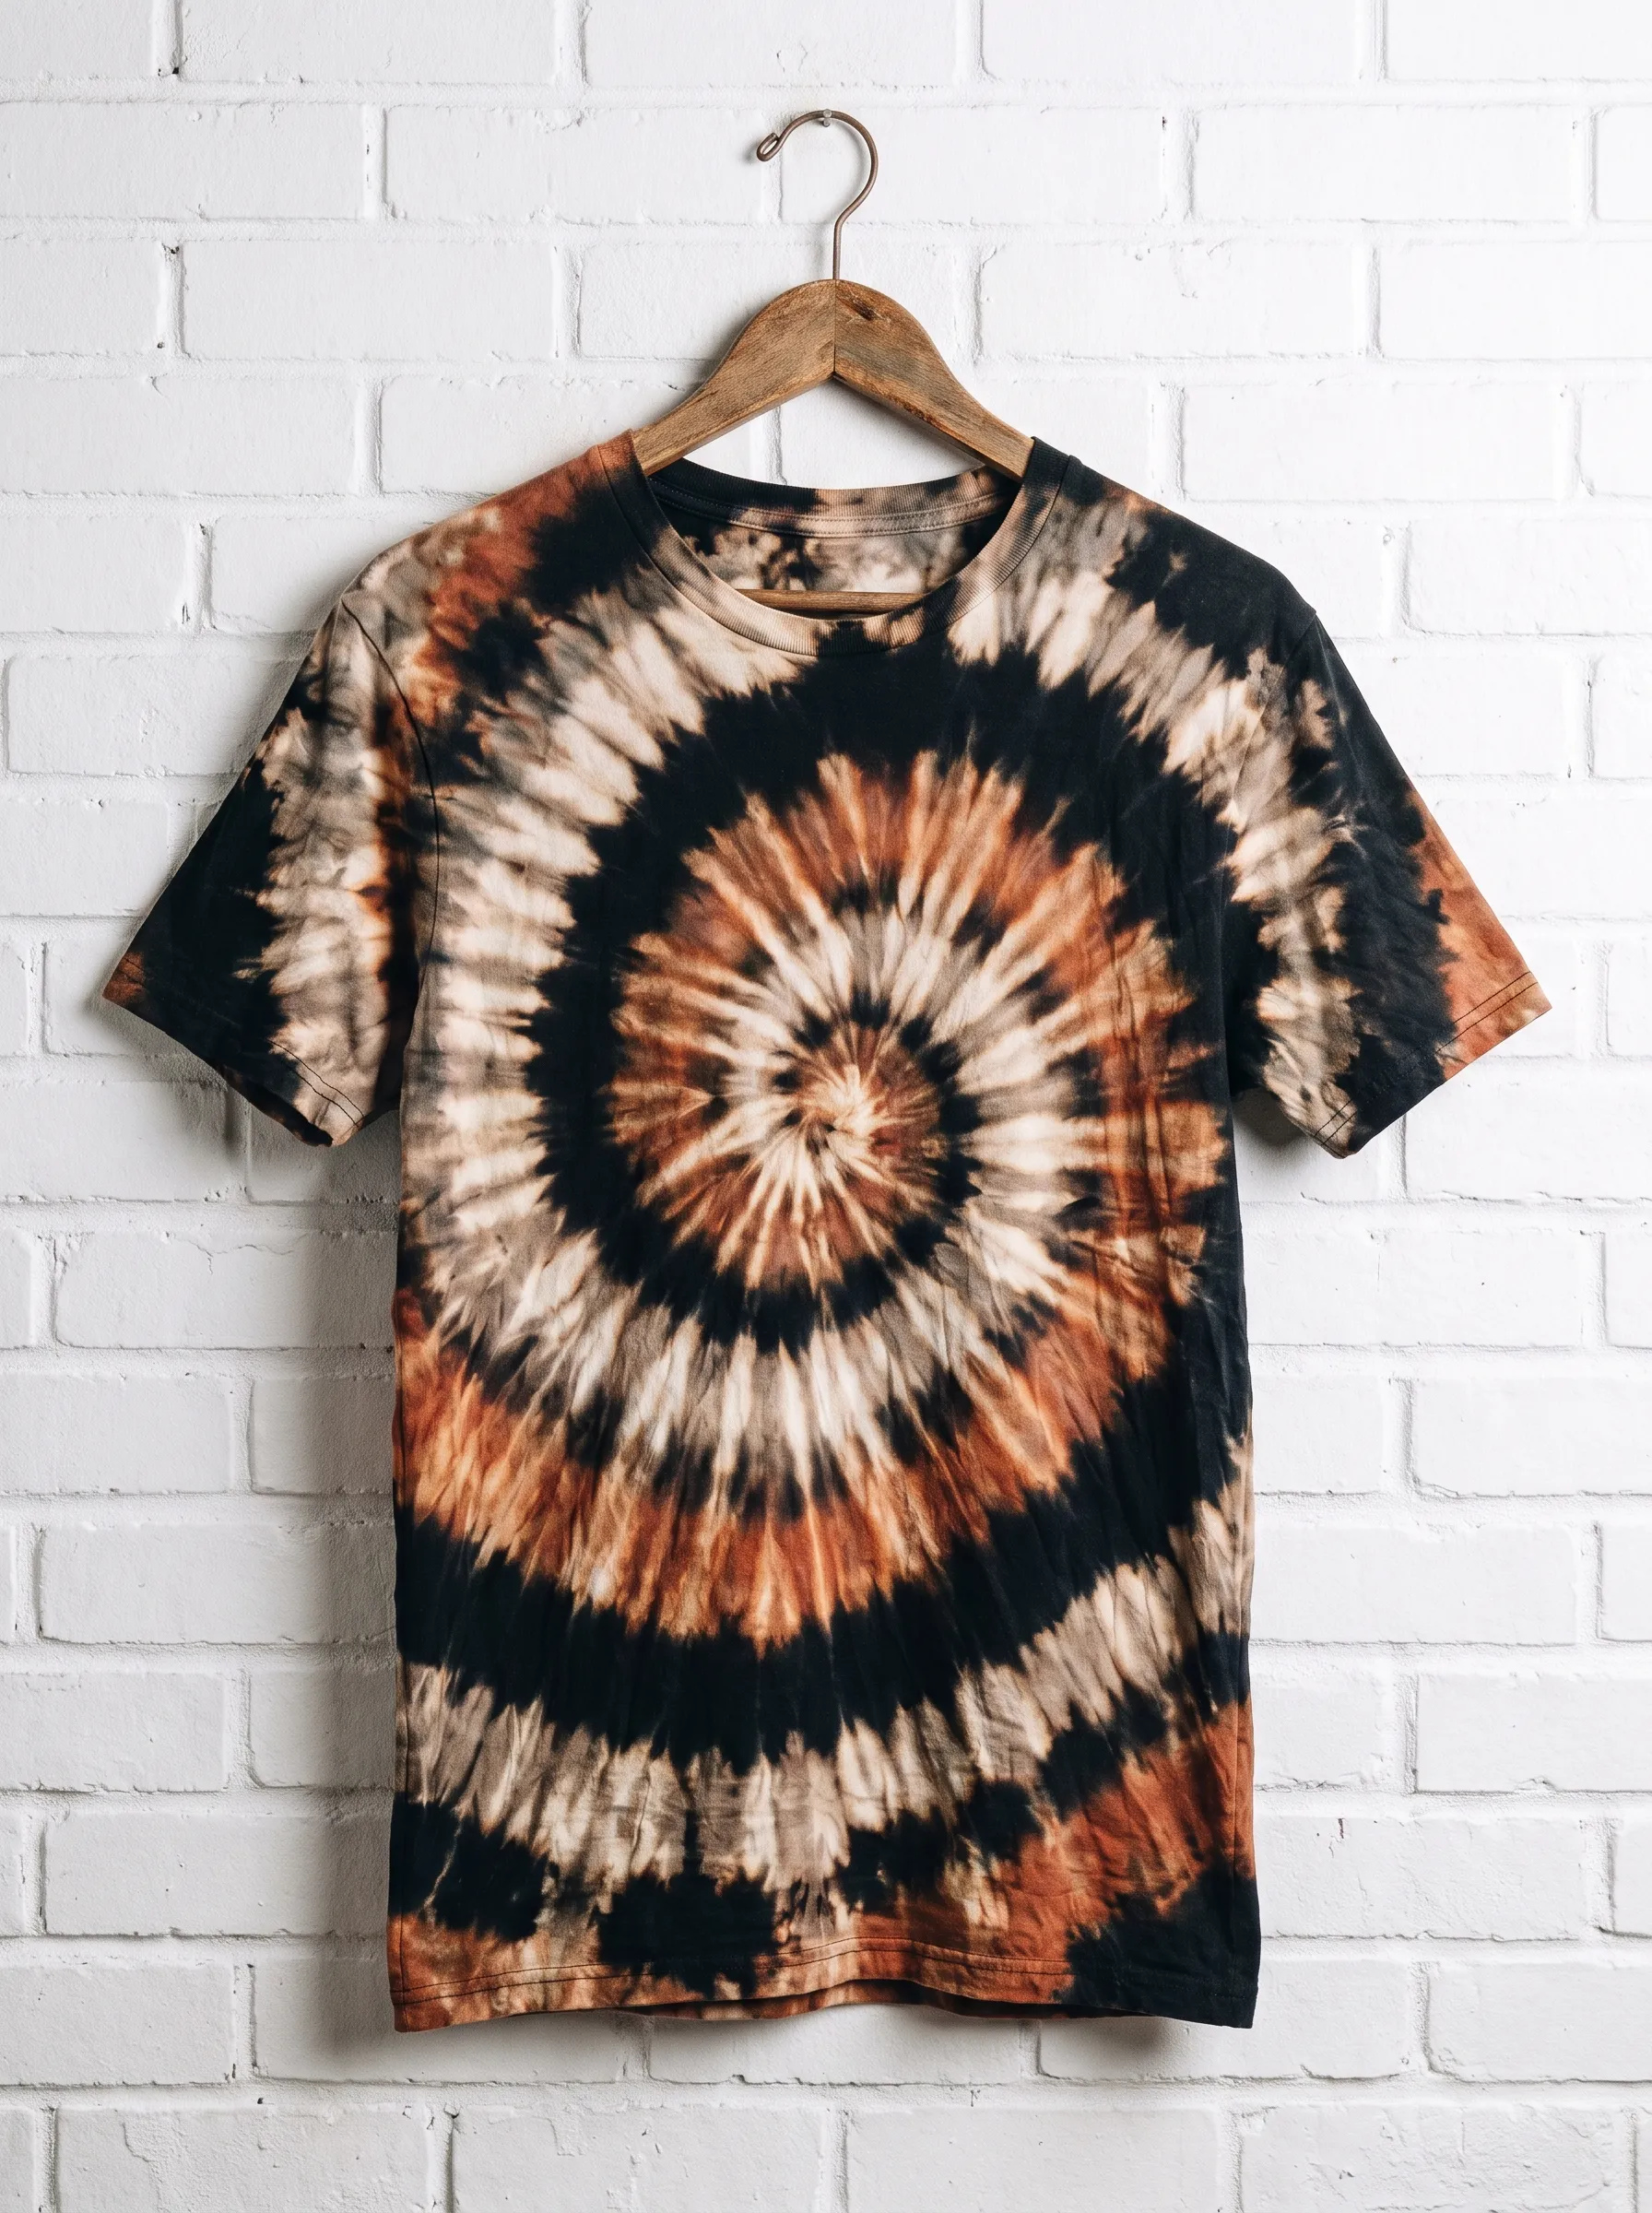
Rich rust and black tones spiral outward from the centre of this shirt, formed by twisting the fabric before applying bleach. Twisting the shirt into a tight spiral and securing it with rubber bands creates the wedge-shaped sections seen in traditional tie dye. Bleach then gets sprayed or poured over each section, soaking into the folds unevenly to create the burst pattern. This technique combines the fun of dye-based tie dye with the softer, faded palette bleach produces. Letting the twisted shirt rest before rinsing allows the colour change to fully develop. Spiral patterns remain a favourite among beginners since the twisting technique forgives small mistakes.
Leaf Silhouette Stencil
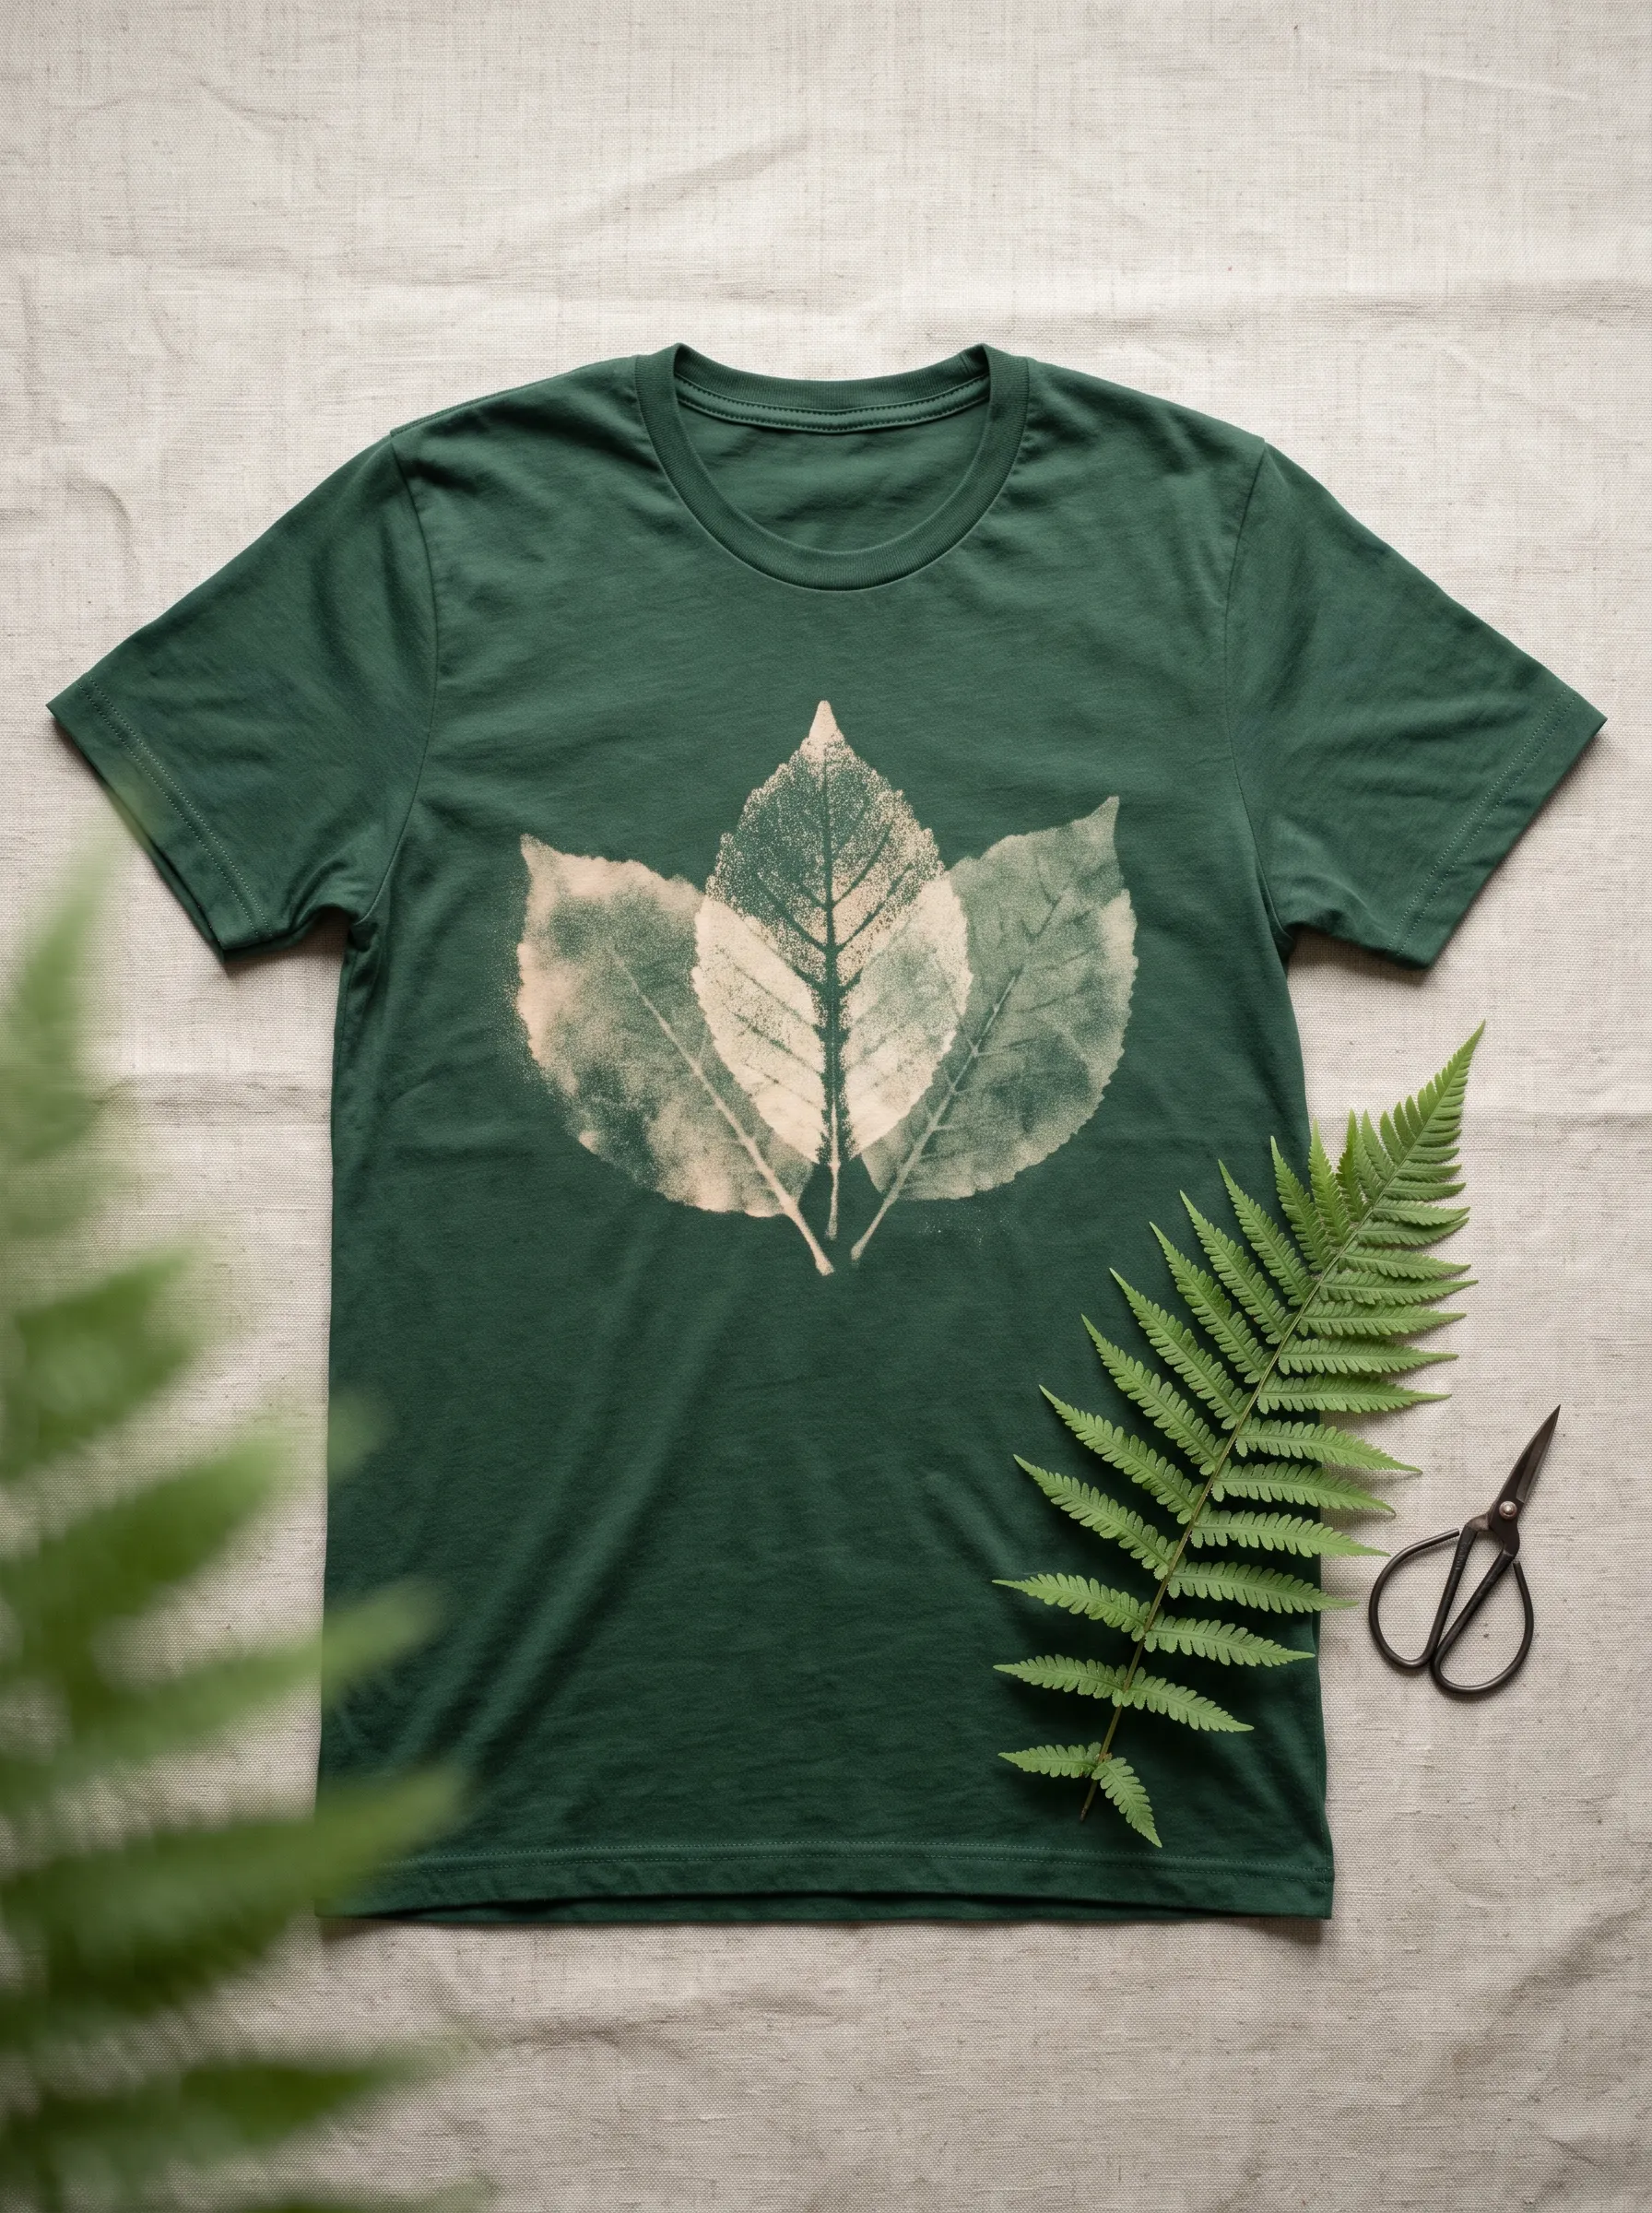
Real fern and leaf shapes press directly onto this hunter green shirt, leaving crisp silhouettes once the bleach fades around them. Placing actual leaves on the fabric and spraying bleach around their edges blocks the chemical from reaching the covered area, preserving the original green shade in the leaf shape. Surrounding areas fade to a lighter, mottled tone, creating natural contrast. Gathering leaves from a backyard or local park costs nothing, making this an affordable nature inspired project. Pressing leaves flat under a book beforehand helps them lie smoothly against the fabric. This technique appeals to anyone who enjoys botanical themes without needing drawing skills.
Sunburst Circle Technique
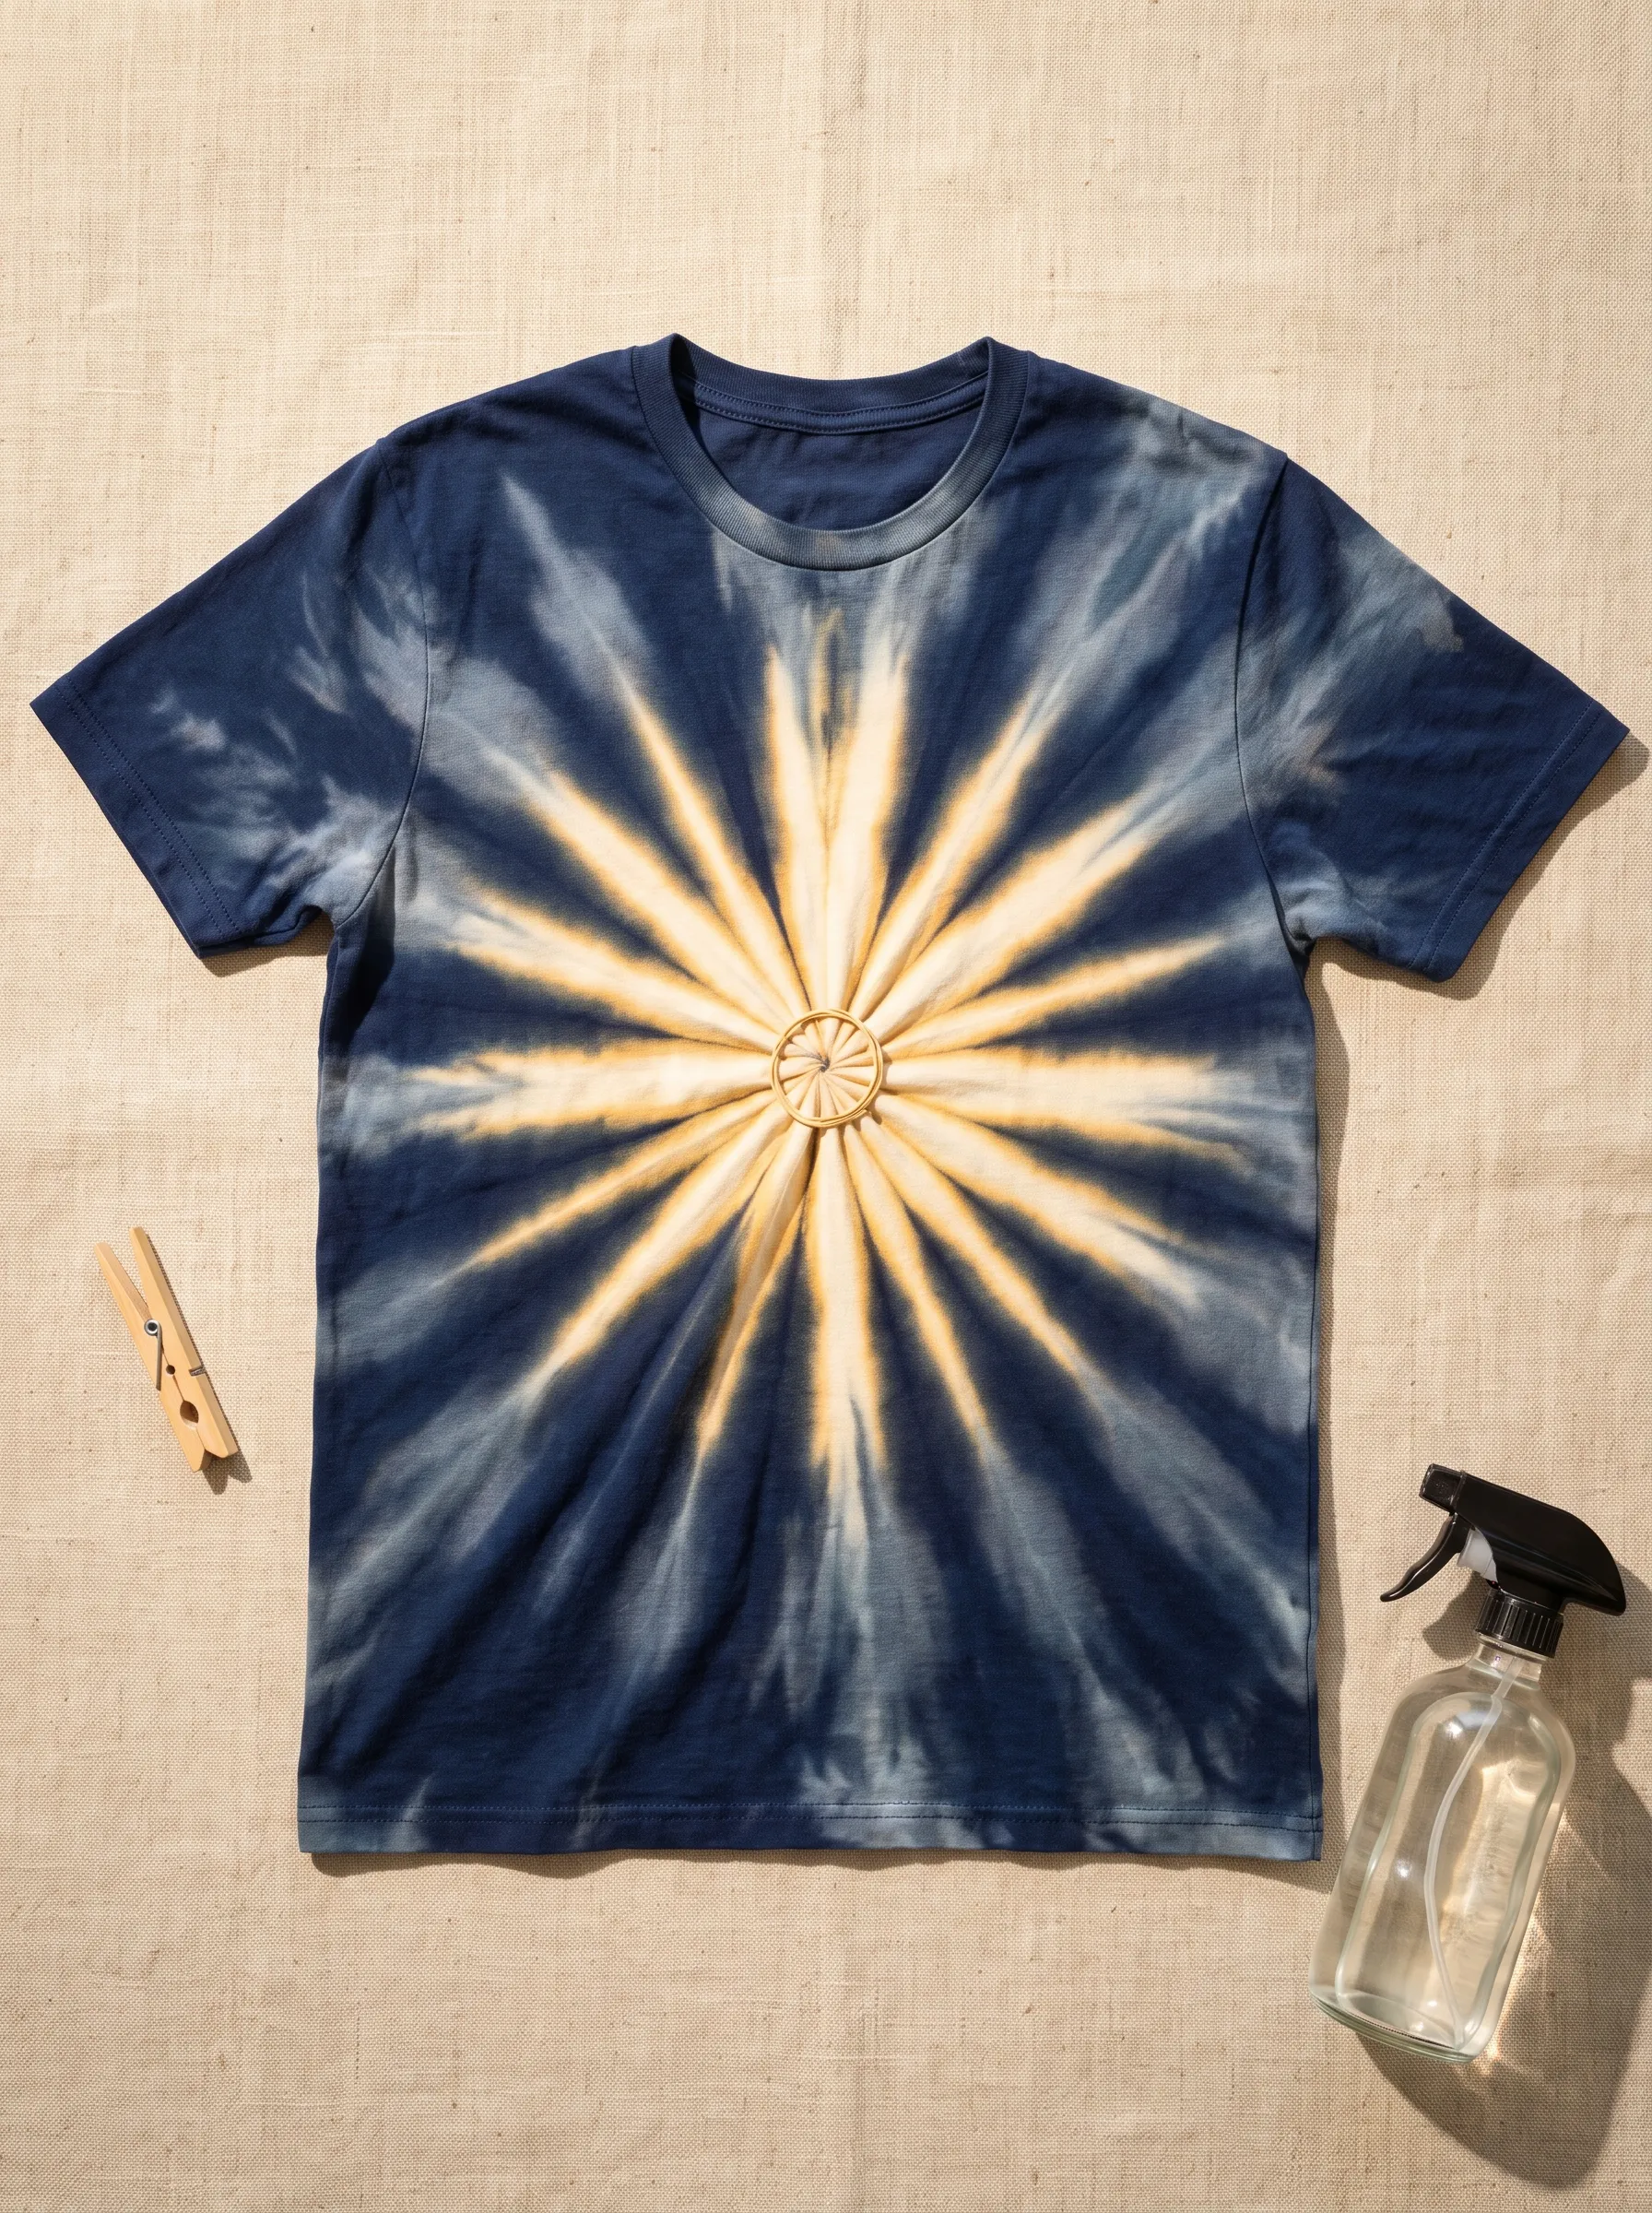
Golden rays radiate from a small centre point on this navy shirt, resembling sunlight breaking through fabric. A rubber band or small ring gets tied at the centre point, then the shirt gets folded into pleats radiating outward before bleach gets sprayed across the surface. This folding method concentrates the bleach along raised ridges, producing the sharp rays seen in the finished piece. Spray bottles work better than pouring for this technique since they distribute bleach evenly across the folds. Warm tones develop as the navy dye reacts, giving the design its golden glow. This project suits beginners ready to move beyond dipping and try structured folding.
Reverse Galaxy Splatter Shirt
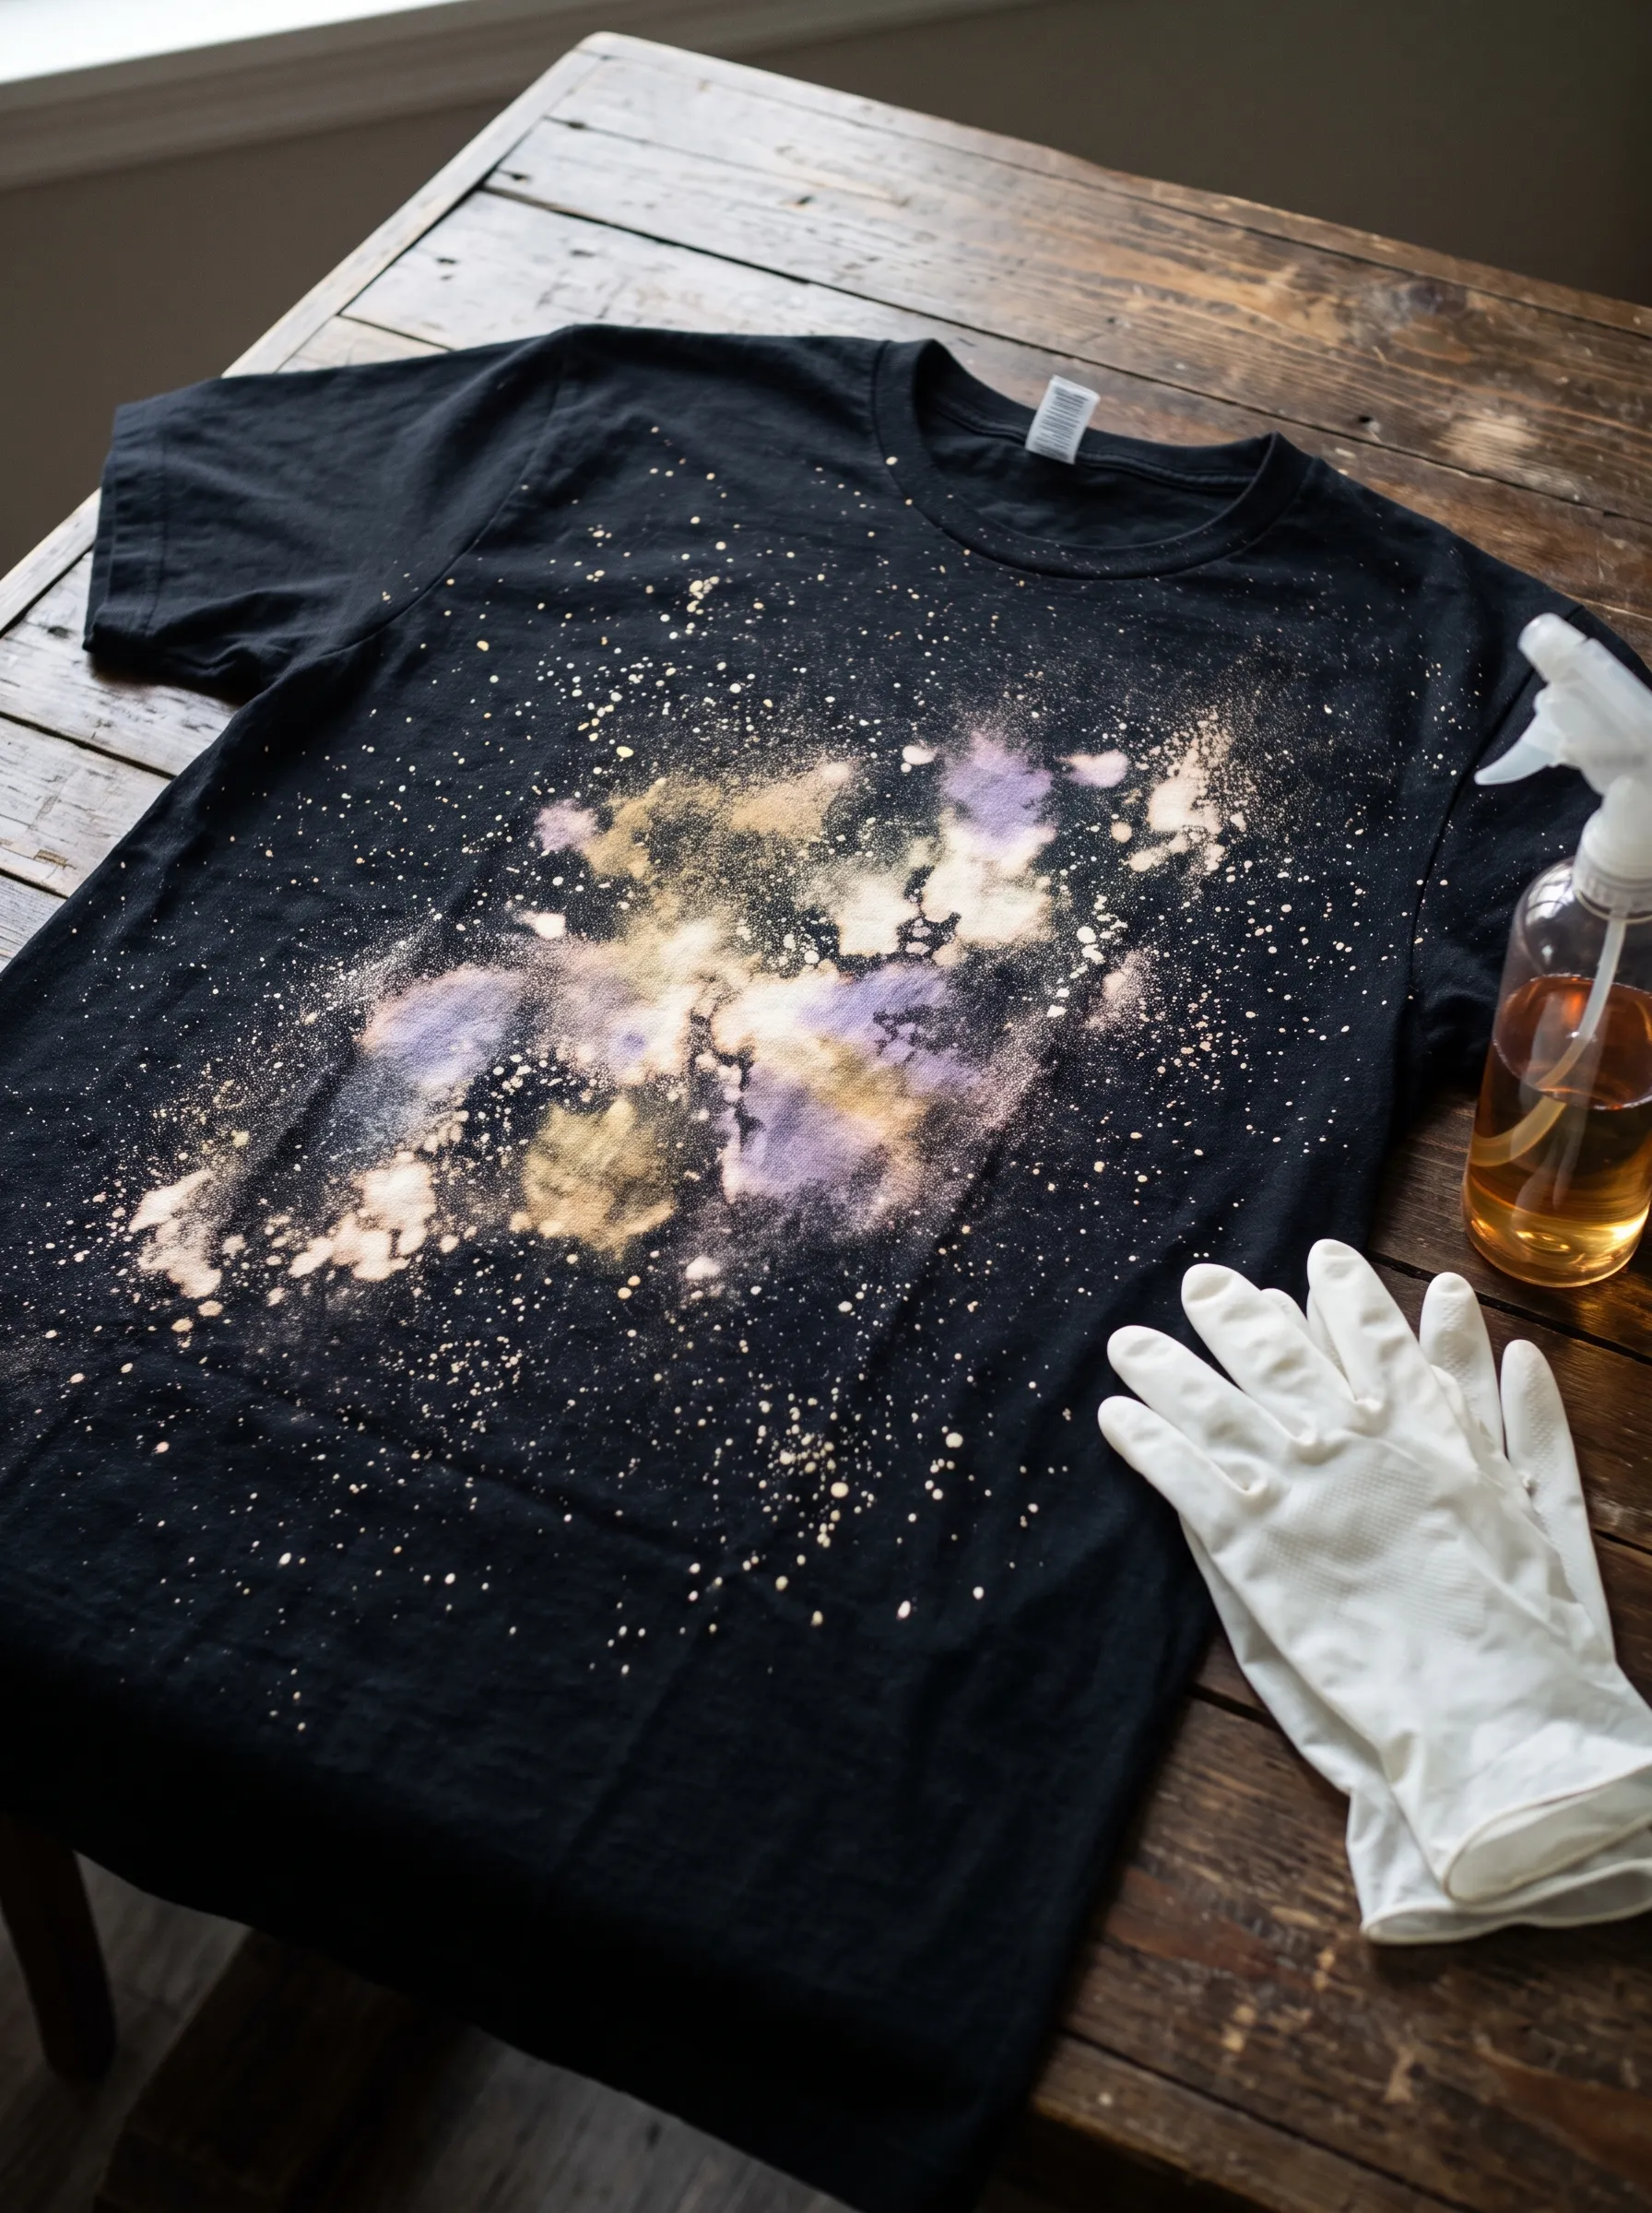
Speckled bleach droplets scatter across this black shirt, clustering into soft purple and gold patches that resemble a galaxy. Flicking a toothbrush loaded with diluted bleach across the fabric creates the fine speckled stars, while a sponge dabbed in stronger solution builds the cloudy nebula shapes underneath. Layering these two techniques together produces depth, with tiny dots surrounding larger, softer patches of colour. Protecting the surrounding work area matters here since flicking bleach sends droplets beyond the shirt itself. Gloves and old newspaper keep the mess contained. This design ranks among the most striking projects for anyone wanting a bold, cosmic statement piece.
Frequently Asked Questions About Bleach Painted Shirts
Q1: What kind of bleach works best for bleach painting shirts?
A1: Gel bleach gives beginners the most control since it stays put instead of running. Regular liquid bleach spreads fast and works better for dip techniques. Mix liquid bleach with water in a spray bottle for lighter, misted effects. Always test on a scrap piece of fabric first to check timing and colour response.
Q2: How long should you leave bleach on a shirt before rinsing?
A2: Most cotton shirts need five to fifteen minutes, depending on dye strength and bleach concentration. Check the fabric every few minutes since dark dyes can shift colour faster than expected. Once the pattern reaches the shade you want, rinse immediately in cold water to stop the chemical reaction completely.
Q3: Can you bleach paint a shirt without ruining the fabric?
A3: Cotton and cotton blends handle bleach painting well without breaking down, as long as you rinse thoroughly afterward. Polyester resists bleach and won't change colour much. Neutralizing the fabric with a vinegar and water rinse after bleaching protects fibbers and stops the fading process from weakening the material over time.
Q4: What shirts work best for bleach art projects?
A4: Dark coloured cotton tees, especially black, navy, and maroon, show the clearest contrast once bleached. Heather grey and olive also react nicely, revealing warm cream or tan tones underneath. Avoid white or light pastel shirts since bleach won't create visible contrast on fabric that's already pale or undyed.
Q5: How do you style a bleach painted shirt for everyday wear?
A5: Pair a bleach painted tee with denim jeans or shorts for a casual, lived in look. Layer it under an open flannel for cooler weather, or tuck it into a skirt for something more put together. Since each design is bold on its own, keep accessories and other clothing pieces simple.
Q6: Do bleach painted shirts fade or wash out over time?
A6: The bleached pattern itself stays permanent since the original dye has been chemically removed. Washing in cold water and avoiding harsh detergents helps prevent the surrounding fabric colour from fading further. Turn the shirt inside out before washing and skip the dryer's high heat setting to protect the design longer.
Which Bleach Painted Shirt Design Fits You Best?
Twelve techniques, one plain shirt, countless directions to take it. Your choice says something about how you like to create, whether that means careful stencil work or loose, freehand spraying. Bleach painting rewards patience and a willingness to experiment, so trust your instincts and let the fabric guide you.
Grab a friend who loves DIY projects and send this their way. Bookmark it too. Next time you spot a plain tee at the back of your closet or need a last-minute gift idea, these bleach painted shirt techniques will be waiting.