12 Bleach Tie Dye Shirt Ideas for Streetwear Fans
How to use this guide
Choose ideas based on the materials, time, skill level, and finish you can realistically manage. For any dye, bleach, paint, or alteration project, test on a spare piece first and follow the product safety instructions.
Bleach and black cotton don't cooperate the way most people expect. Splash it wrong and you get a blotchy mistake fit for the rag pile. Control it, though, and that same reaction turns into rust, gold, cream, and stark white patterns that no printer or dye vat can replicate. Every fold, spray, and drip changes the outcome, which means the shirt sitting in your hands right now has never existed before and never will again. That unpredictability scares off a lot of people who'd rather buy a pre-made graphic tee, but it's exactly what makes this technique worth learning.
This roundup breaks down twelve distinct bleach patterns, from precise lightning fractures to loosen watercolour splatters, each with the specific method behind it. You'll find techniques suited for festival wear, moody streetwear, and even subtle pieces that read as intentional rather than DIY. Fabric folds, spray distances, dilution ratios, and drying times all shift the result, so each idea includes what actually separates a wearable design from a ruined shirt.
Frost Crackle
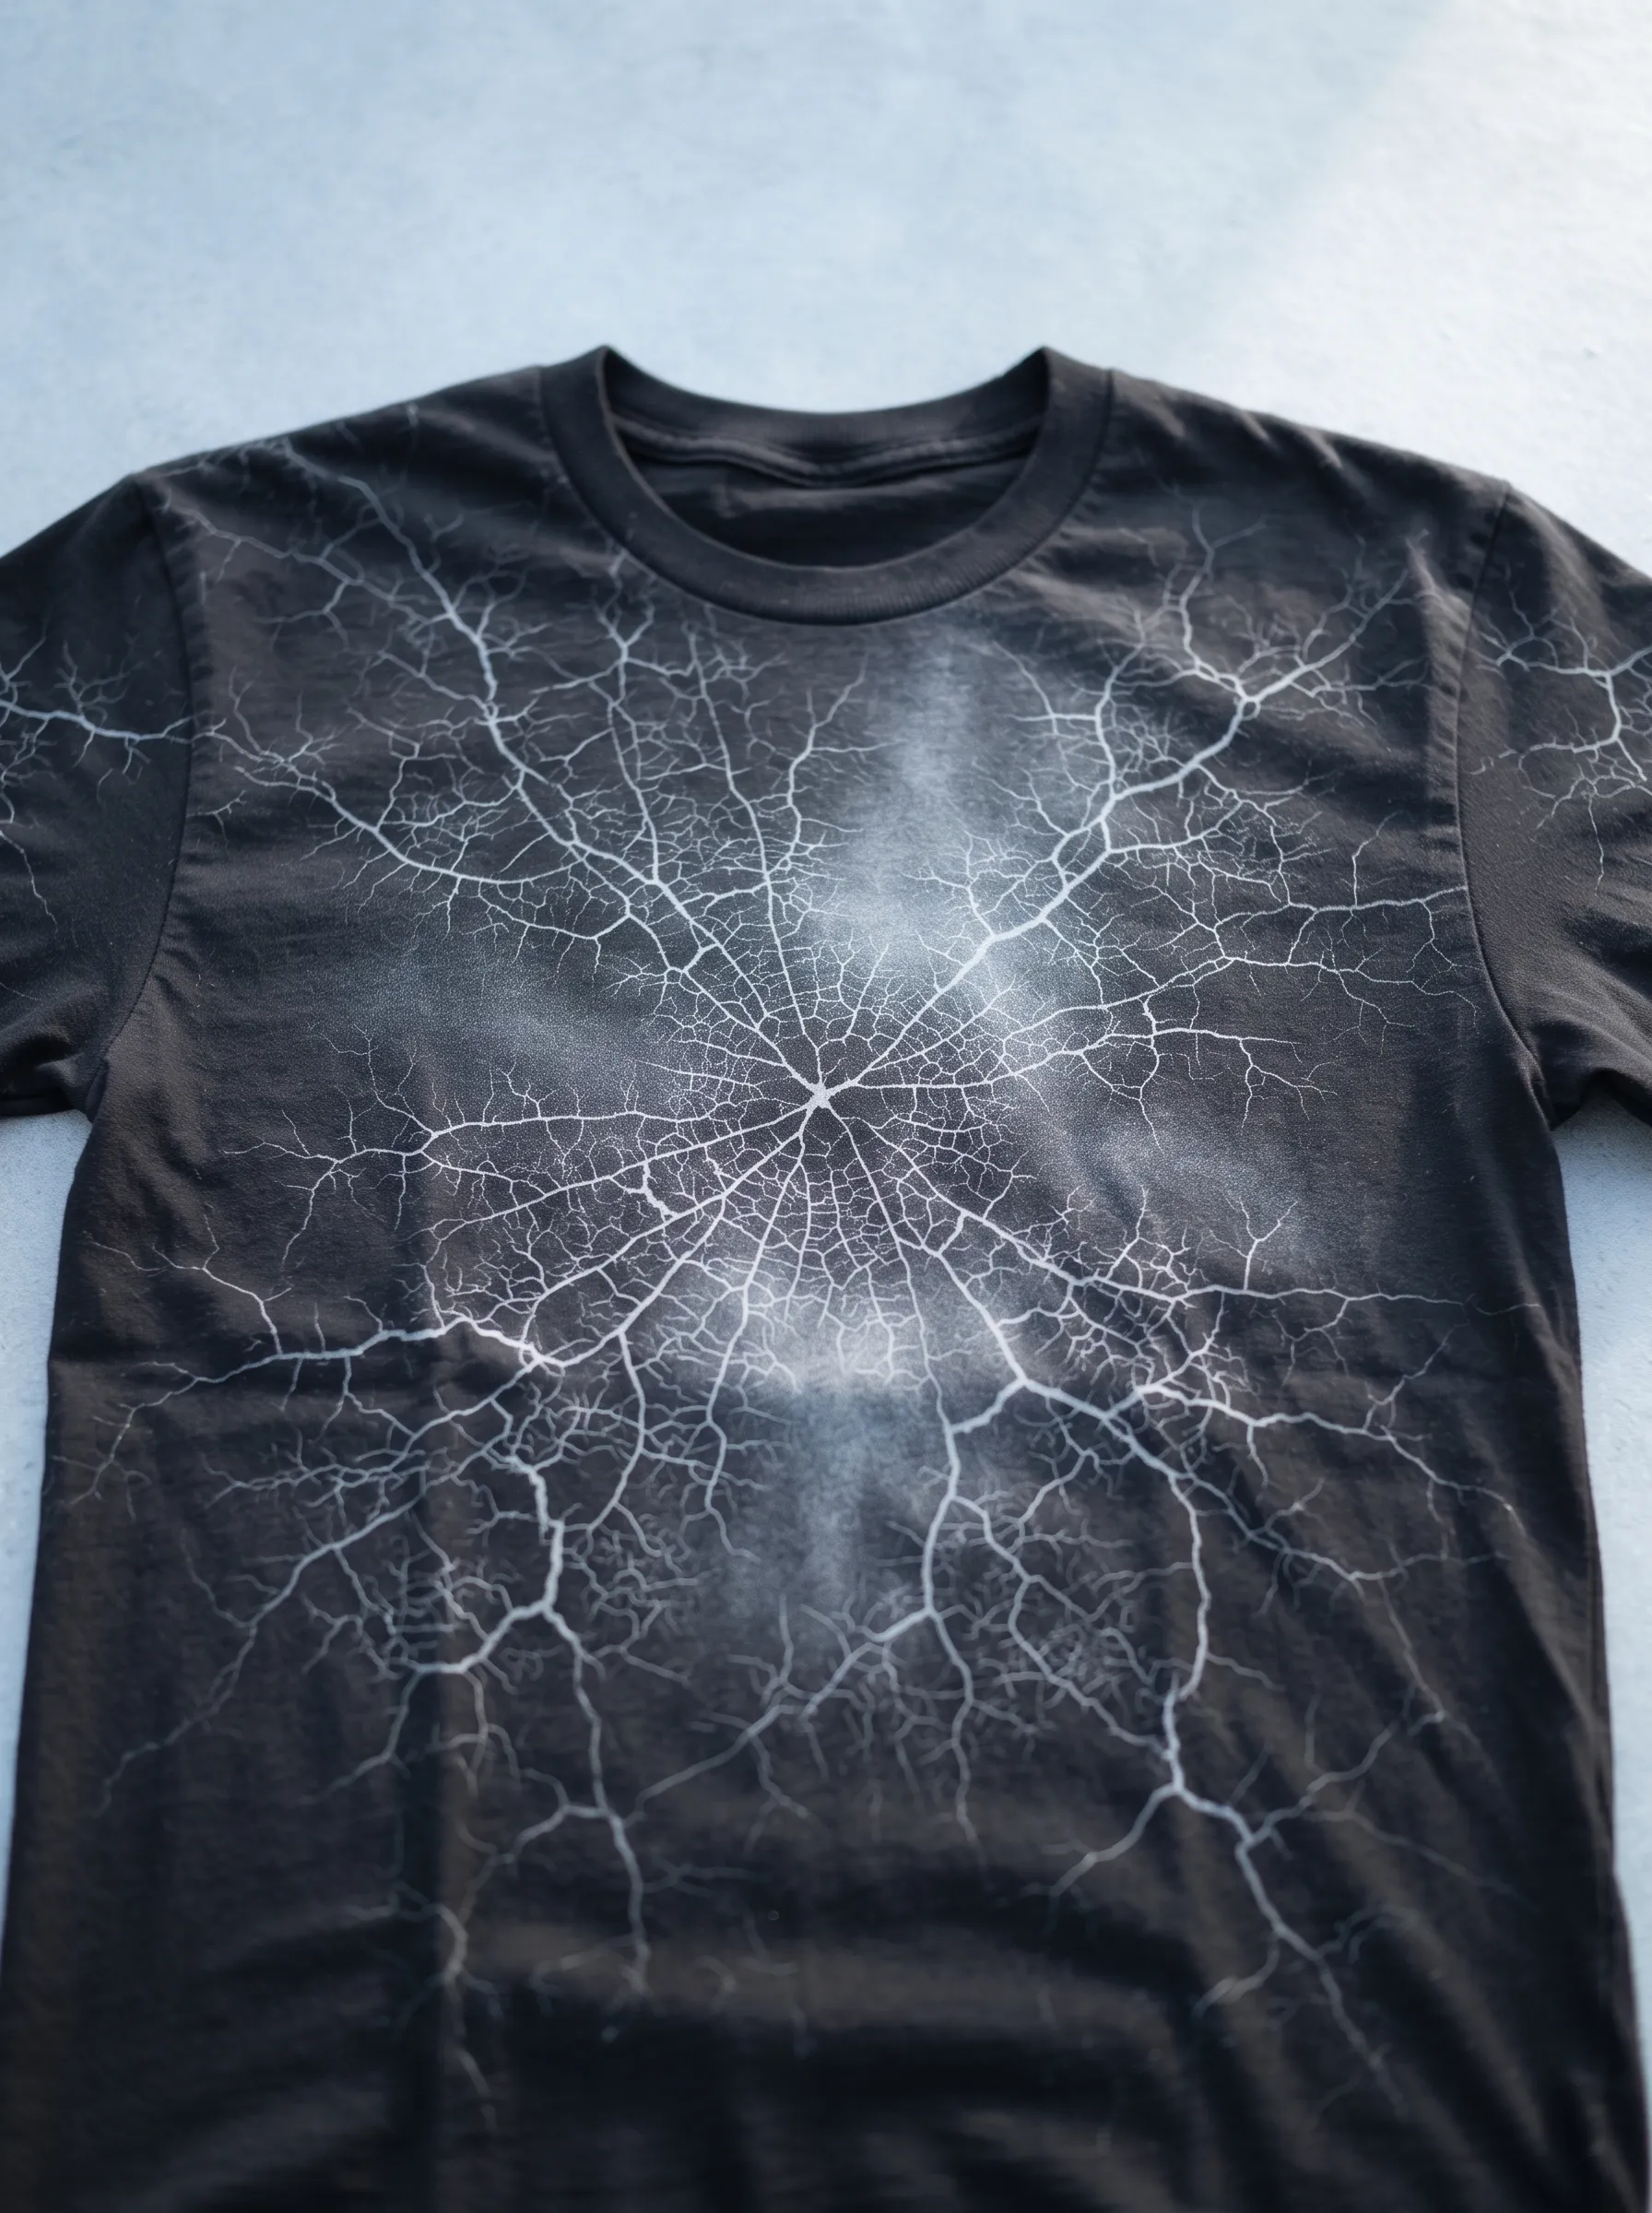
A black tee bursts open with a web of icy white lines that spread out like frozen lightning across the chest. This design mimics the look of shattered glass or a spider's web caught in frost, radiating from a single point outward to the shoulders and sleeves. Bleach pens or fine tip applicators work best here since the lines demand precision and control. Cotton fabric holds this pattern well because it lets the bleach travel along the weave in thin, branching veins. Anyone drawn to gothic or nature inspired streetwear will find this design striking. Layer it under a jacket or wear it alone for a bold statement piece. The stark contrast between deep black and bright white makes this one of the more dramatic techniques on this list, and it photographs beautifully for social media too.
Molten Camo Fade
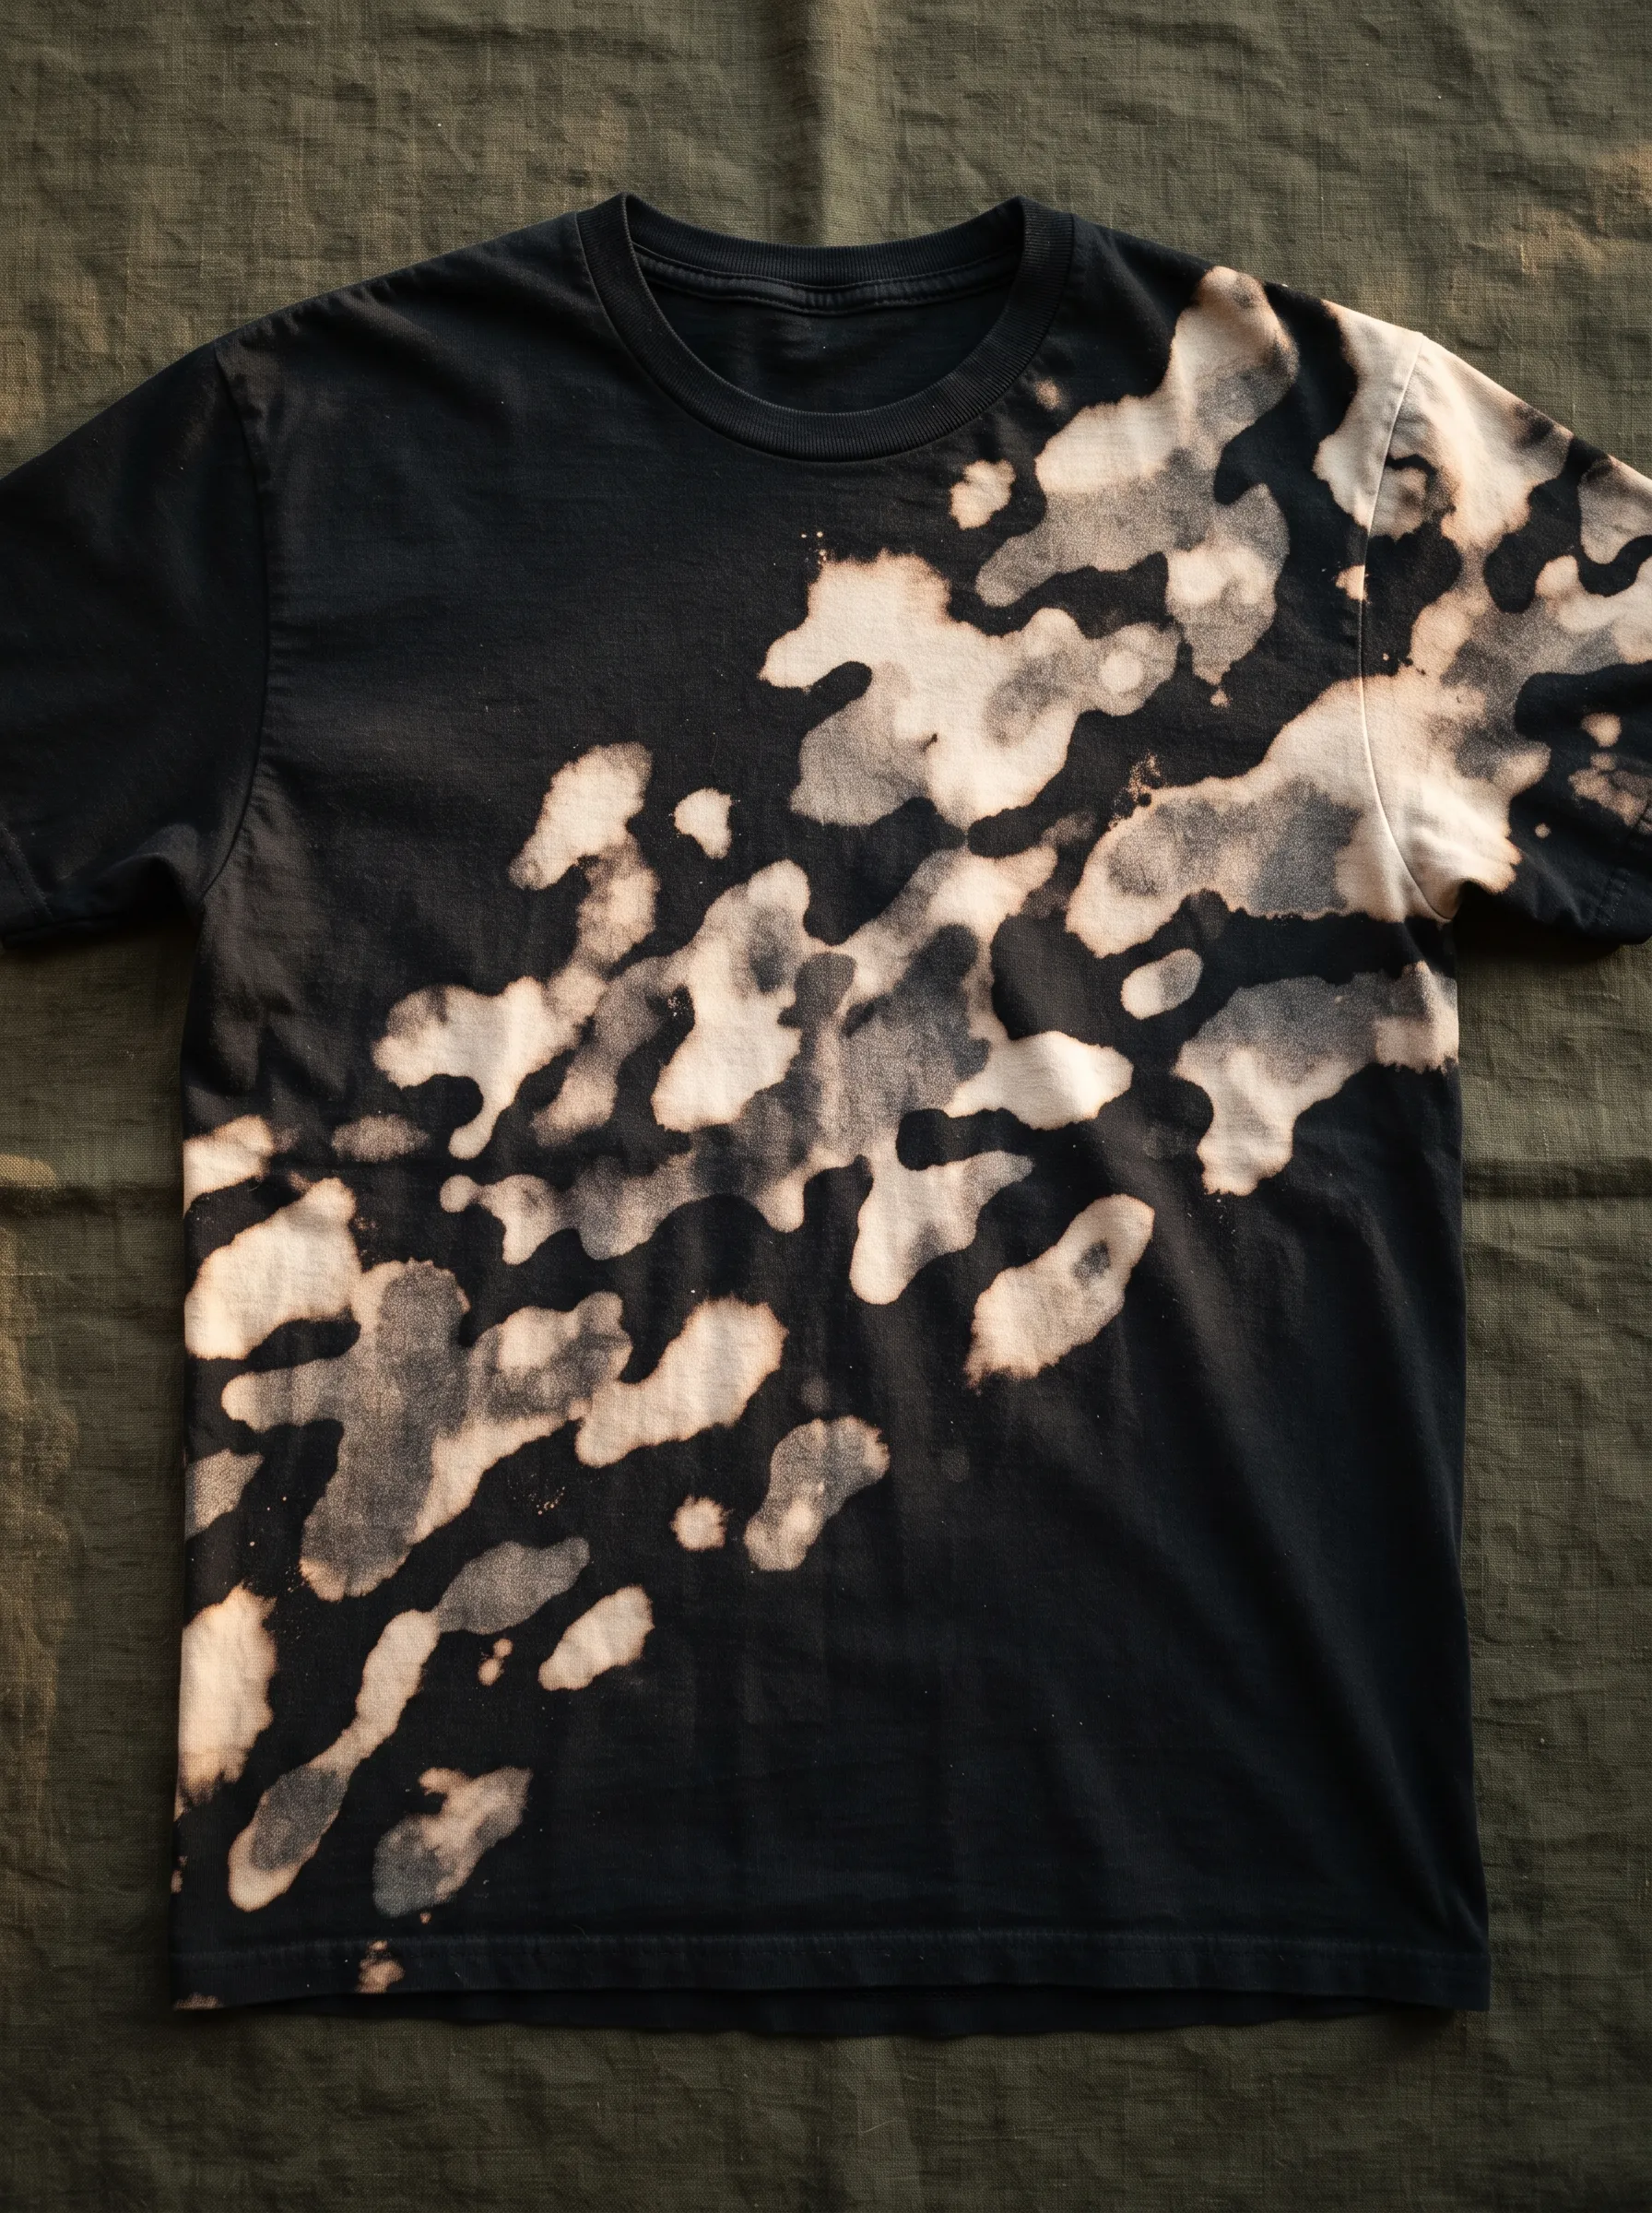
Blotchy patches of cream, tan, and charcoal spread across one shoulder and down the chest in this rugged design. Unlike traditional camouflage printed on fabric, this pattern forms naturally through uneven bleach application, giving each shirt its own distinct shape. Sponge dabbing or crumpled cloth techniques create these irregular blobs, and no two attempts will ever look identical. Military inspired fashion fans often gravitate toward this style because it channels tactical wear without feeling too costume like. Olive drab or army green backdrops photograph well against this shirt too. Streetwear brands have leaned into this aesthetic for seasons now, proving its staying power. Try layering the bleach in stages, letting it dry between applications, to build depth and avoid a flat, muddy look across the fabric.
Constellation Map
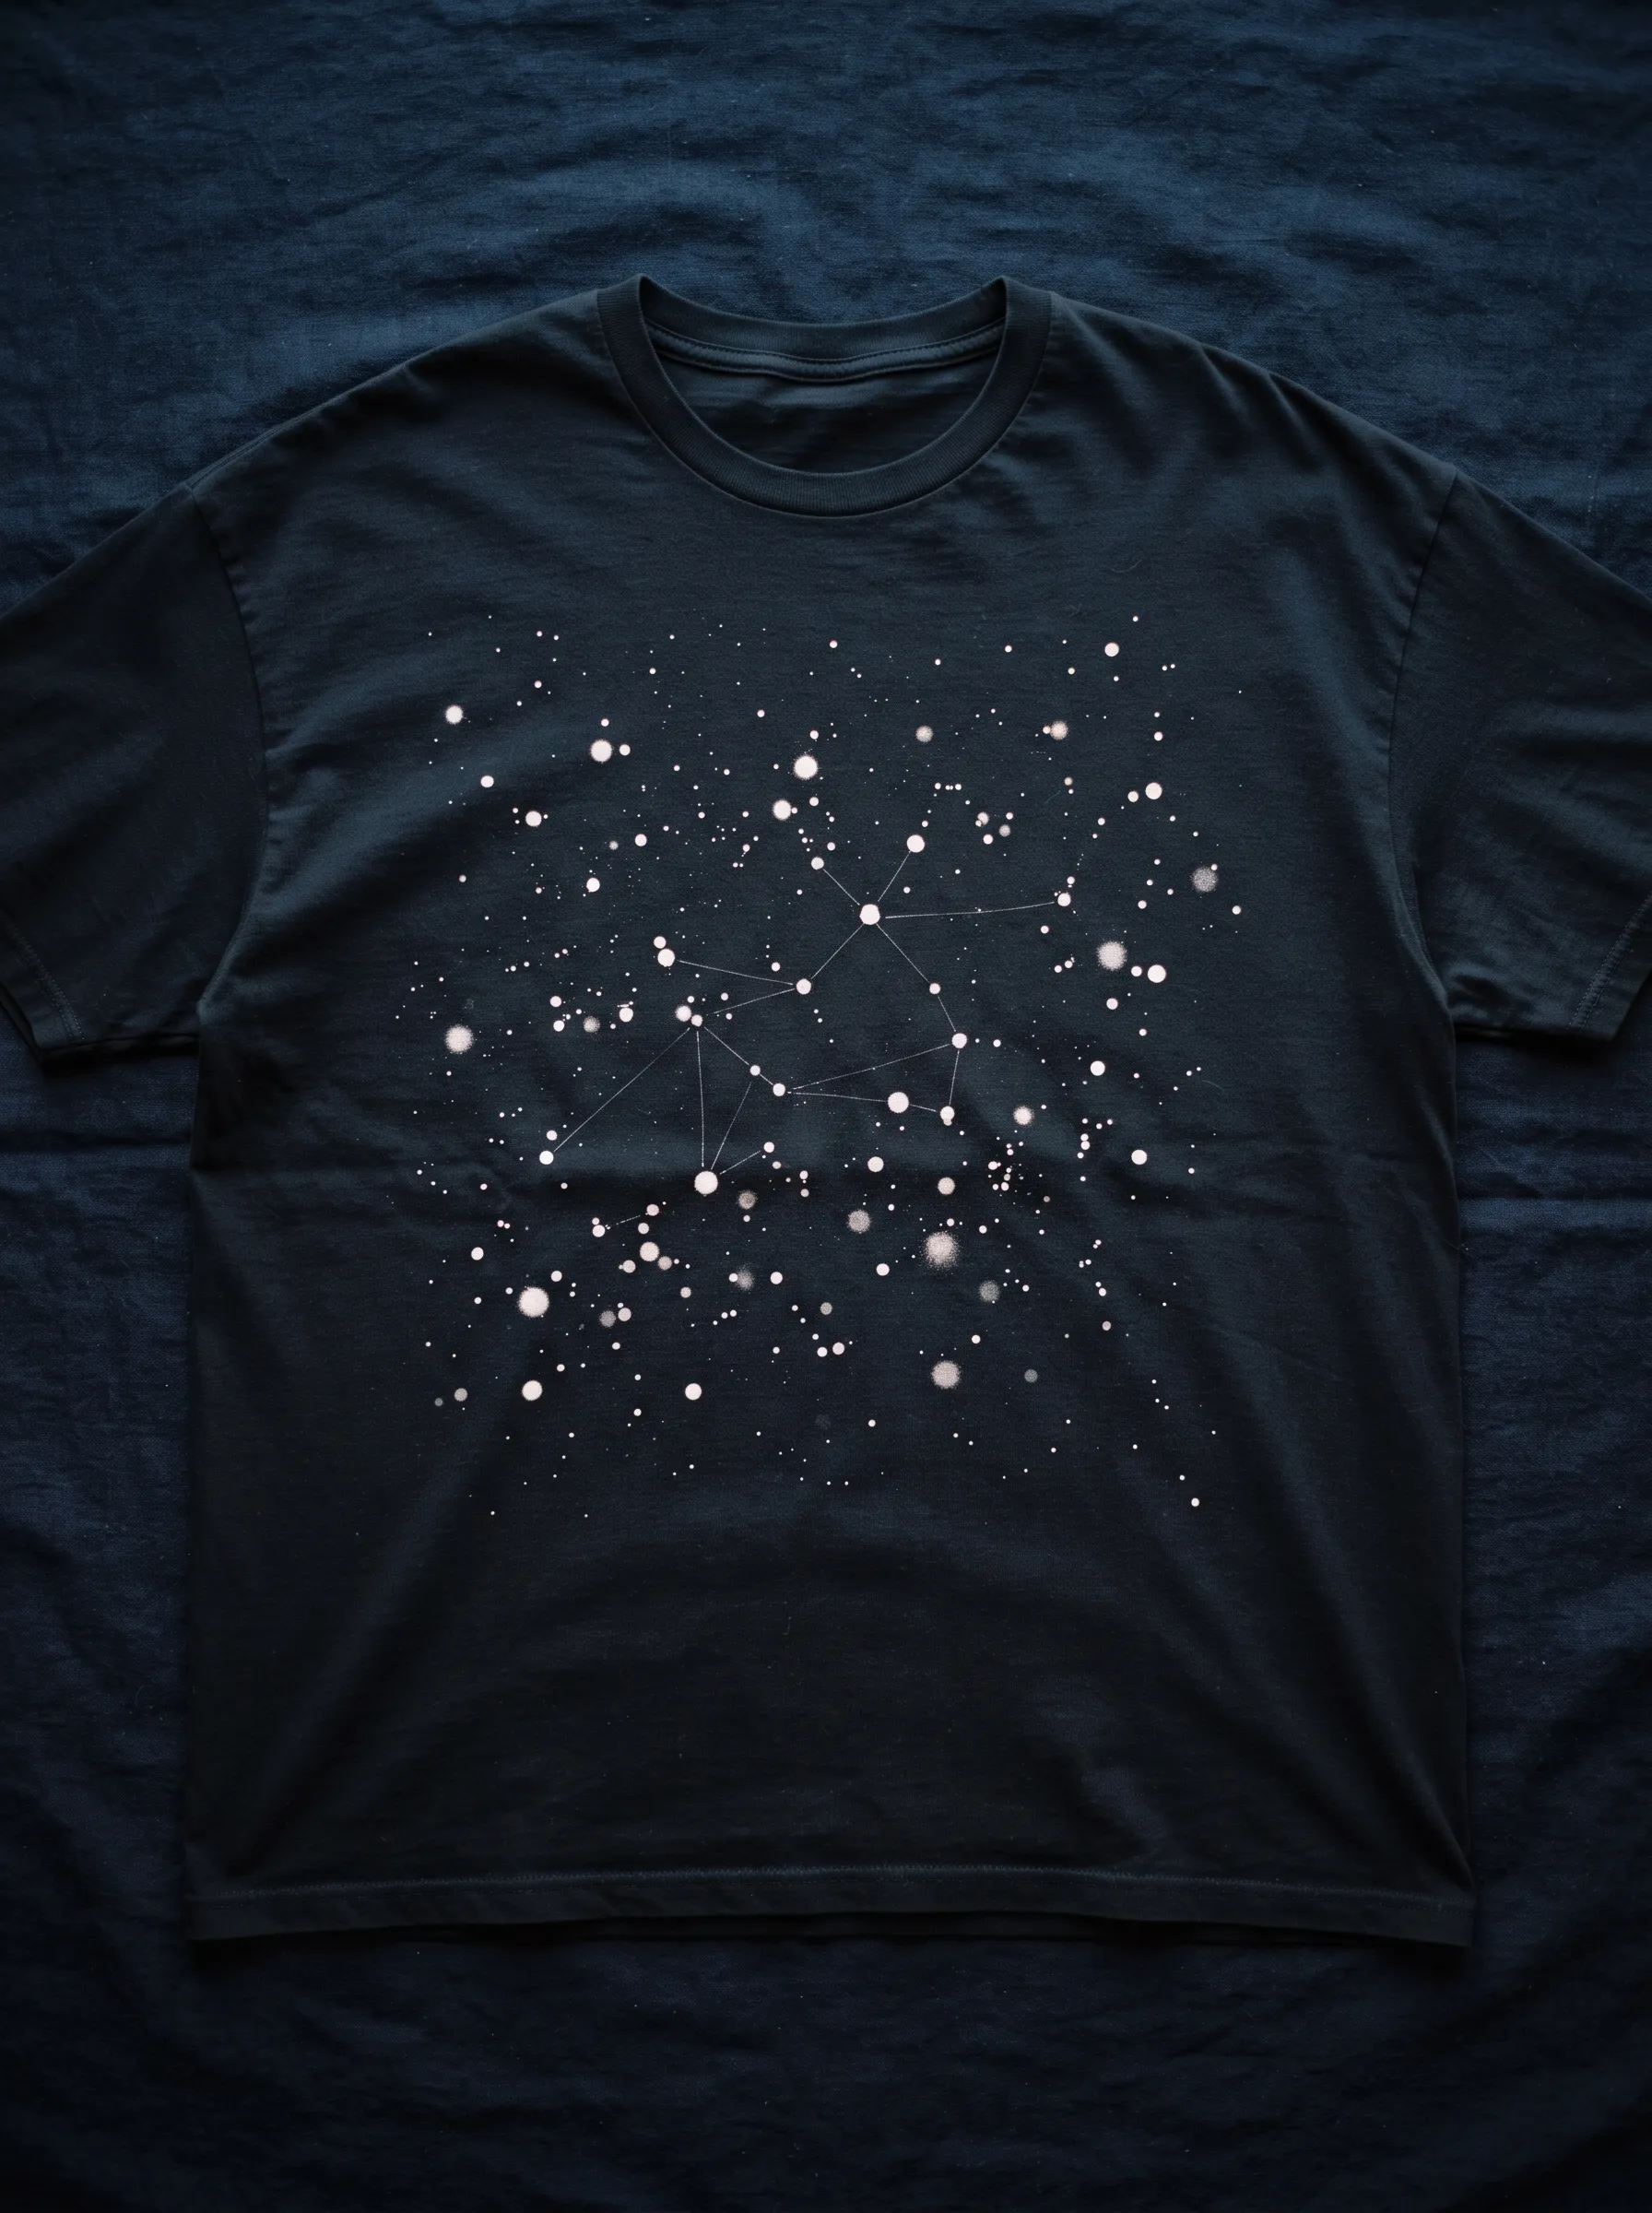
Scattered white dots connect through thin lines to form star patterns across a deep navy shirt, resembling an actual night sky chart. Small droplets of bleach create the background stars while slightly larger dots mark constellation points, connected afterward with a fine brush or marker dipped in bleach solution. Astronomy lovers and stargazers will appreciate how authentic this design feels compared to printed star shirts. Precision matters more here than in most bleach techniques since the connecting lines need steady hands. Random splatter forms the fainter background stars, adding realism and depth to the overall composition. Navy or midnight blue fabric works better than pure black for this project because it echoes the natural colour of a clear night sky. Pair this shirt with dark jeans for a subtle celestial vibe.
Watercolour Bloom Splatter
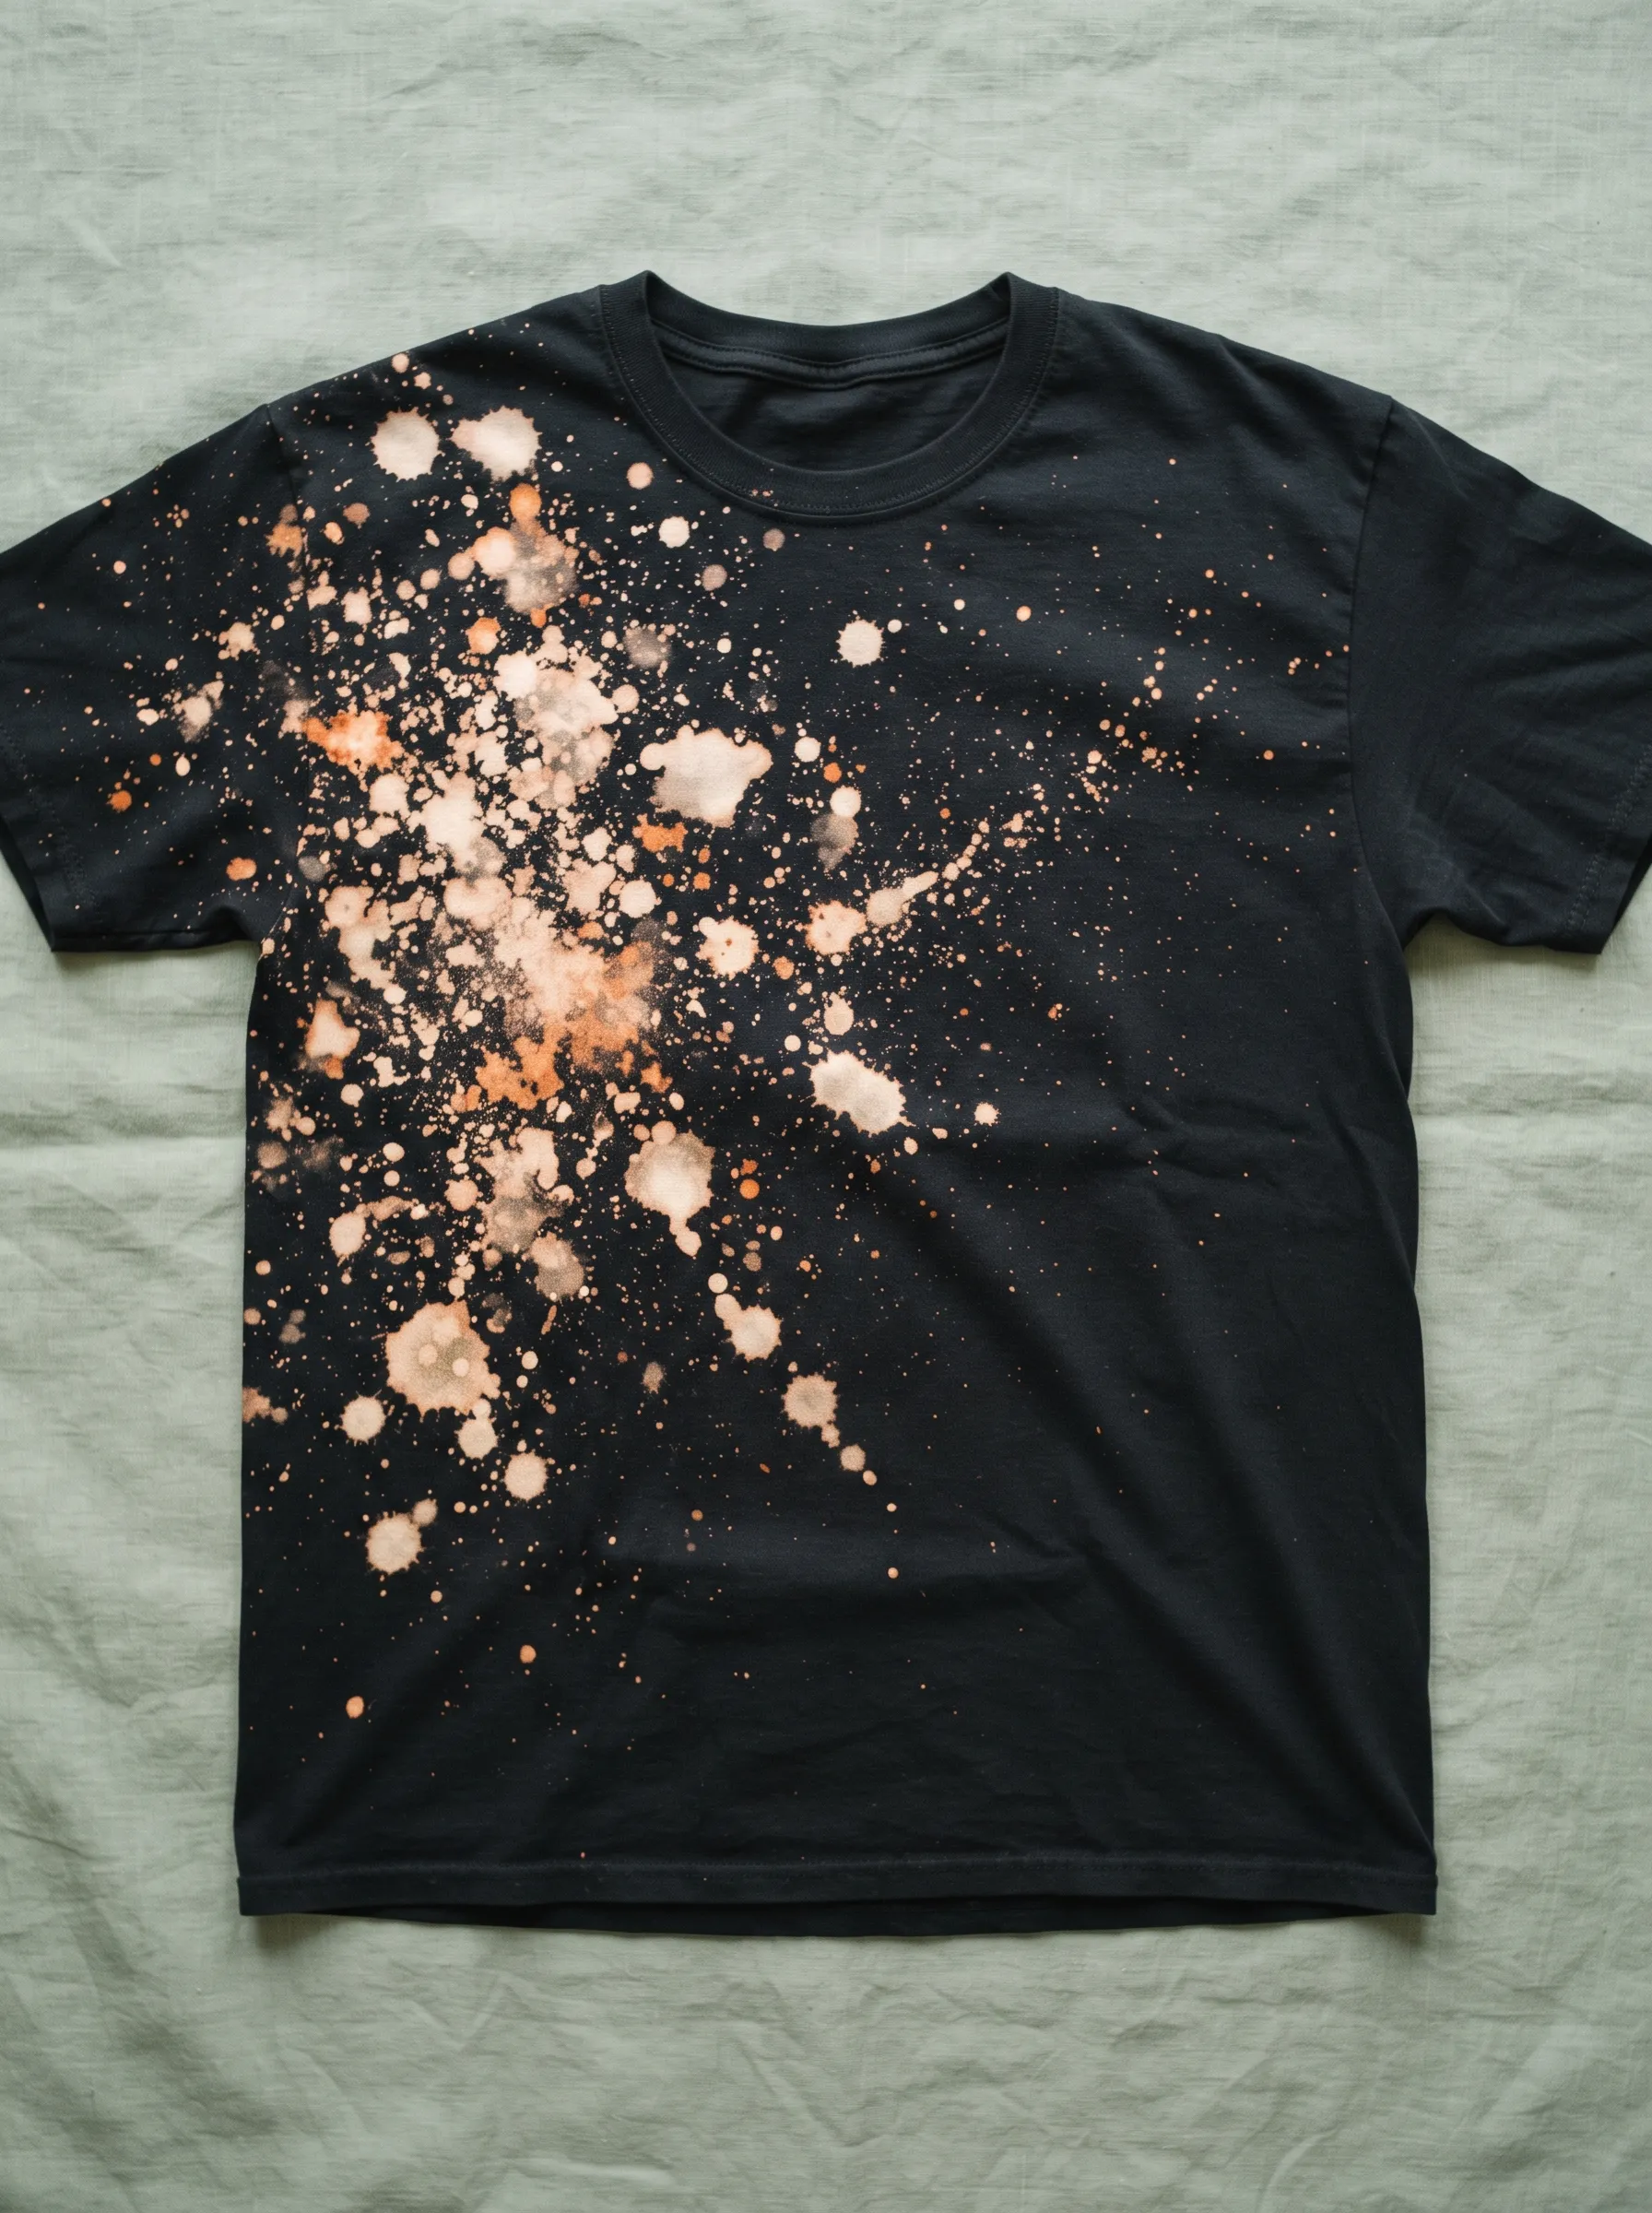
Warm orange and cream splatters cluster in one corner of this black shirt, fading outward into smaller isolated droplets. Diluted bleach mixed with water produces this soft, painterly effect, closer to watercolour art than traditional tie dye. Spray bottles set to a fine mist work wonders for the outer speckles, while direct application creates the denser cluster near the shoulder. Artists and creative types often choose this technique because it feels expressive rather than structured. Every splatter lands differently depending on fabric tension and bleach concentration, so testing on scrap fabric first helps avoid surprises. The gradient from concentrated colour to scattered dots gives movement to an otherwise plain garment. This design pairs nicely with minimalist outfits since the shirt itself carries enough visual interest on its own.
Tiger Ember Stripe
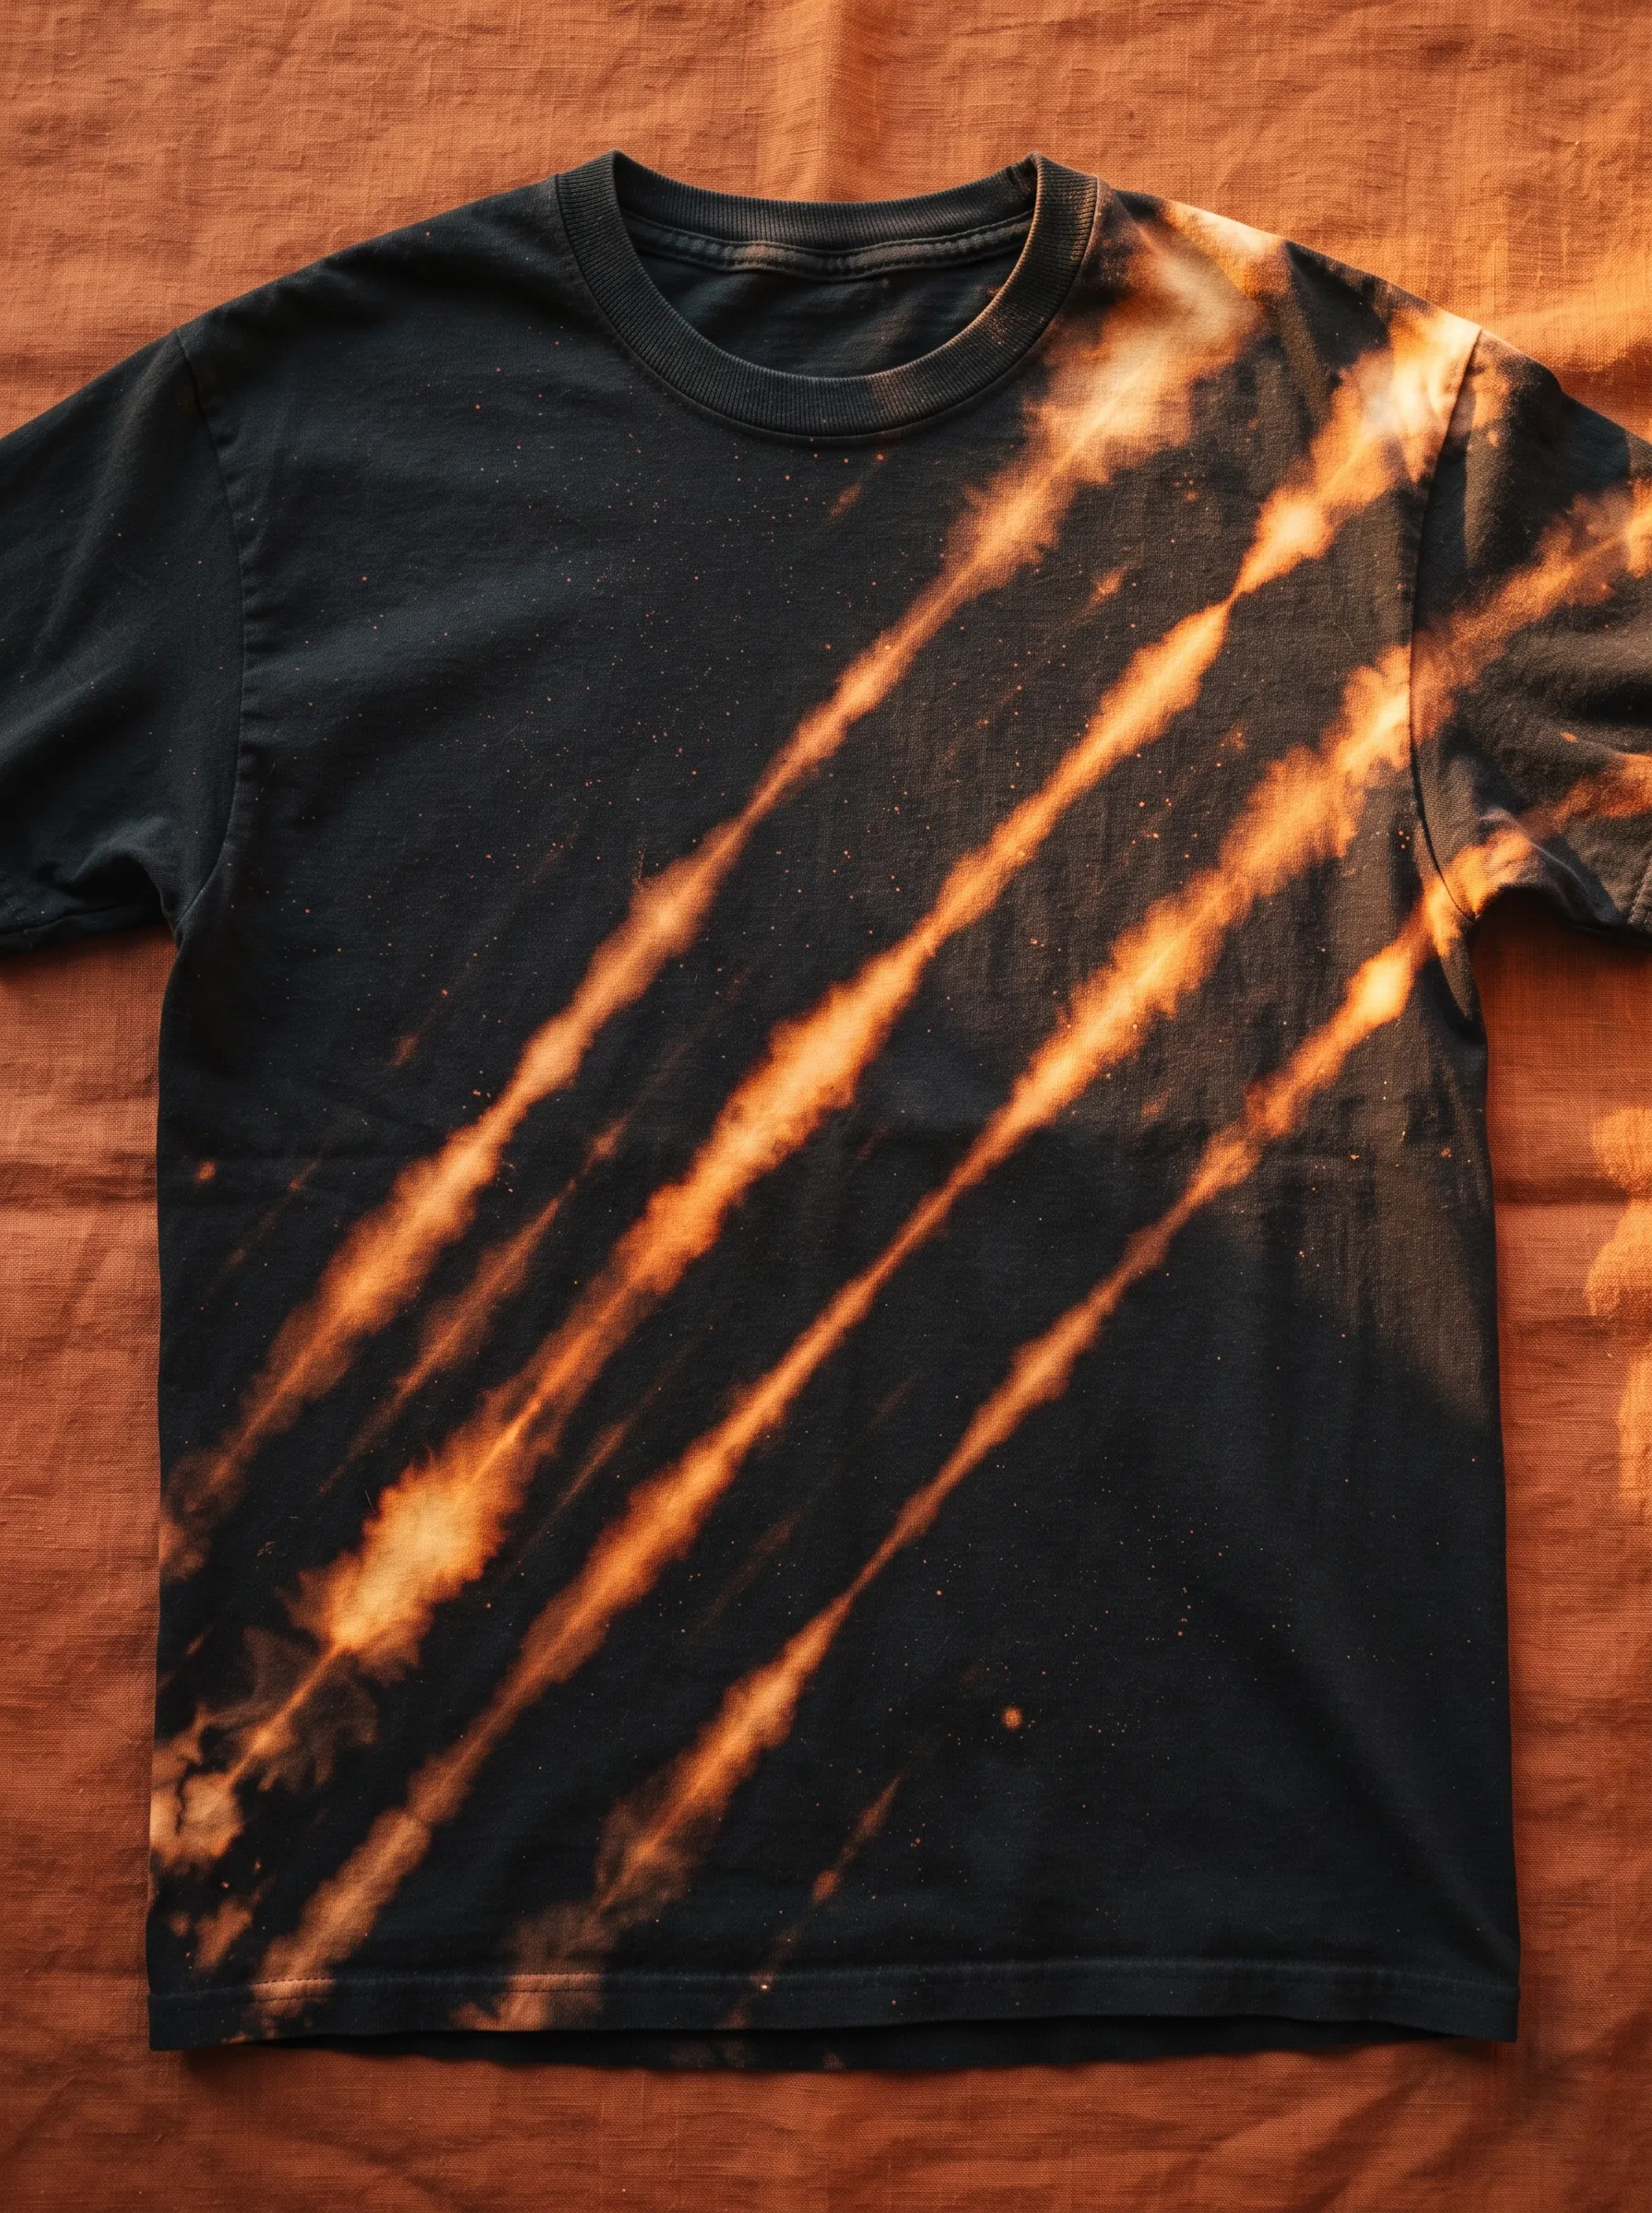
Bold diagonal streaks of orange and gold cut across this black shirt like claw marks or glowing embers caught mid motion. Folding the fabric into pleats before applying bleach along the ridges produces these parallel lines, and the technique rewards patience over speed. Rust coloured undertones emerge naturally when bleach reacts with certain black dyes, giving this design its fiery warmth without needing extra dye. Streetwear fans who want something with edge, but not full chaos often pick this pattern. Sunset or desert themed photoshoots complement this shirt especially well given its warm palette. Getting even stripe width takes practice, so folding fabric carefully and securing it with rubber bands before spraying helps maintain consistency across the whole design.
Storm Cloud Bleed
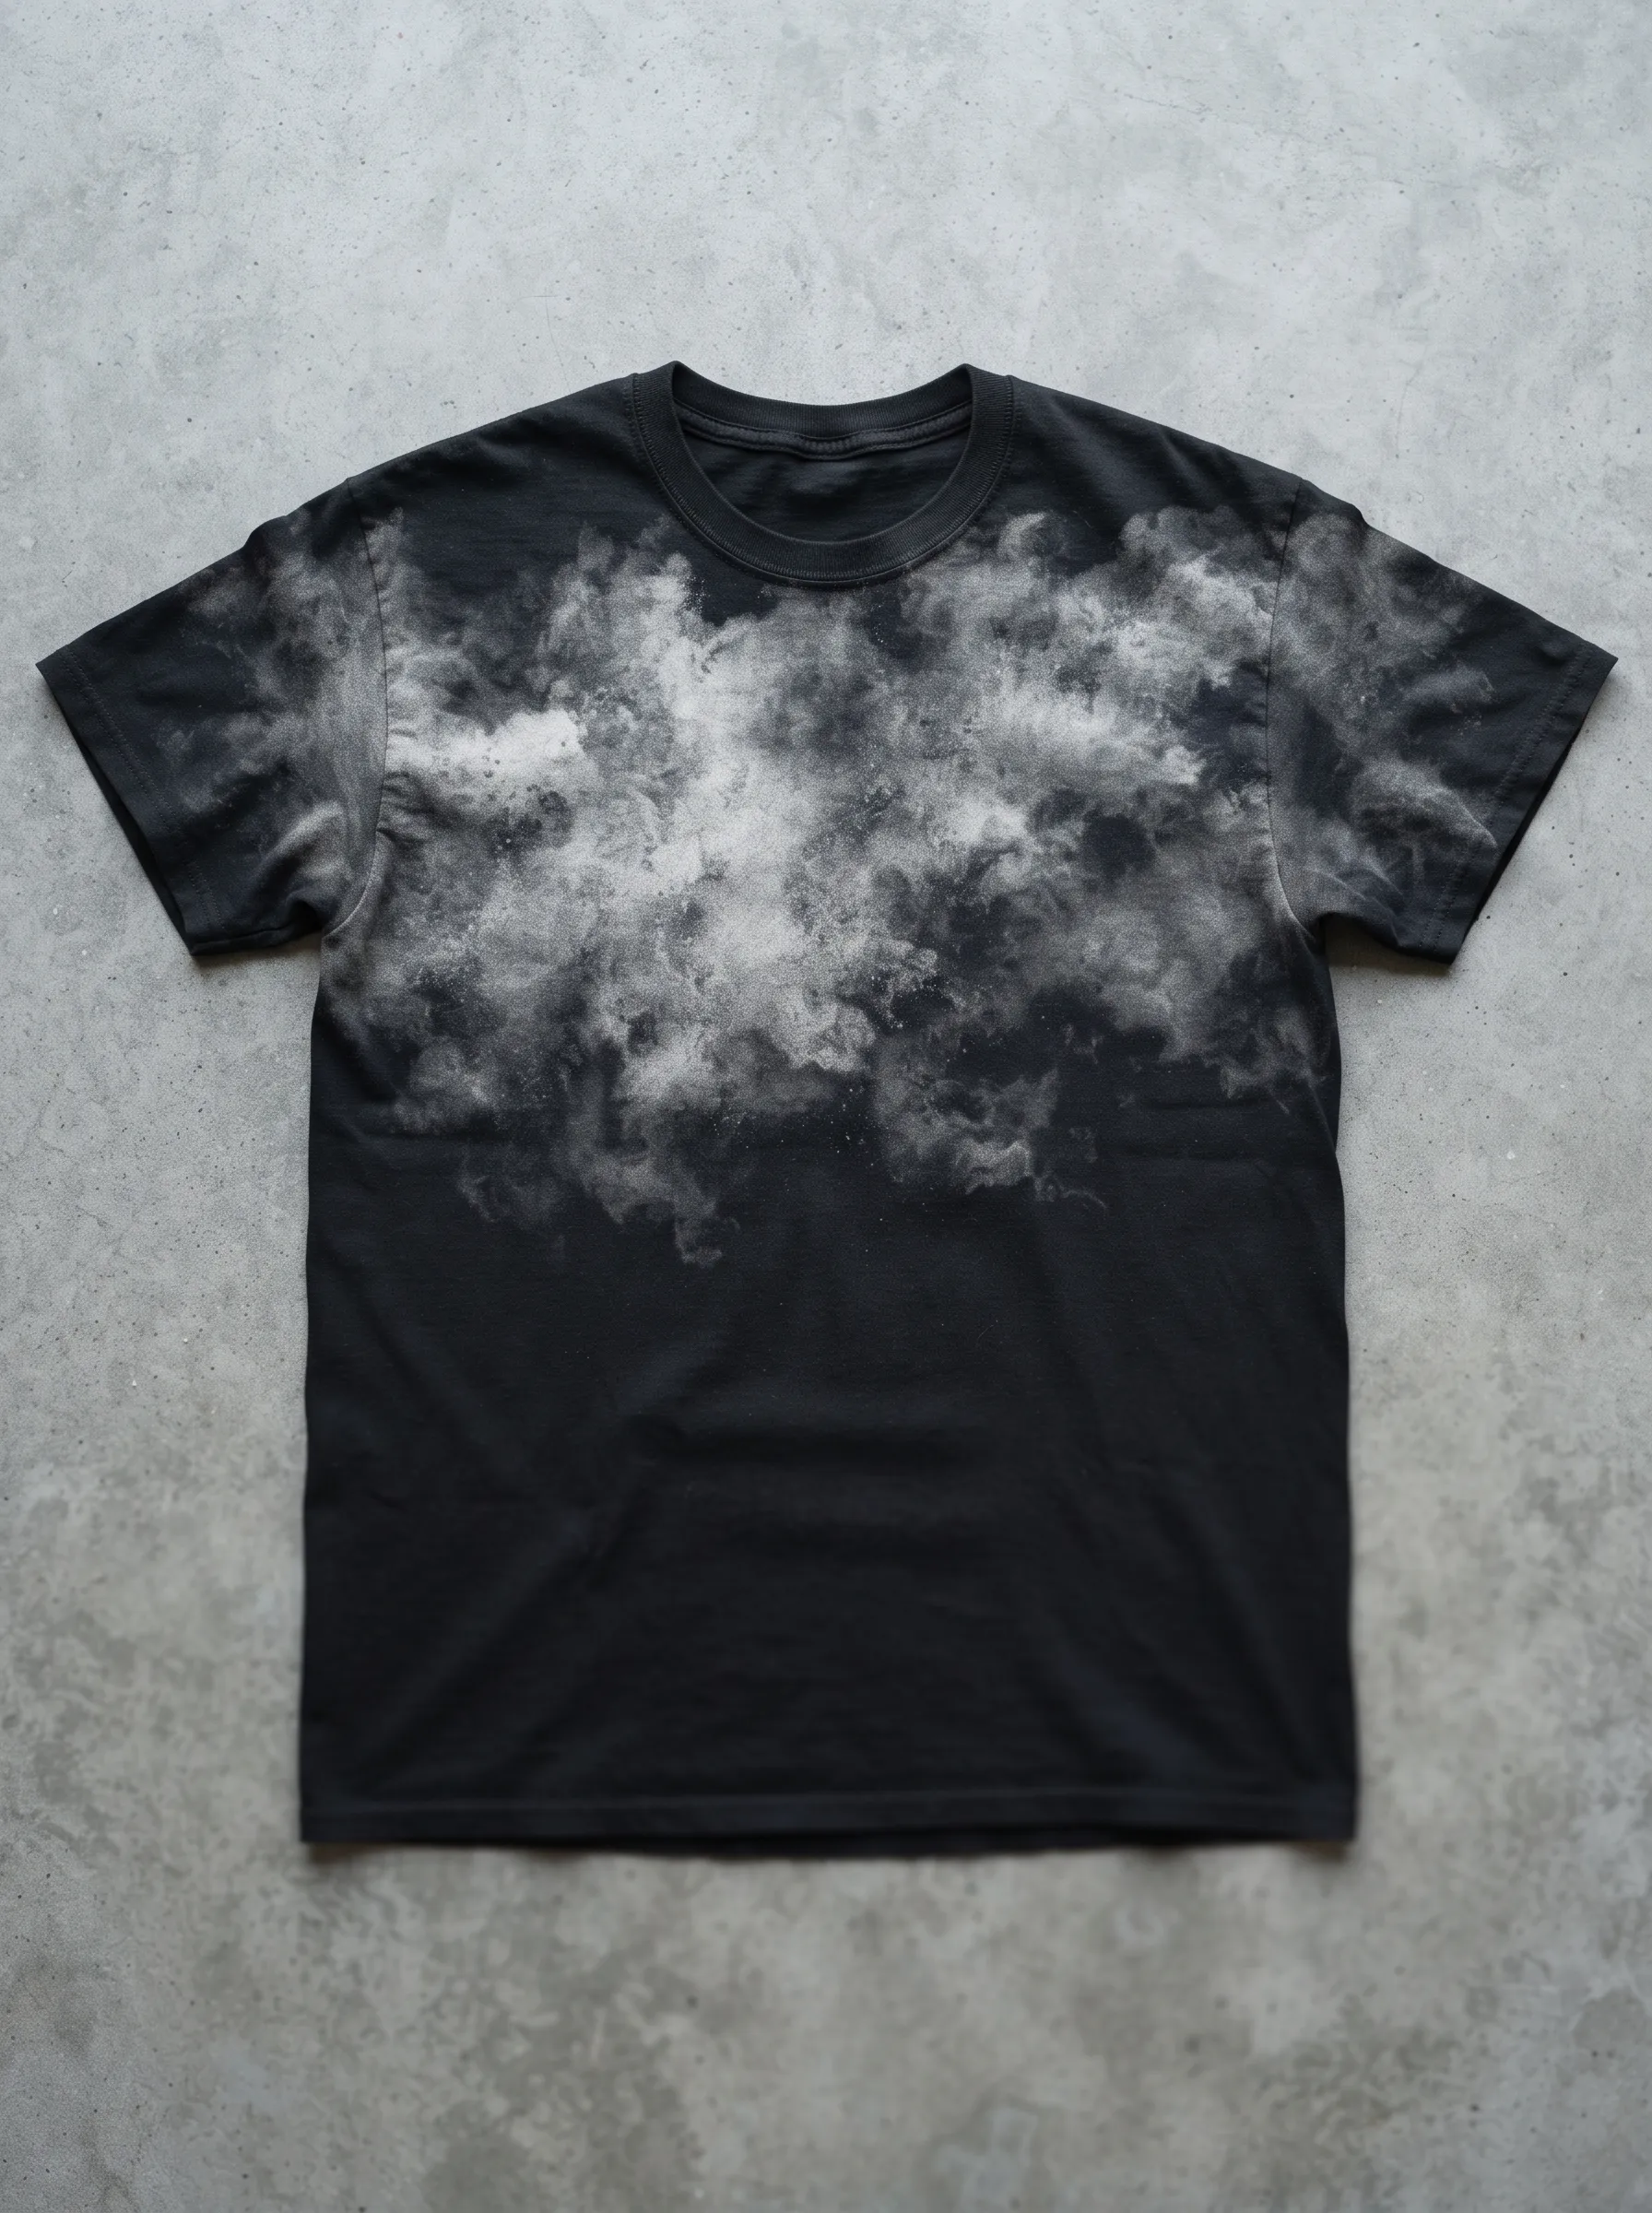
Soft grey and white masses billow across the upper chest of this shirt, resembling storm clouds rolling in before rain. Wetting the fabric first before applying bleach creates this blurred, atmospheric effect since the moisture lets the colour bleed and diffuse naturally. Sponges or spray bottles work for this technique, though sponges give more control over cloud density. Moody, minimalist wardrobes benefit from a shirt like this because the design reads as abstract art rather than a typical pattern. Concrete or stone backgrounds photograph well against this piece, echoing the industrial grey tones. Letting the bleach sit slightly longer than usual deepens the contrast between the white highlights and darker shadow areas within the cloud formation, adding dimension to the overall bleed.
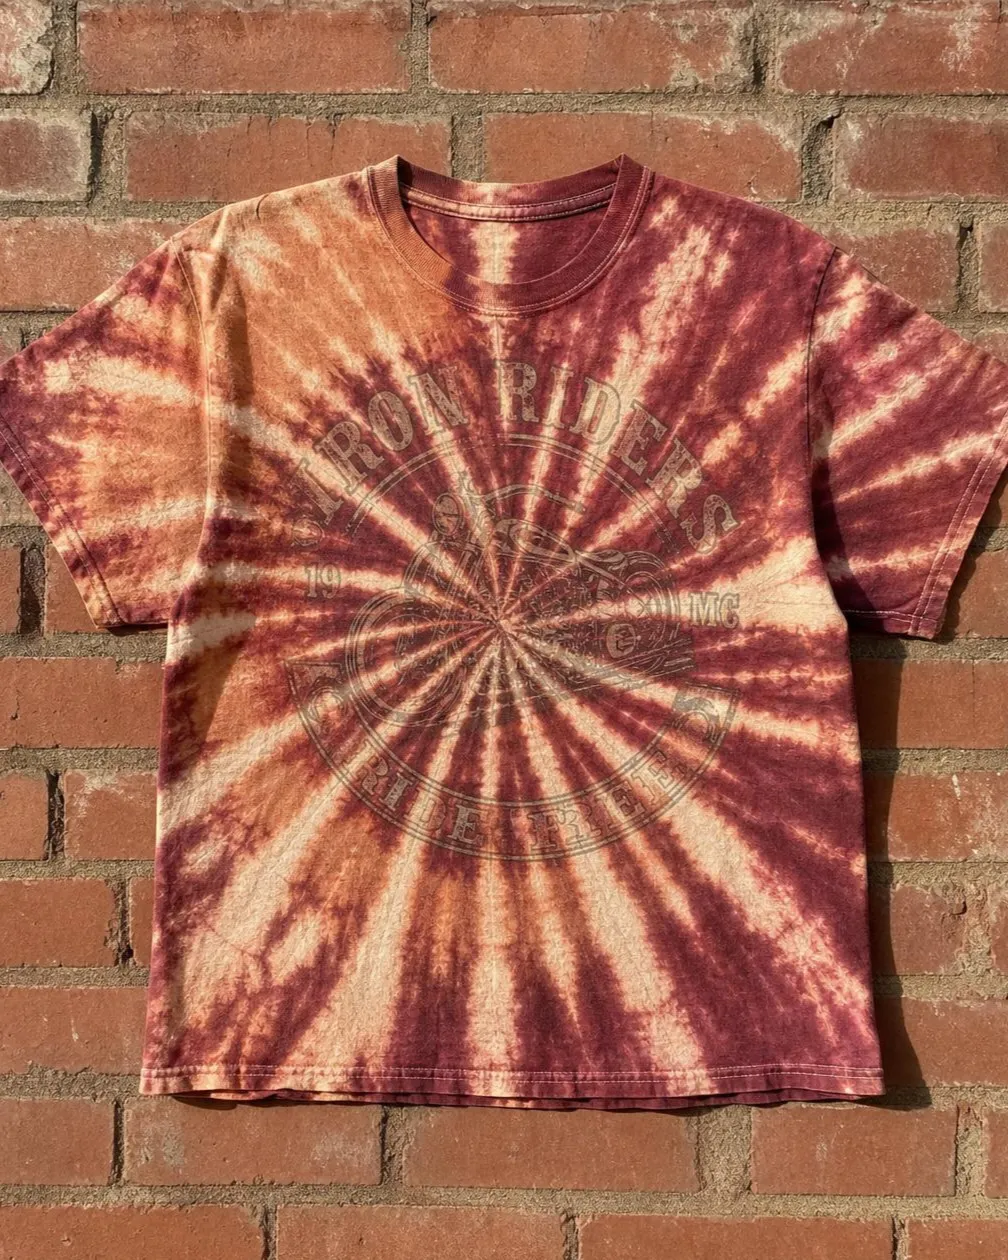
Shattered Mandala
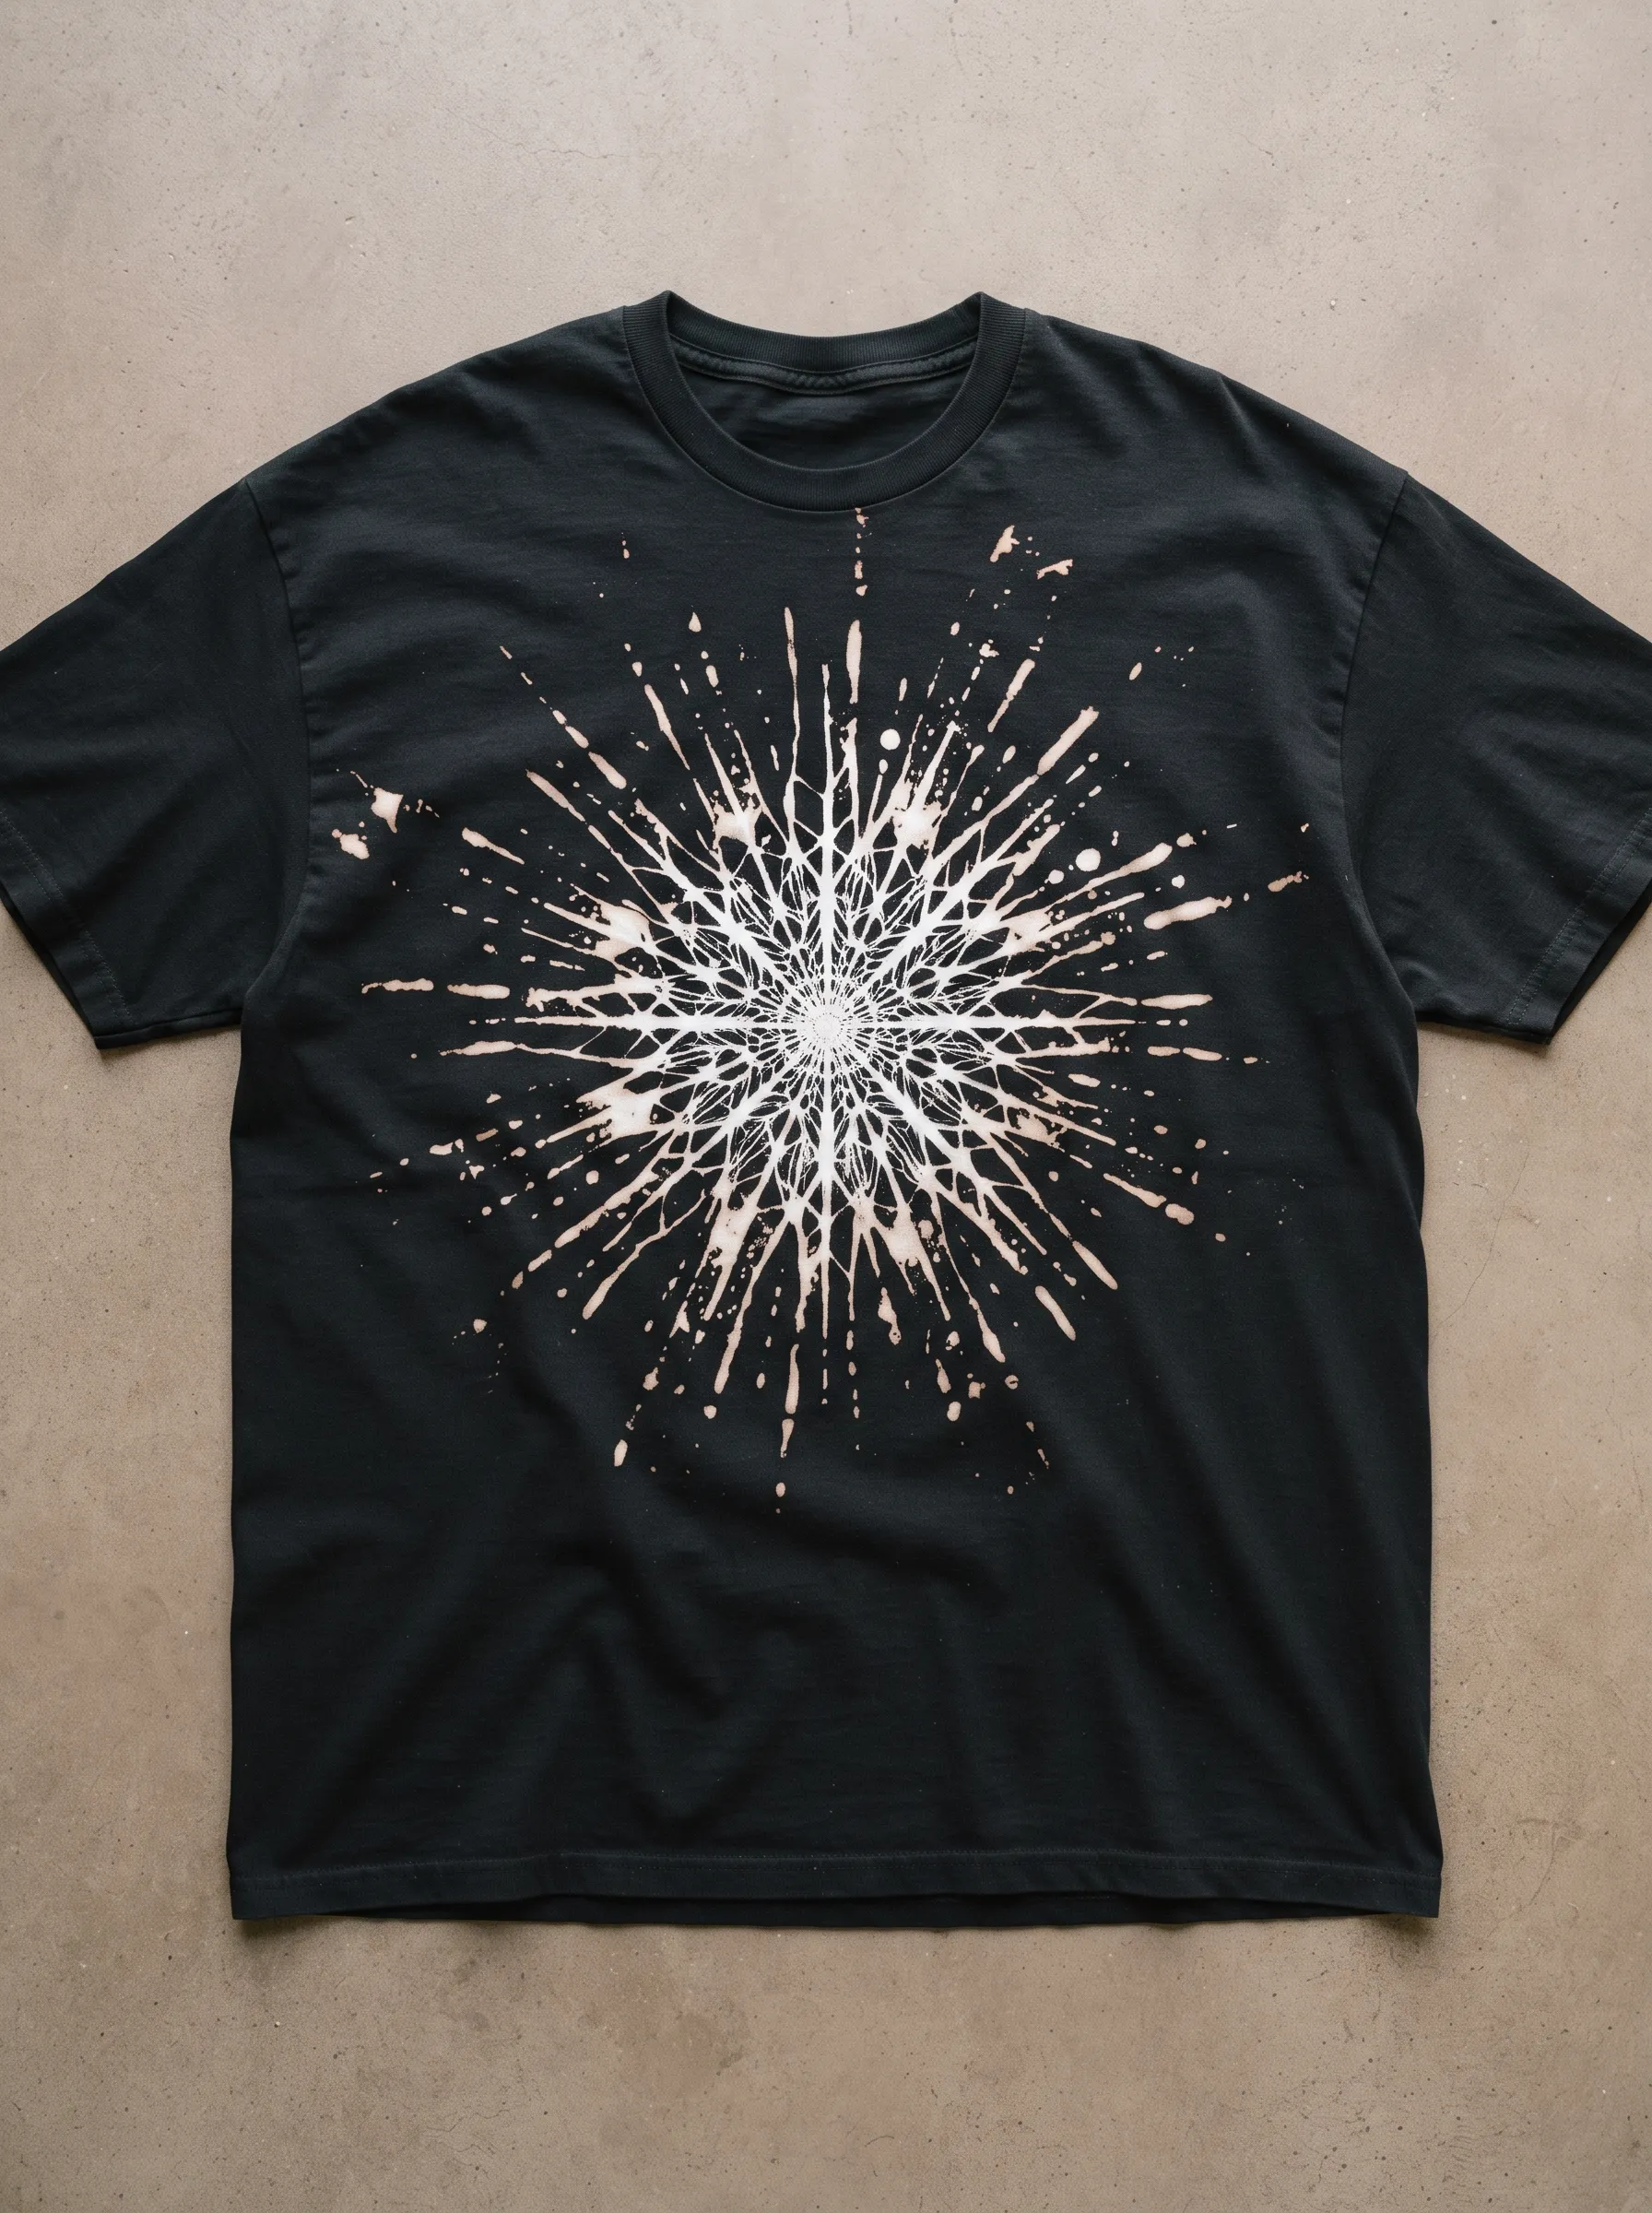
A radial burst of cracked white lines explodes from the shirt's centre, forming a fractured mandala across the chest. Folding the shirt into quarters before applying bleach at the fold lines creates this symmetrical starburst, with random splatter added afterward for texture. Bohemian and festival fashion crowds tend to love this design given its spiritual, geometric roots. Getting clean symmetry requires marking the fabric's centre point first, then working outward in even sections. Neutral toned backdrops like sand or concrete let the intricate linework stand out clearly in photos. This technique takes longer than most bleach methods on this list, but the payoff delivers a genuinely unique wearable art piece that looks handcrafted rather than mass produced.
Marbled Ink Drop
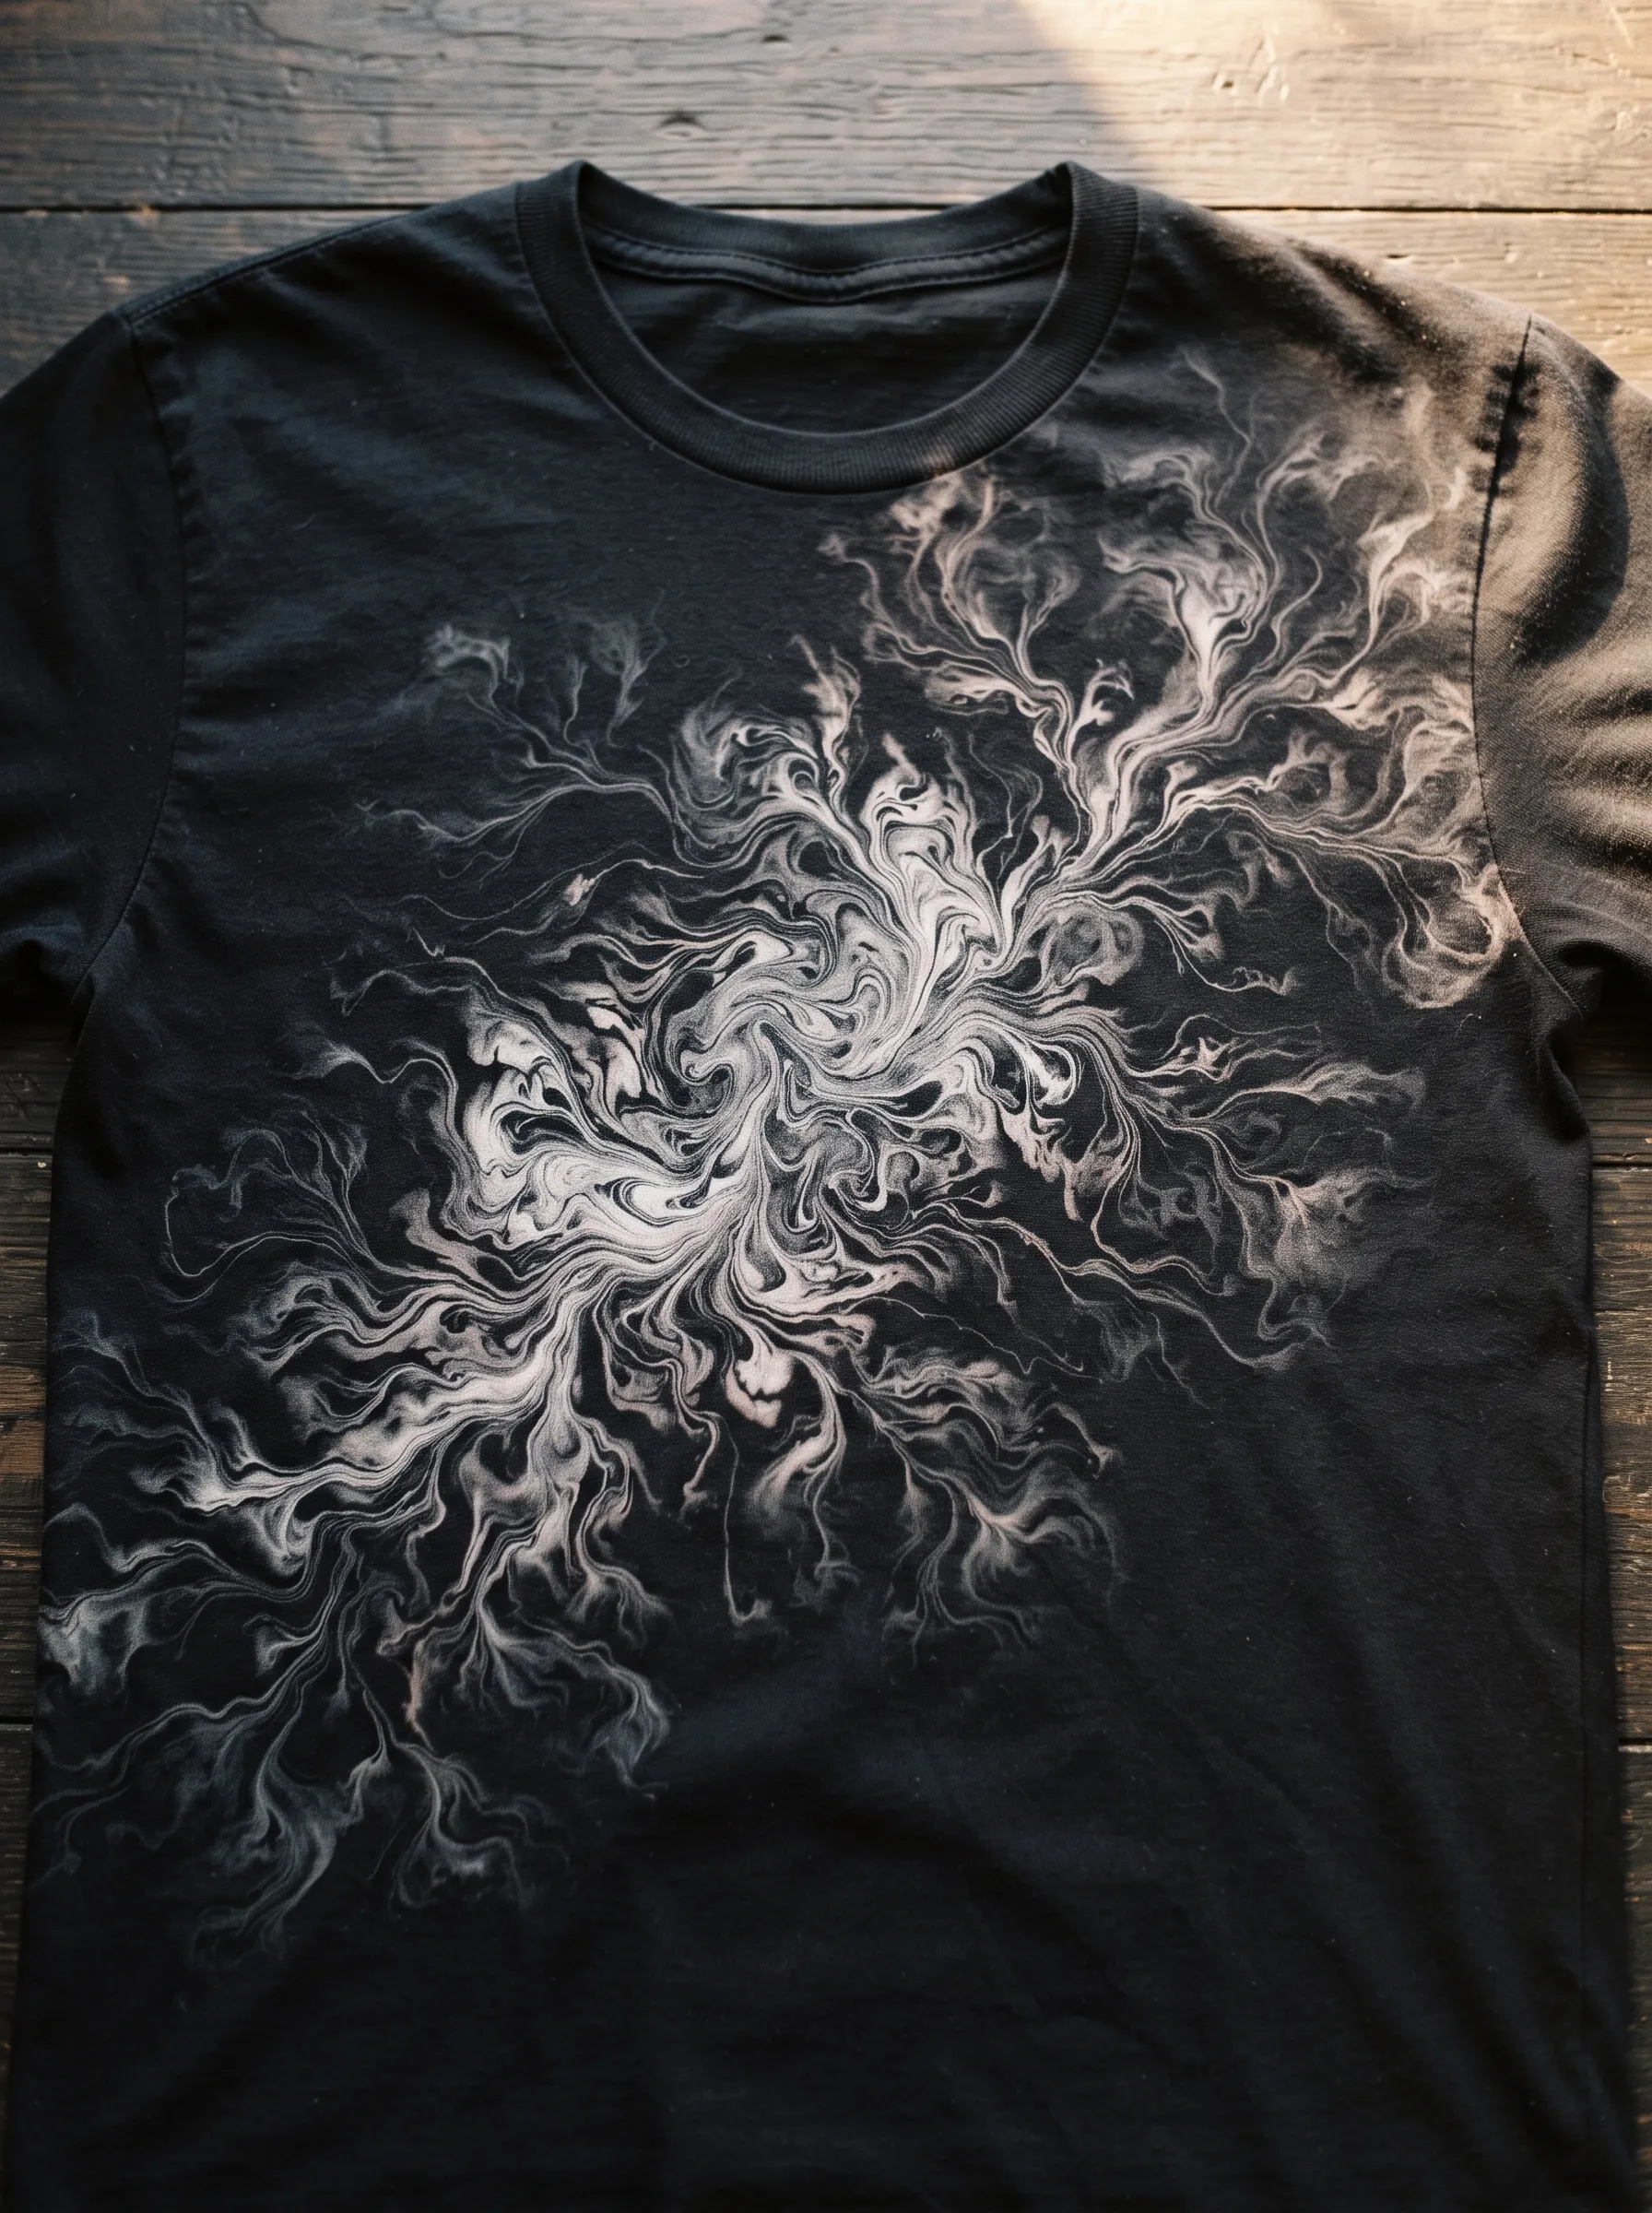
Swirling grey and white patterns twist across this shirt like ink dropped into water and left to spread. Applying bleach unevenly, then using a brush or stick to swirl it while still wet, produces these organic, flowing shapes. Wood grain backgrounds pair naturally with this design since both share that same twisting, veined quality. Fashion lovers drawn to abstract expressionist art often request this style because no two shirts ever turn out alike. Working quickly matters here since bleach starts setting fast once it hits the fabric fibres. Adding water to slow the reaction time gives more room to manipulate the swirls before they lock into place, resulting in richer, more layered textures throughout the design.
Crescent Moon Phase
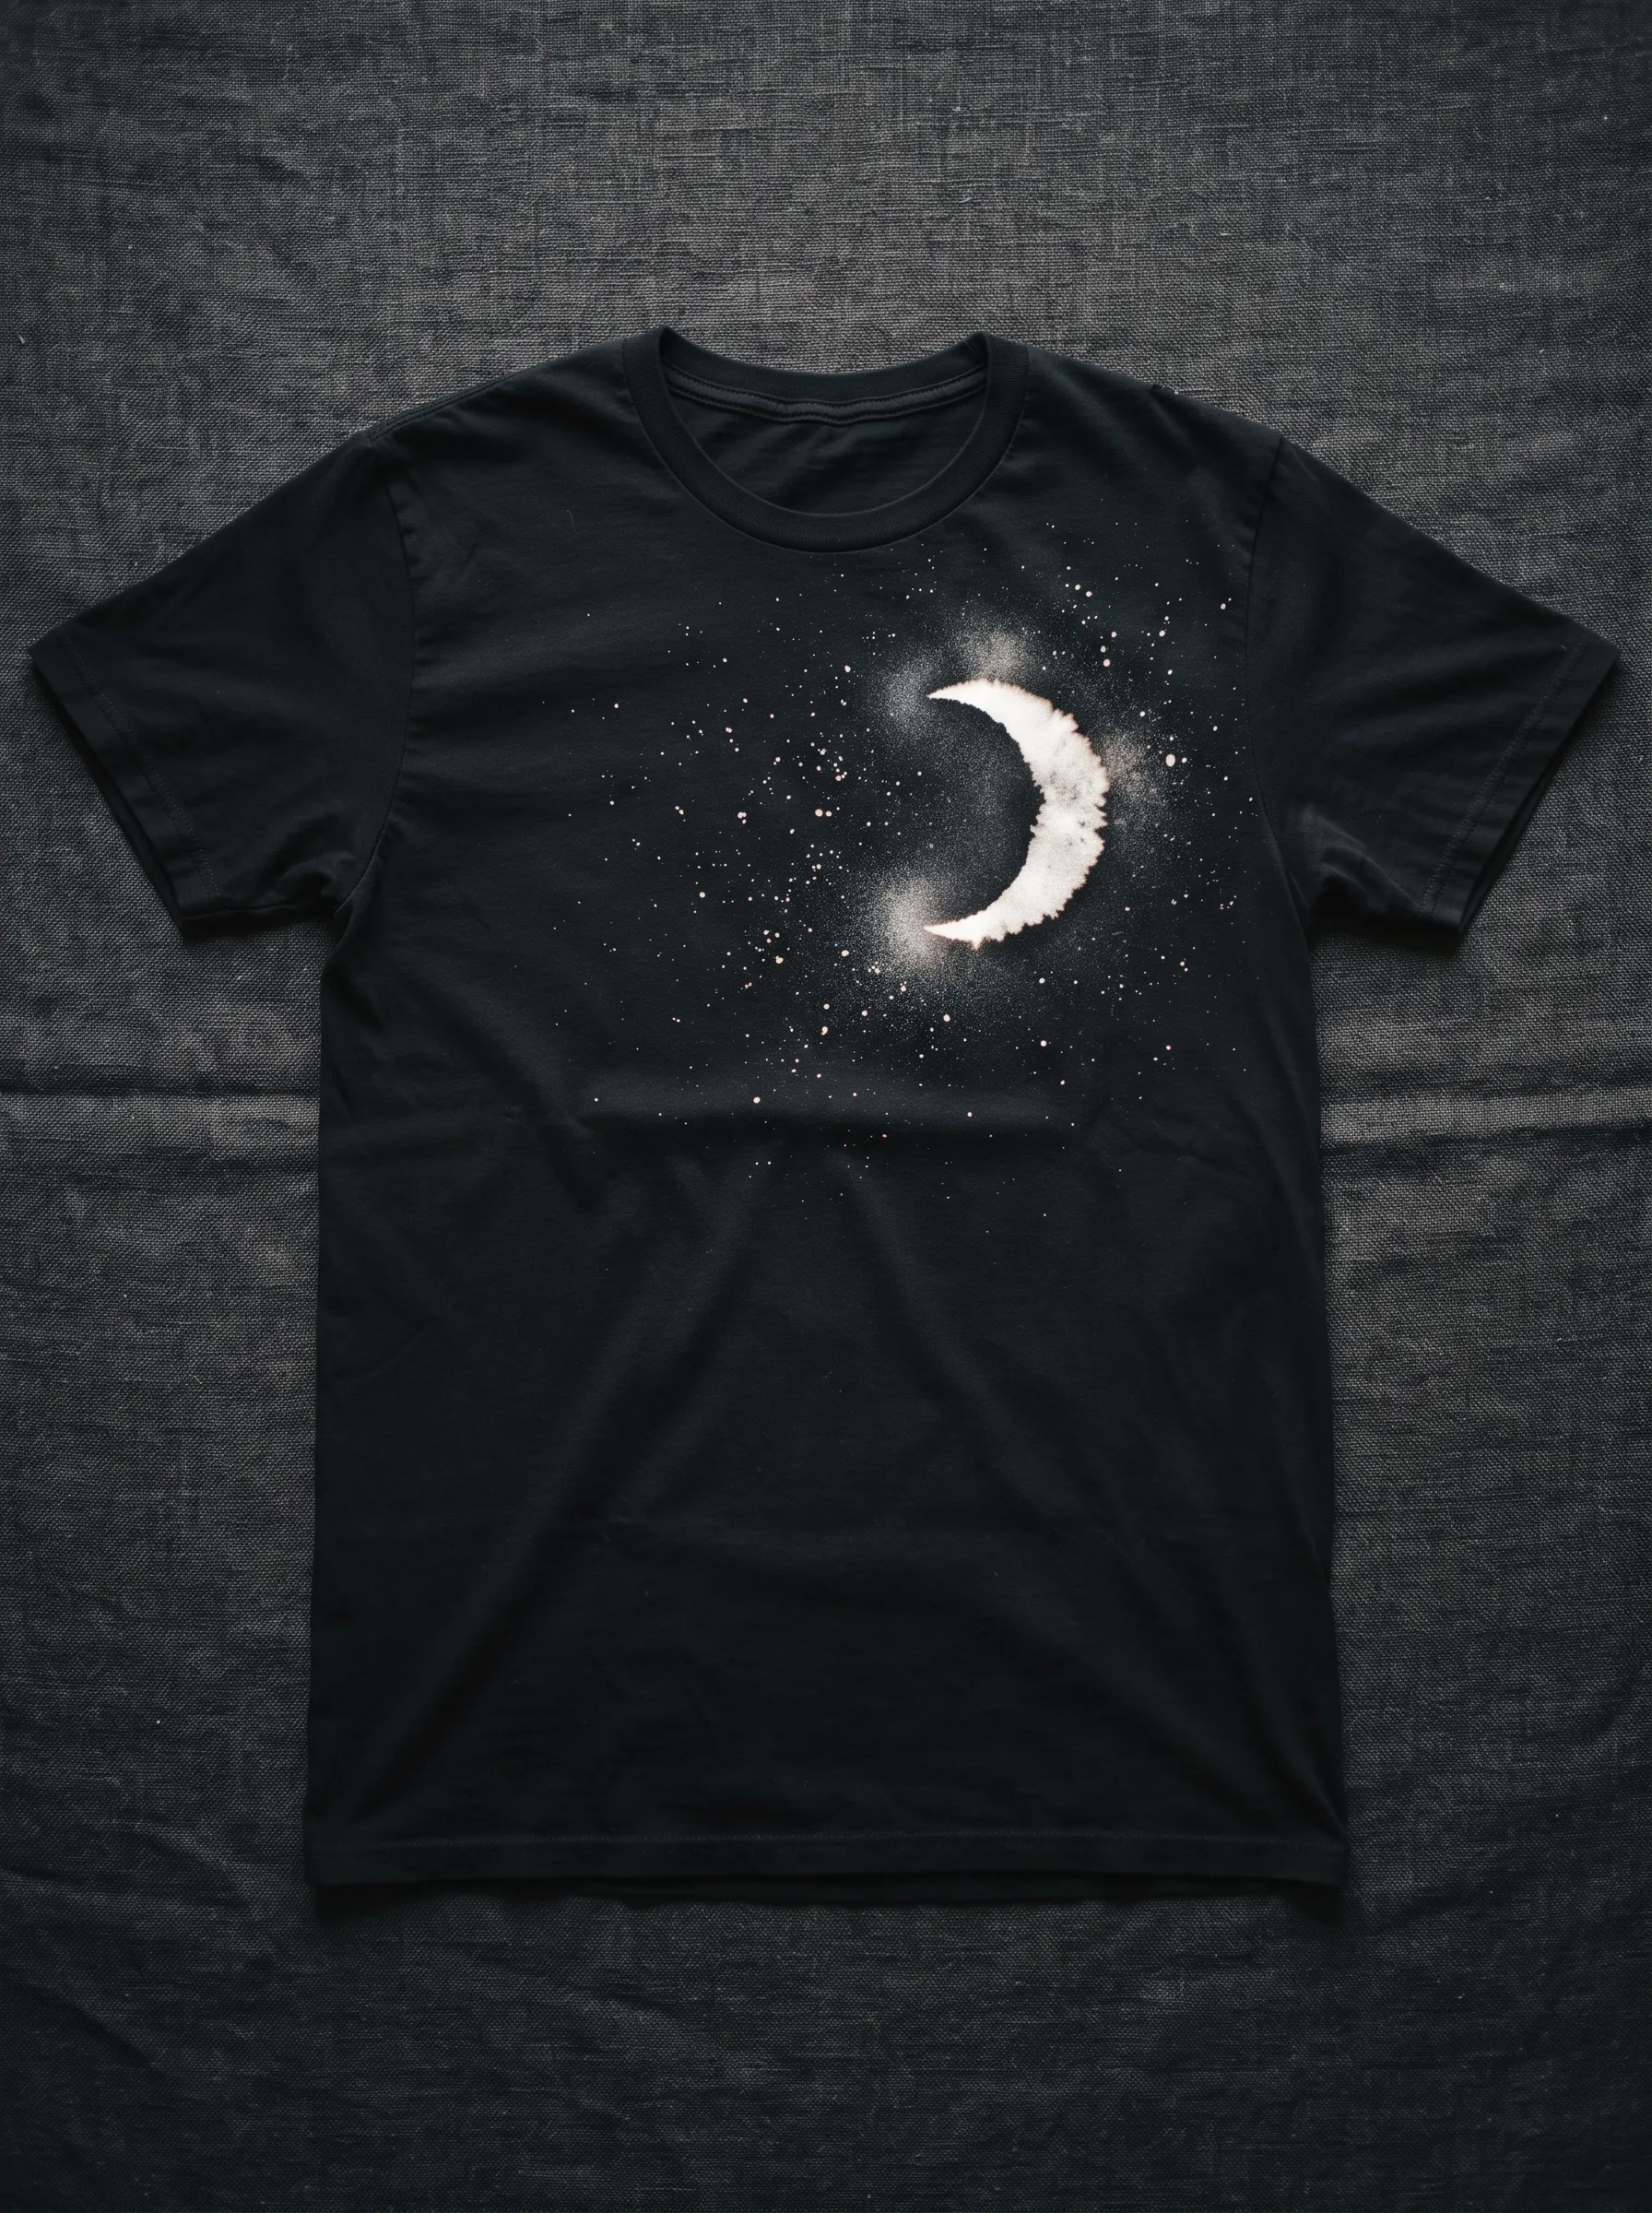
A glowing white crescent sits surrounded by scattered stars on this shirt, capturing a quiet night sky moment. Stencilling a moon shape before spraying bleach around it creates the sharp curved edge, while a fine mist technique handles the surrounding stardust. Charcoal linen textures behind this shirt highlight its soft, muted colour palette beautifully. Dreamy, romantic wardrobes benefit from this design since it feels gentle compared to bolder bleach patterns on this list. Positioning the moon slightly off centre rather than dead middle gives the composition a more natural, photographic feel. Light dabbing around the stencil edge softens the moon's glow, mimicking the way real moonlight diffuses into a dark sky rather than cutting sharply against it.
Sunset Ombre Horizon
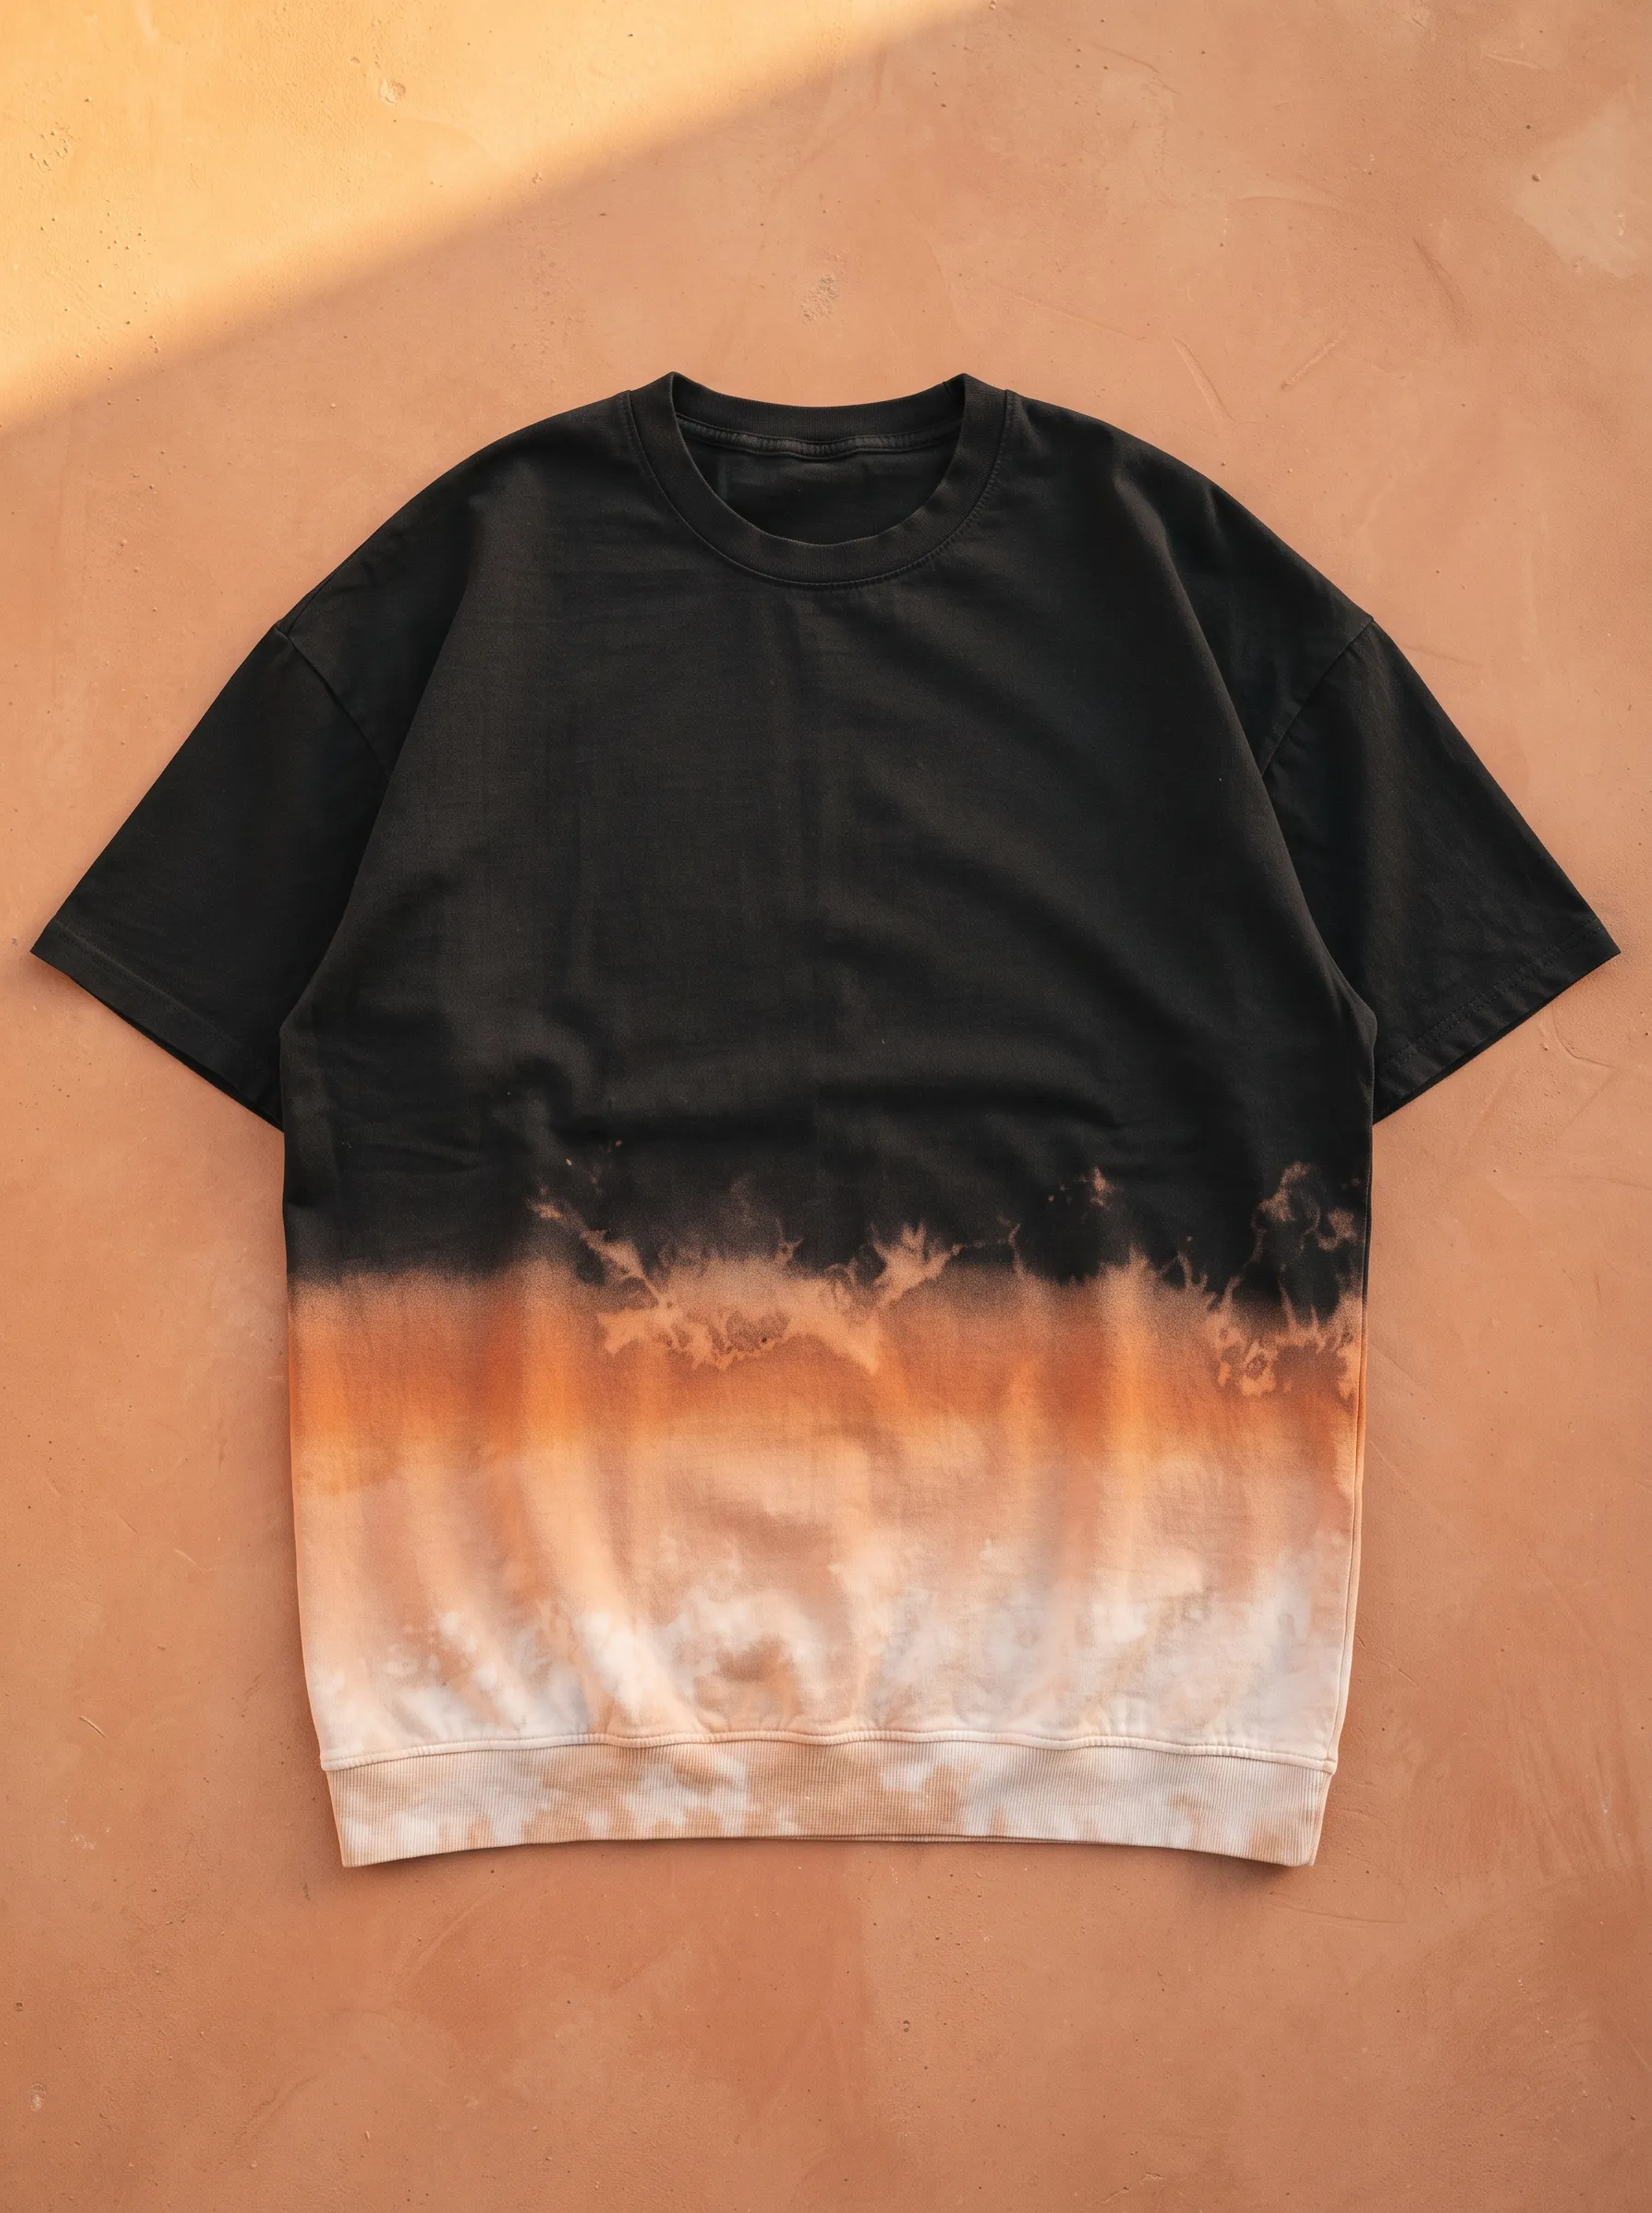
This shirt transitions from solid black at the collar down through burnt orange and finally into soft cream near the hem, mimicking an actual sunset. Dip dye techniques using diluted bleach in graduated concentrations create this smooth gradient effect. Terracotta or clay-coloured backgrounds complement the warm tones running through this design. Minimalists who want subtle colour shift without busy patterns often reach for this style first. Achieving a clean gradient means dipping the fabric slowly and lifting it in stages, letting each section develop before moving to the next. Oversized fits work particularly well with this design since the extra fabric gives the gradient more room to unfold across the body.
Lightning Fracture
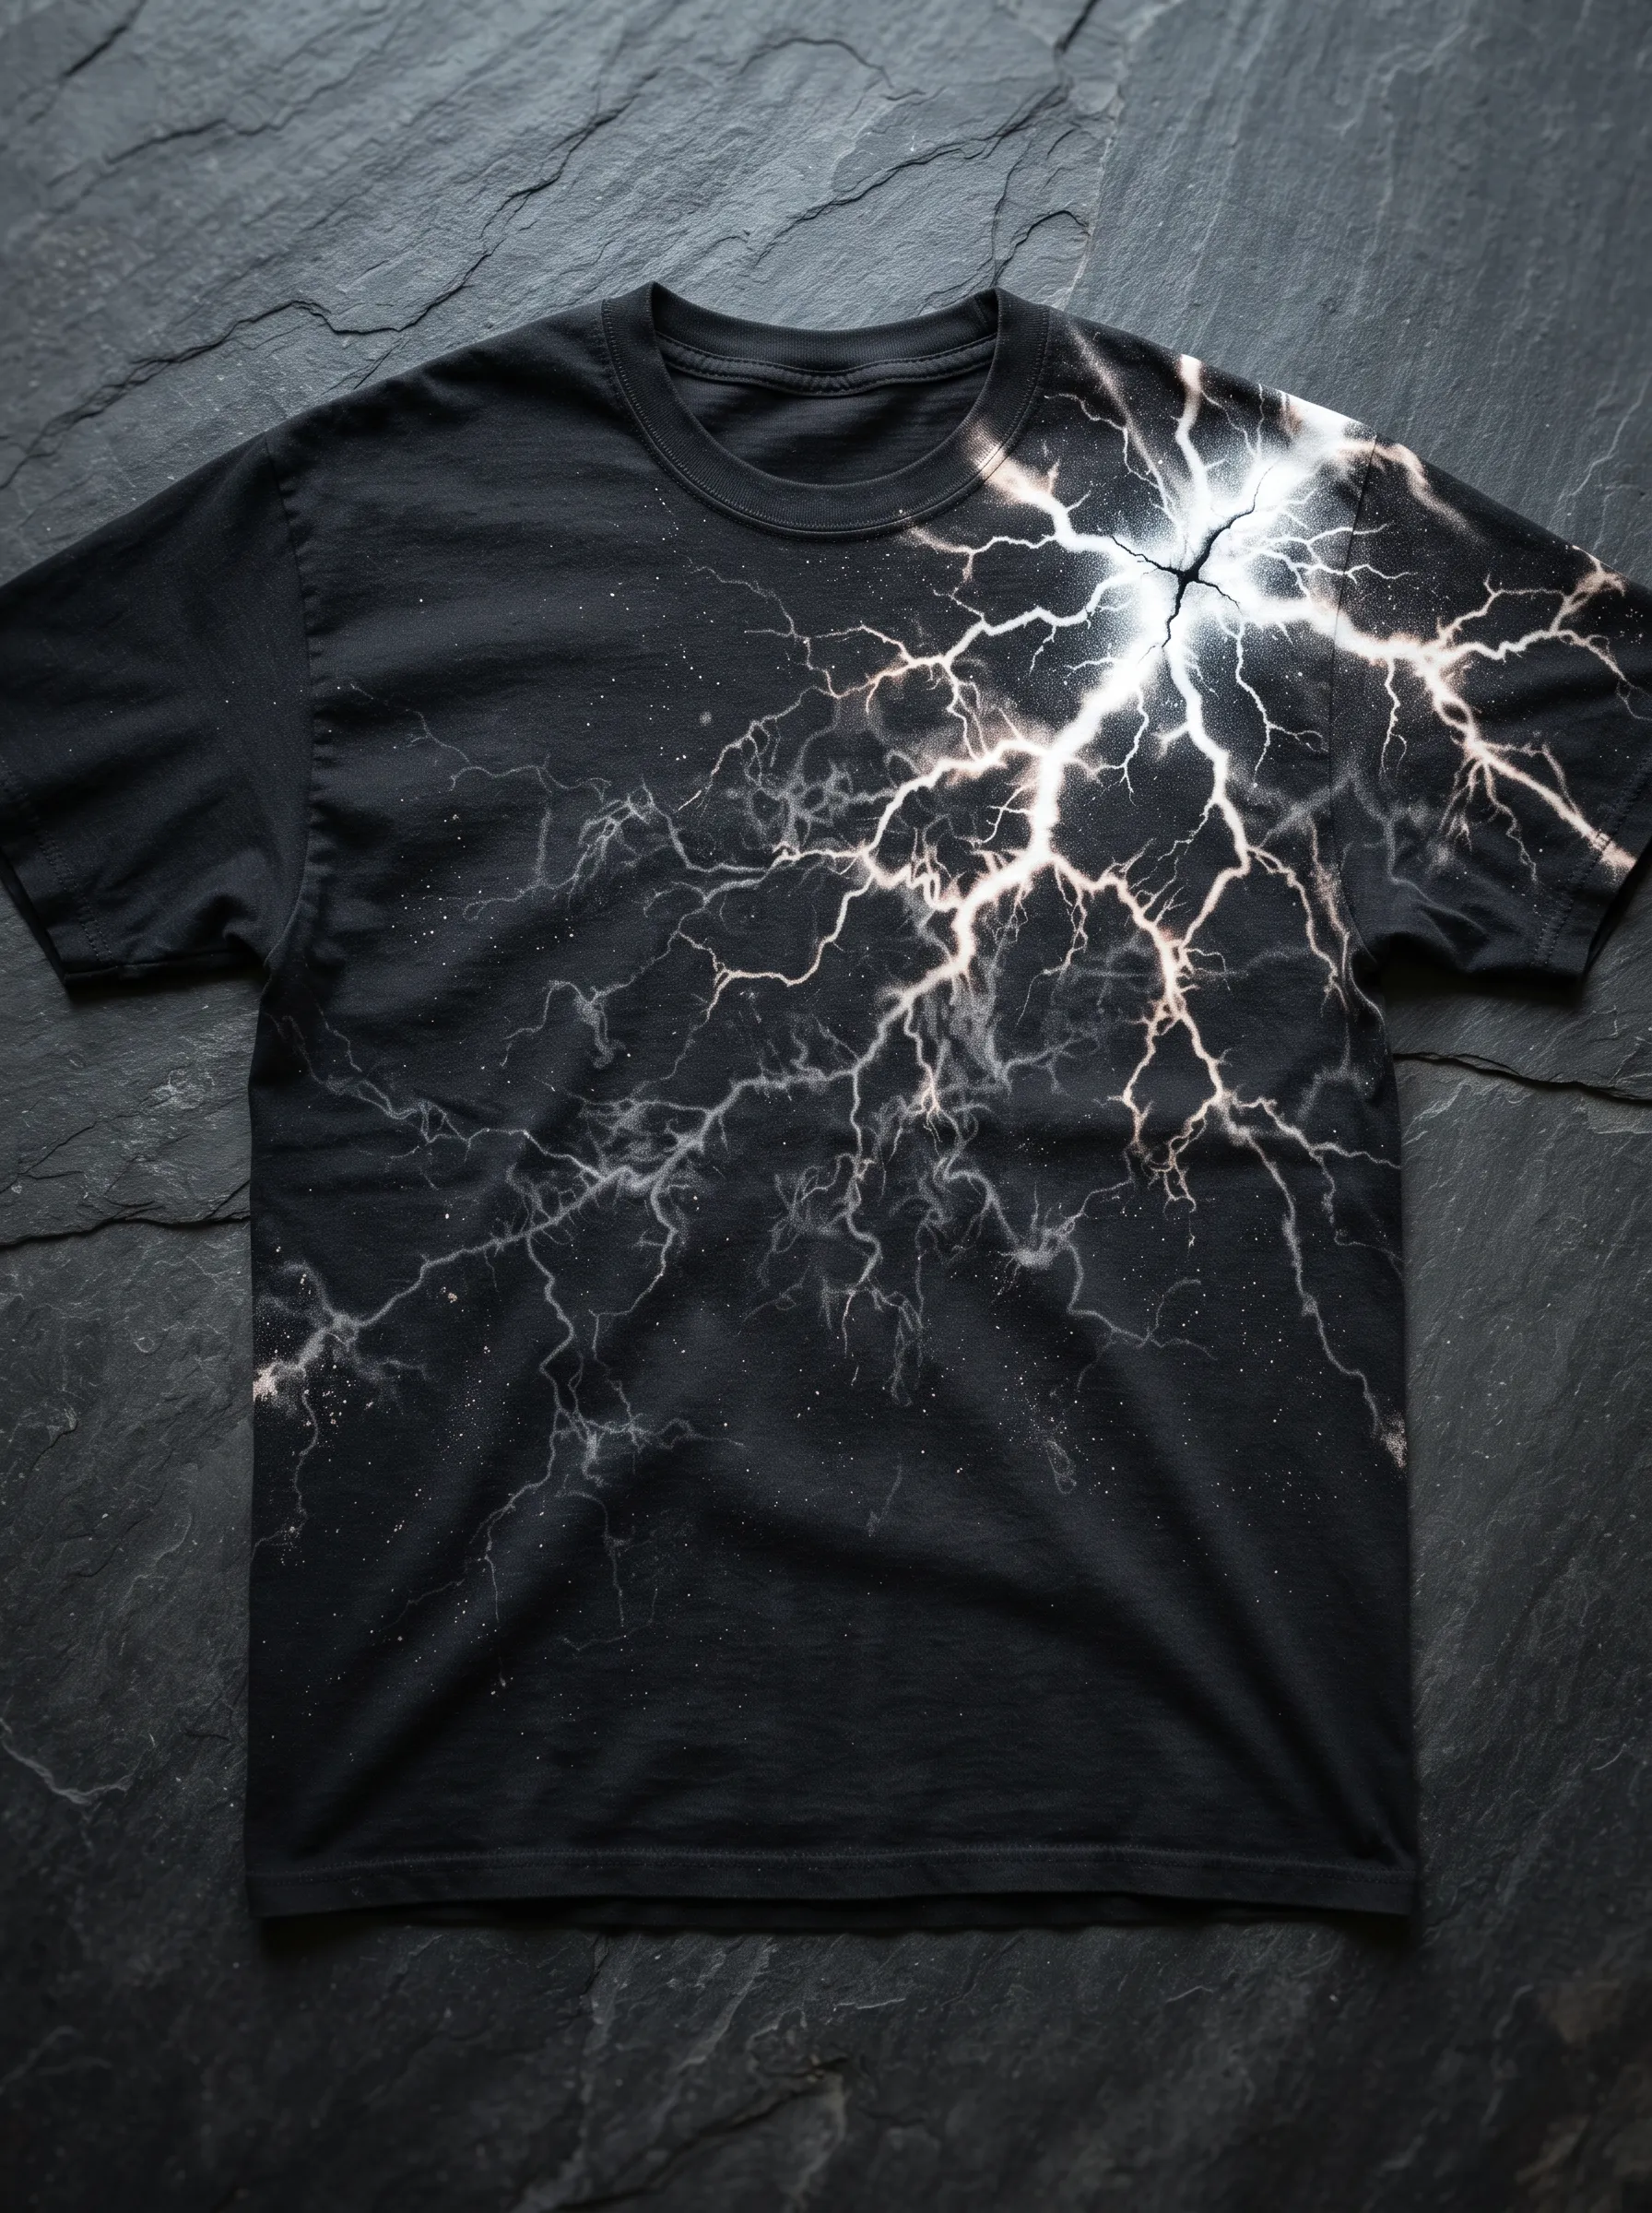
Bright white bolts fracture across the shoulder of this shirt, radiating outward like an actual lightning strike caught on camera. Direct bleach application along a zigzag path, followed by feathering the edges with a damp cloth, creates this electric effect. Slate or dark stone backgrounds echo the shirt's dramatic, high contrast palette. Rock and alternative fashion crowds gravitate toward this design because of its raw, energetic feel. Building the bolt in layers, starting thin and widening toward the strike point, gives the pattern realistic proportion. Speckled bleach dots scattered around the main bolt suggest static energy crackling through the air, rounding out the storm inspired theme nicely.
Reverse Galaxy Nebula
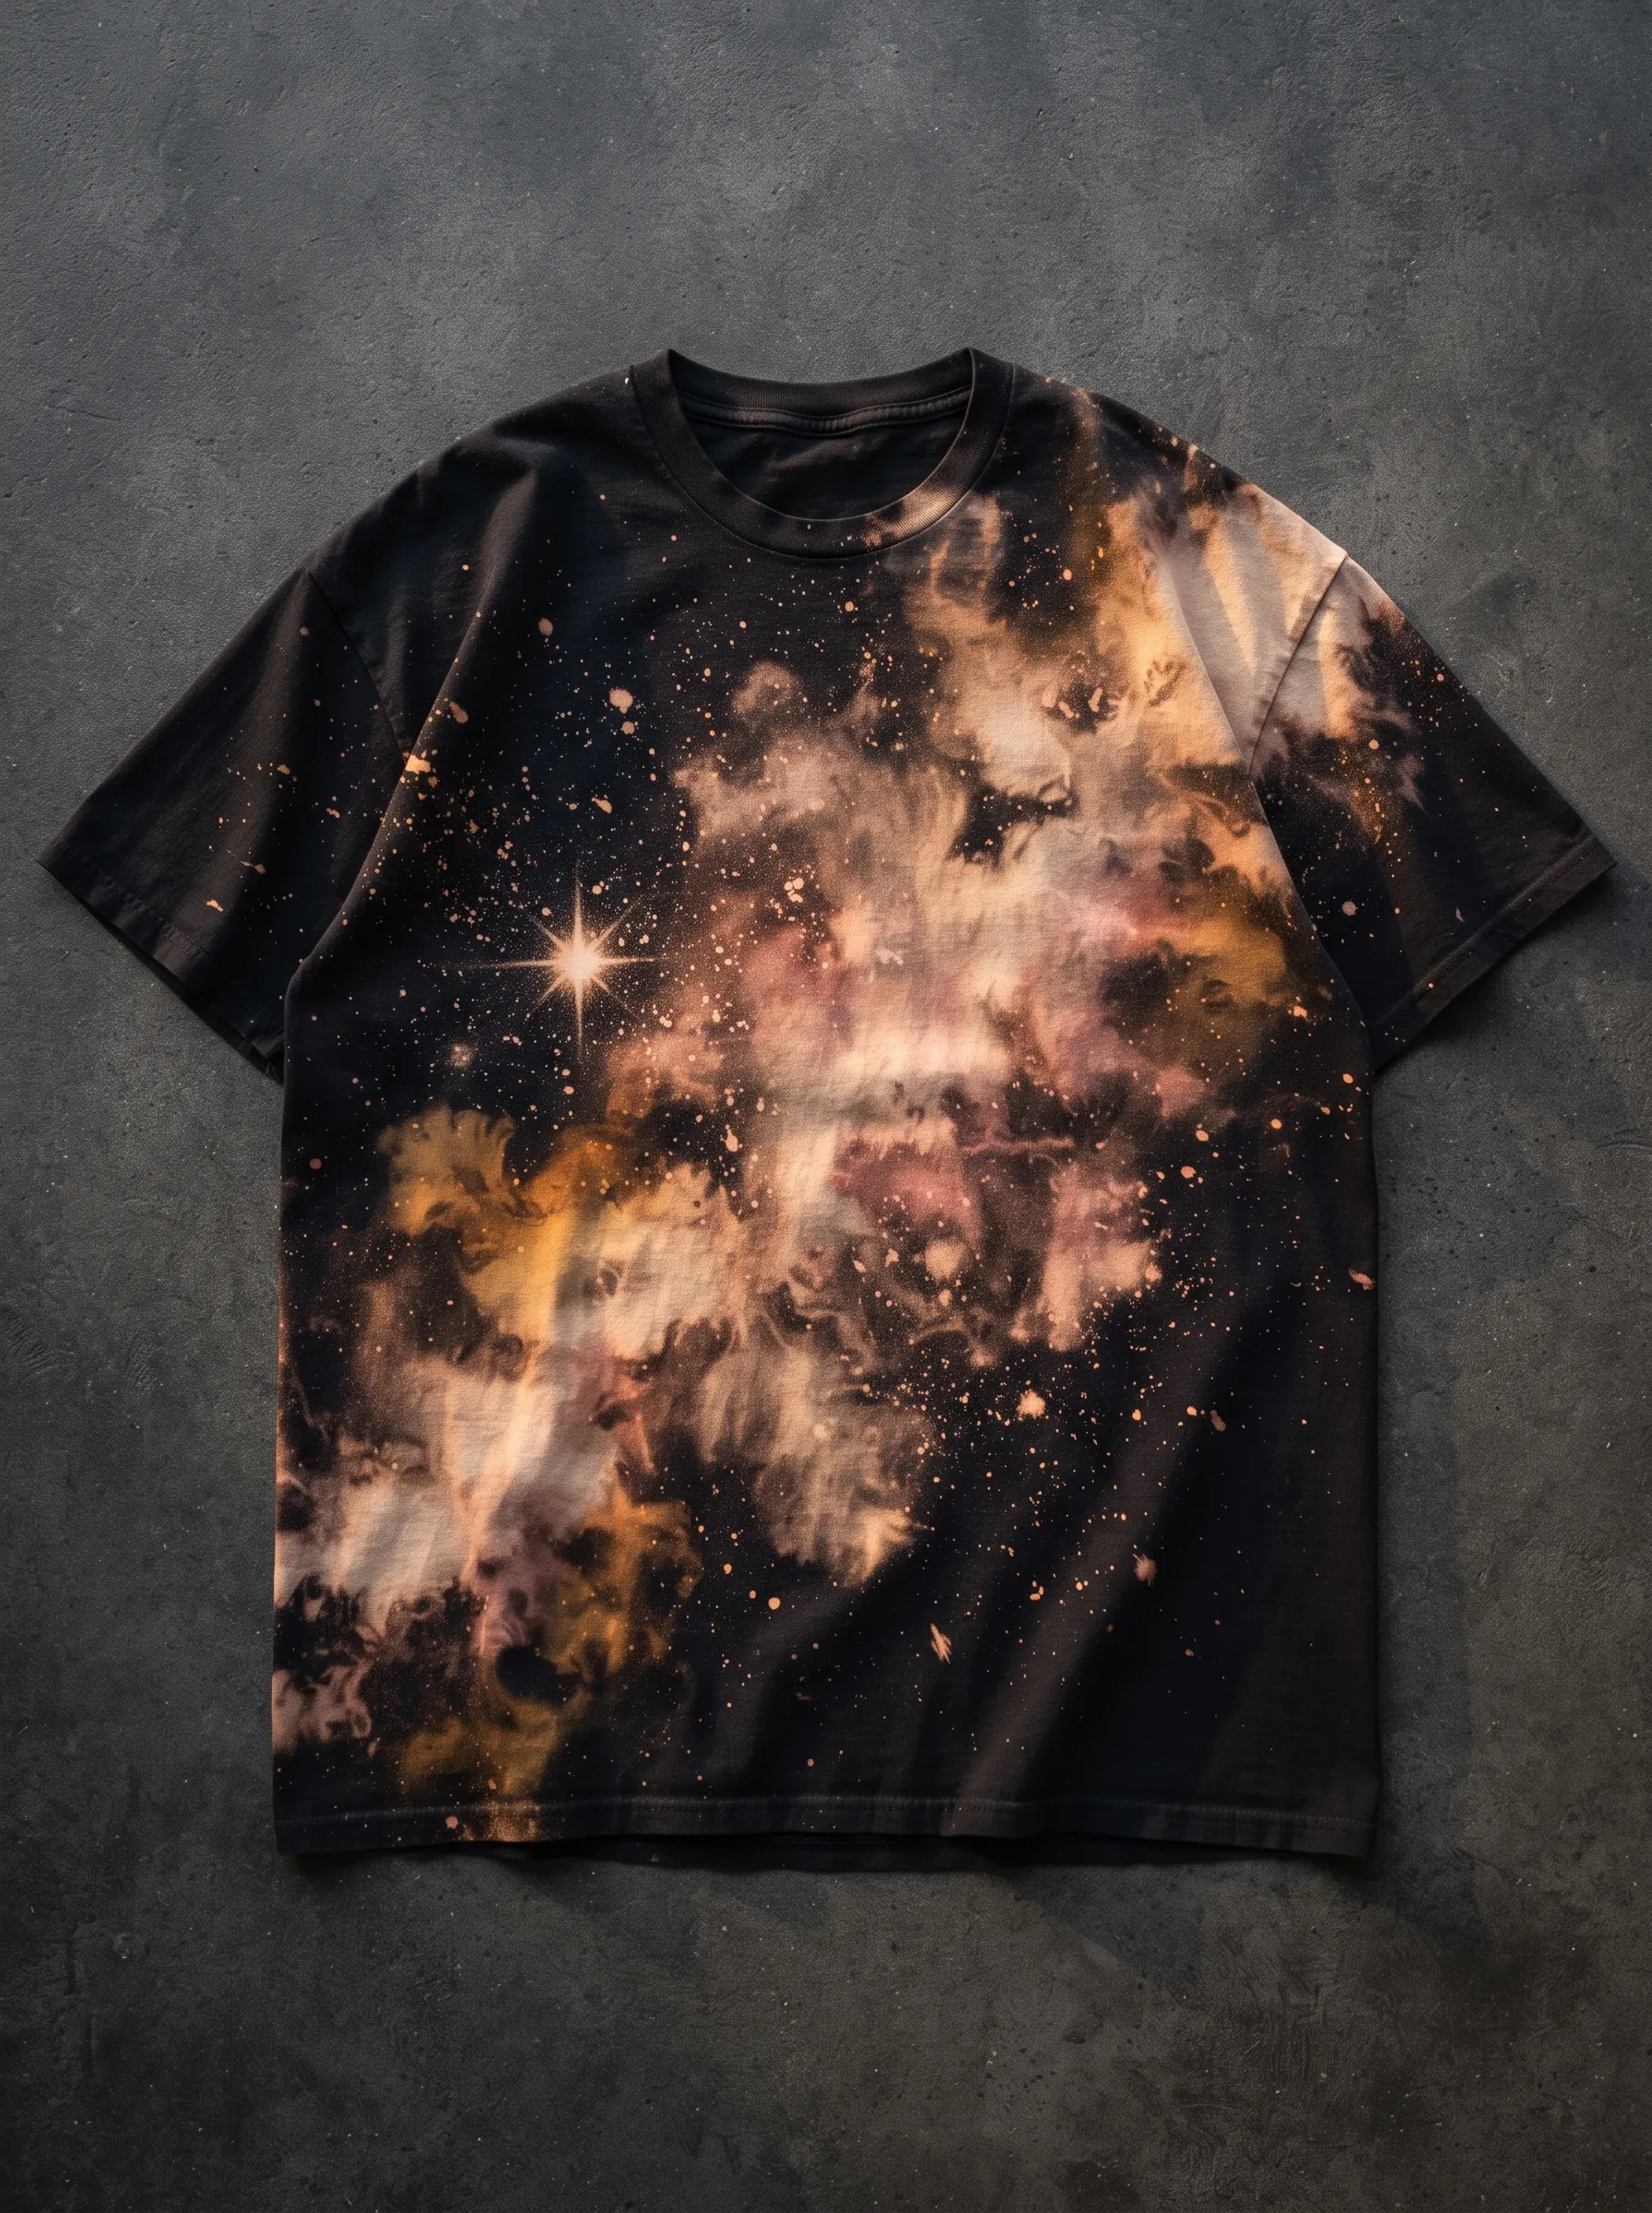
Rich clouds of amber, rust, and pale gold swirl across this shirt like a nebula captured through a telescope lens. Multiple bleach applications layered over time build up this complex, multi-coloured effect since black fabric often reveals different undertones as it lifts. Concrete grey backgrounds let the warm nebula colours pop even further. Space enthusiasts and maximalist dressers both find something to love in this intricate design. Patience becomes essential here, since rushing the layering process leads to muddy, flat results instead of the rich depth this pattern needs. A single bright dot added near the cluster mimics a distant star, finishing the cosmic illusion with one small but effective detail.
Bleach Tie Dye Shirt Questions, Answered
Q1: What kind of bleach works best for tie dye shirts?
A1: Gel bleach gives more control than liquid because it clings to fabric instead of running. Liquid bleach mixed with water in a spray bottle suits looser, watercolour style patterns. For sharp lines and stencil work, a bleach pen beats both since it lets you draw with precision.
Q2: How long should you leave bleach on a black shirt?
A2: Check the fabric every five minutes rather than setting a fixed timer, since dye brands react at different speeds. Most cotton shirts show full colour change between ten and twenty minutes. Pull the shirt once you like the shade, since bleach keeps working even after it looks finished.
Q3: Can you wear a bleach tie dye shirt to work?
A3: Subtler patterns like the sunset ombre or storm cloud bleed pass in casual offices, especially tucked into trousers with a blazer on top. Skip the bold lightning or mandala designs for work settings. Save those for weekends, since they read as streetwear rather than office appropriate.
Q4: How do you stop bleach from damaging the shirt fabric?
A4: Rinse the shirt in cold water the moment it reaches your desired shade, then wash it separately with a neutralizer like hydrogen peroxide or a mild detergent. Skipping this step lets bleach keep eating at the fibres, which weakens the fabric and shortens the shirt's lifespan.
Q5: What season fits bleach tie dye shirts best?
A5: Warm toned patterns like molten camo or tiger ember stripe suit fall and early winter since their rust and gold colours match the season's palette. Cooler designs like constellation map or crescent moon phase work year-round, especially layered under jackets once temperatures drop.
Q6: Do bleach tie dye shirts fade over time with washing?
A6: Some fading happens naturally since bleach already stripped the original dye in those areas. Washing in cold water, turning the shirt inside out, and avoiding harsh detergents slows this process considerably. Expect the contrast to soften slightly after a year of regular wear and washing.
Which Bleach Tie Dye Pattern Matches Your Style?
None of these techniques come with a wrong answer. Whether you gravitate toward chaotic splatters or controlled geometric bursts, the pattern you pick says something about how you want to show up in a room. Bleach tie dye rewards experimentation, so your first attempt won't be your last.
Send this to a friend who's been eyeing a bleach project but hasn't started yet. Bookmark it too, since the next blank black shirt in your closet deserves better than sitting there unused.